


ENGLISH
- 74 -
1. PROGRAMME
will be the first selected item as you enter
the
INSTALL
menu. Pressing or button select the
programme number where you want to the tuned channel
to be stored. (You may also type the programme number
using the digit buttons.)
Note:
Do not use
PROGRAMME
item when you modify the cur-
rent programme numbers setting. If you select other
programme number by mistake, the selected programme
numbers setting will be changed.
2.
Press
or
button to select
BAND
. Using or
button to select the band in which you want to search
a channel.
3.
Press
or
button to select
SEARCH
. Press
or button to start searching. (Press button to
search forward. Press to search backwards.)
If the found channel is not the desired one, press or
button to start searching again.
To stop searching before a channel is found, press the
reverse direction button. For example, when the TV is
searching forward with button, press button to
stop searching.
If you know the channel number which you want to find,
you can find the channel directly. Follow the step 4 to
select the correct standard, then press
or
to select
CHANNEL
again, and press or button to
select the channel number, or enter the number with the
digit buttons.
4.
If the sound or picture is abnormal, change the standard
(broadcasting system) of new channel. Press
or
button to select
STANDARD
, then press or
button to change the correct one.
The indicated number will be changed when you change
the standard.
B/G : C02-C12, C21-C73 / S01-S41 / S75-S79
D/K : 01-C12, C21-C69 / S01-S19, S22-S41
L
: C01-C73 / S01-S41 / S75-S77
L
: C04-C09
5.
If the picture is not clear or no colour appears, change the
colour system to display the picture normally. Press
or
button to select
COLOUR SYSTEM
, then
press or button to choose the correct one.
In TV mode:
PAL
/
SECAM
In AV mode:
AUTO / PAL /
SECAM / NTSC 3.58 / NTSC 4.43
6.
If the channel reception is poor, fine-tune the channel.
Press
or
to select
FINE TUNING
, then press
or button to fine-tune the channel.
7.
After the all settings are completed, store the new
channels setting to the programme number which you se-
lected. Press
or
to select
STORE
, then
press or button to store it.
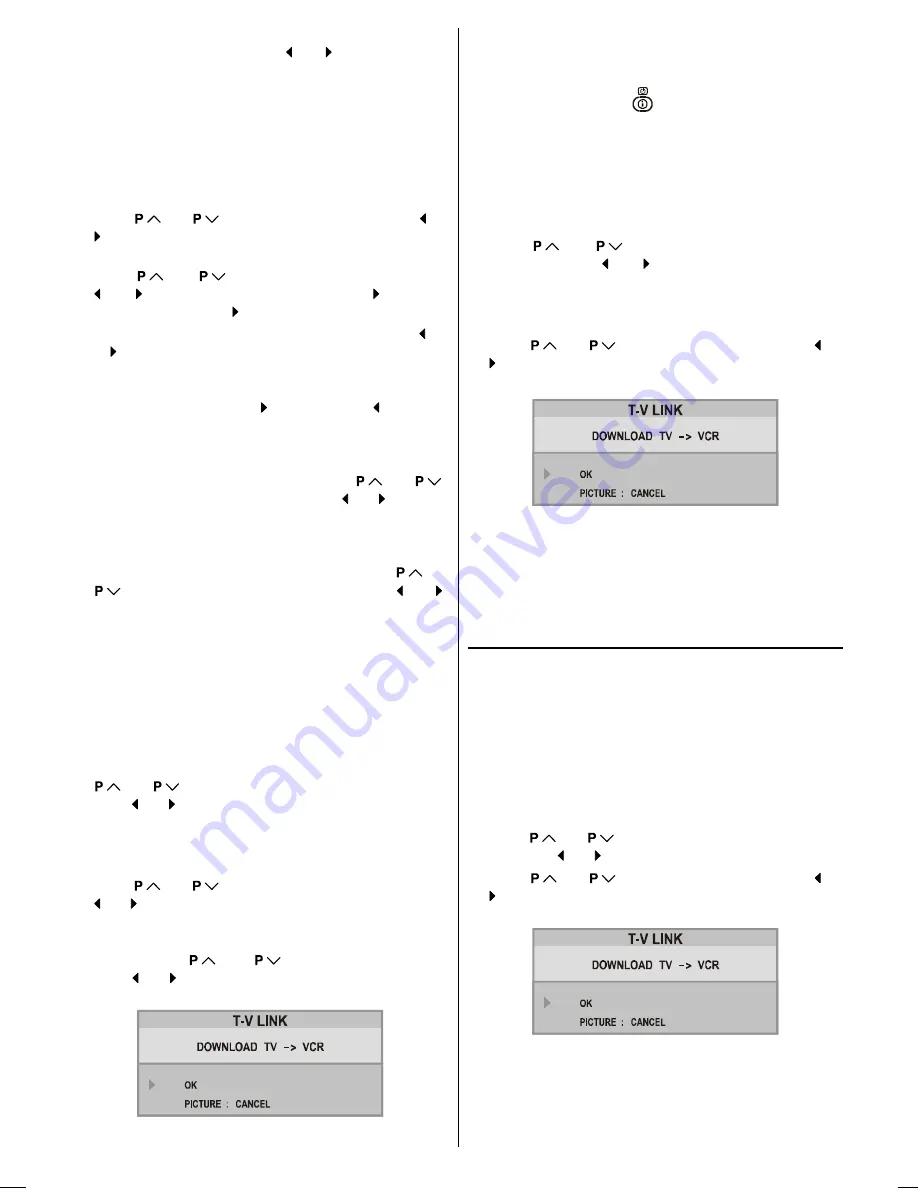
T-V LINK
menu will ap-
pear after the TV stores the settings.
8.
If you do not have a T-V LINK compatible VCR, press
PICTURE
button to exit the menu.
If you have a T-V LINK compatible VCR connected to the
EXT-2 terminal, press
button to display
T-V LINK
menu. Then follow the operating procedure
Downloading
the data to VCR
on
page 69
to transmit the Programme
table data to the VCR.
To change the Colour system:
If the picture is not clear or no colour appears, choose the
correct colour system to display the picture normally.
1.
Press
or
button to select
COLOUR SYS-
TEM
, then press or button to choose the correct
one.
In TV mode:
PAL
/
SECAM
In AV mode:
AUTO / PAL /
SECAM / NTSC 3.58 / NTSC 4.43
2.
Press
or
to select
STORE
, then press or
button to store it.
3.
When
T-V LINK
menu appears, follow the step 4.
4.
If you do not have a T-V LINK compatible VCR, press
PICTURE
button to exit the menu.
If you have a T-V LINK compatible VCR connected to the
EXT.2
terminal, follow the operating procedure
Down-
loading the data to VCR
on
page 69
to transmit the
Programme table data to the VCR.
Using the Decoder(EXT-2) function
If you have a decoder connected to a T-V LINK compatible
VCR, which in turn is connected to the EXT.2 terminal, use
DECODER(EXT-2)
to unscramble the scrambled TV chan-
nels.
1.
Exit the menu.
2.
Turn on the decoder power.
3.
Display the scrambled TV channel on the TV. Even if the
decoder is working, a scrambled picture appears.
4.
Display the
INSTALL
menu again.
5.
Press
or
button to select
DECODER(EXT-2)
,
then press or button to set to
ON
6.
Press
or
to select
STORE
, then press or
button to store it.
T-V LINK
menu will appear after the
TV stores the setting.
7.
Follow the operating procedure
Downloading the data
to VCR
on
page 69
to transmit the revised programme
table data to the VCR.
If you do not want to transmit, press
PICTURE
button
to exit the menu.
05-ENG-2835-AK45-1512UK-16-9-(AV-28GT15UF)-50041369.p65
04.07.2003, 15:00
74


