background image

ENGLISH

IMPORTANT SAFETY INSTRUCTIONS

1.  Read these instructions.
2.  Keep these instructions.
3.  Heed all warnings.
4.  Follow all instructions.
5.  Do not use this apparatus near water.
6.  Clean only with dry cloth.
7.  Do not block any ventilation openings. Install 

in accordance with the manufacturer’s 
instructions.

8.  Do not install near any heat sources such 

as radiators, heat registers, stoves, or other 
apparatus (including amplifiers) that produce 
heat.

9.  Only use attachments/accessories specified by 

the manufacturer.

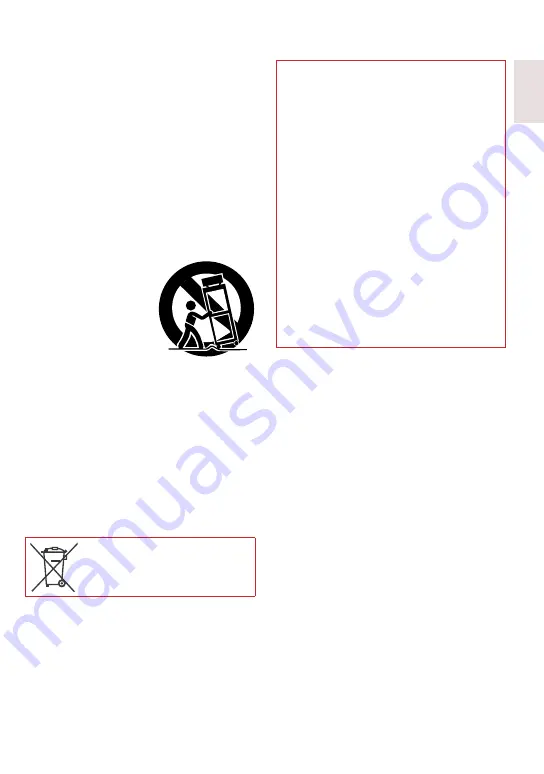
10. Use only with the cart, 

stand, tripod, bracket, 
or table specified by 
the manufacturer, 
or sold with the 
apparatus. When a cart 
is used, use caution 
when moving the 
cart/apparatus combination to avoid injury from 
tip-over.

11. Unplug this apparatus during lightning storms 

or when unused for long periods of time.

12. Refer all servicing to qualified service 

personnel. Servicing is required when the 
apparatus has been damaged in any way, such 
as power-supply cord or plug is damaged, 
liquid has been spilled or objects have fallen 
into the apparatus, the apparatus has been 
exposed to rain or moisture, does not operate 
normally, or has been dropped.

Remember that this camcorder is intended for 

private consumer use only.

Any commercial use without proper permission 

is prohibited. (Even if you record an event such 

as a show, performance or exhibition for personal 

enjoyment, it is strongly recommended that you 

obtain permission beforehand.)

Trademarks

 Manufactured under license from Dolby 

Laboratories. Dolby and double-D symbol are 

trademarks of Dolby Laboratories.

 Windows

®

 is either a registered trademark or 

trademark of Microsoft Corporation in the United 

States and/or other countries.

 Macintosh is a registered trademark of Apple 

Inc.

 YouTube and the YouTube logo are trademarks 

and/or registered trademarks of YouTube LLC.

 iTunes is a trademark of Apple Inc., registered 

in the U. S. and other countries.

 Other product and company names included 

in this instruction manual are trademarks 

and/or registered trademarks of their respective 

holders.

If this symbol is shown, it is only 

valid in the European Union.

Summary of Contents for 1208YDR-YG-MD

Page 1: ...e safety information and precautions contained in pages 2 and 3 to ensure safe use of this product For Future Reference Enter the Model No located on the bottom of the memory camera and Serial No located on the battery pack mount of the memory camera below Model No Serial No GUIDEBOOK LYT2019 002A M GZ MS130U ...

Page 2: ...hen the equipment is installed in a cabinet or on a shelf make sure that it has sufficient space on all sides to allow for ventilation 10 cm 3 15 16 or more on both sides on top and at the rear Do not block the ventilation holes If the ventilation holes are blocked by a newspaper or cloth etc the heat may not be able to get out No naked flame sources such as lighted candles should be placed on the...

Page 3: ...er supply cord or plug is damaged liquid has been spilled or objects have fallen into the apparatus the apparatus has been exposed to rain or moisture does not operate normally or has been dropped Remember that this camcorder is intended for private consumer use only Any commercial use without proper permission is prohibited Even if you record an event such as a show performance or exhibition for ...

Page 4: ...amcorder please be careful not to drop it CAUTION Be sure to use JVC battery packs If you use any other battery packs besides JVC battery packs safety and performance can not be guaranteed Grip Adjustment Adjust the strap and fasten Charge the battery before recording Turn off the camcorder and attach the battery pack Power charge lamp Blinks Charging goes out Charging finished Do not remove the A...

Page 5: ...ty closest to the area where you use the camcorder U Select ON if daylight saving time is effective LCD monitor SET SET DATE TIME YES NO Slide your finger up and down on the sensor Then touch OK SET QUIT CLOCK SETTING AREA SETTING SET FOR DAYLIGHT SAVING TIME SET THE CITY DATE AND TIME CLOCK ADJUST AREA SETTING SET QUIT NOV 1 2009 04 55PM R SET QUIT SET FOR DAYLIGHT SAVING TIME DAYLIGHT SAVING TIM...

Page 6: ...video mode R S elect recording mode S Start recording The mode changes when you press the button 0 04 01 4 h 59 m M The auto recording indicator appears 4 h 59 m 0 04 01 REC Remaining space on built in memory or SD card Video Quality Record standby Recording DC Press the START STOP button to start recording and press it again to stop PLAY REC ...

Page 7: ...les using a VCR DVD recorder Z pg 53 To play back a created DVD disc Z pg 46 To edit files on your computer Z pg 47 LTo perform operations such as forward search or reverse search Z pg 26 LTo view files on TV Z pg 33 It is recommended to copy your important recorded data to a DVD or other recording media for storage JVC will not be responsible for any lost data LASER TOUCH OPERATION VIDEO PLAYBACK...

Page 8: ...e no right to grant a licence to use the Program and may not distribute rent lease or transfer the Program to any third party or otherwise let them use the Program 4 LIMITED WARRANTY JVC warrants that any media in which the Program is embodied are free from any defects in materials and workmanship for a period of thirty 30 days from the date of Your purchasing any our products accompanying the Pro...

Page 9: ...ized representative of JVC 2 If any part of this Agreement is held invalid by or in conflict with any law having jurisdiction over this Agreement the remaining provisions will remain in full force and effect 3 This Agreement shall be governed by and interpreted under the laws of Japan The Tokyo District Court has jurisdiction over all disputes which may arise with respect to the execution interpre...

Page 10: ...used with the JVC battery and not with other batteries JVC cannot guarantee safety or performance of this product when it is operated by other batteries If the camcorder is subjected to electrostatic discharge turn off the power before using it again If a malfunction occurs stop using the camcorder immediately and contact www jvc com or by phone at 1 800 252 5722 Recorded data may be erased while ...

Page 11: ... Checking the Remaining Battery Power 24 Checking the Remaining Space on the recording medium 25 Registering Files to Events 25 Playing Back Files 26 Video Playback 26 Still Image Playback 27 File Search Function 28 Playing Back MPG Files 29 Manual Recording 30 Change to Manual Recording Mode 30 Backlight Compensation 30 Manual Setting Menu 30 USING WITH TV Viewing Files on TV 33 Connection with T...

Page 12: ...g the Menu Settings 58 Troubleshooting 63 Warning Indications 66 Cleaning 68 Specifications 69 Cautions 71 Terms 74 How to use the Touch Sensor After the menu is displayed on the LCD monitor MANUAL SETTING LIGHT REGISTER EVENT VIDEO QUALITY USE DETAIL SETTINGS BASED SET QUIT VIDEO Q Slide your finger up and down on the sensor R Select SET Touch OK A B A To select an on screen button appearing on t...

Page 13: ... to other devices Preparing the Remote Control A battery is included inside the remote control at the time of purchase Remove the insulation sheet before use Release the stopper 3 cm 1 3 16 USB Cable Wind once AC adapter Wind twice Beam Effective Area NOTE The transmitted beam may not be effective or may cause incorrect operation when the remote sensor is directly exposed to sunlight or powerful l...

Page 14: ...14 Index DC NOTE The LCD monitor can rotate 270 Be careful not to cover 4 5 7 and 8 during shooting GETTING STARTED ...

Page 15: ...amera Sensor 5 LED Light Z pg 24 6 Lens Cover 7 Lens 8 Stereo Microphone 9 Stud Hole Tripod Mounting Socket Z pg 20 Battery Release Button BATT Z pg 18 Remote Control Q Infrared Beam Transmitting Window R ZOOM T W Buttons Zoom in out S Up Button T Skip Backward Button U Left Button V Back Button W PLAYLIST Button X START STOP Button Y S SHOT SNAPSHOT Button Z INFO Button a Skip Forward Button b PL...

Page 16: ...pg 31 Photometry Area Control Indicator Z pg 32 2 Shutter Speed Z pg 31 During Video Recording Only REC 0 0 4 0 1 4h59m PHOTO LIB Mode Indicator EXPORT Mode Indicator Z pg 54 Counter Upload Mode Indicator Z pg 56 Video Quality B ULTRA FINE C FINE D NORMAL E ECONOMY Z pg 58 Remaining Time MREC Appears during recording MQ Appears during record standby mode Digital Image Stabilizer DIS Indicator Appe...

Page 17: ...INE D NORMAL E ECONOMY Z pg 58 Counter Playback Mode F Playback Q Pause K Forward Search J Reverse Search G Forward Slow Motion E Reverse Slow Motion The number on the left shows speed Battery Indicator Date Time Z pg 19 Volume Level Indicator During Still Image Playback 4 55 PM JAN 01 2009 SD 101 0098 Mode Indicator Folder File Number Slide Show Playback Indicator Battery Indicator Date Time Z pg...

Page 18: ...ing time approx When the LED light is off and the monitor backlight is set to STANDARD mode Battery pack Charging time Recording time BN VF808U Provided 1 hr 50 min 2 hr 45 min BN VF815U 2 hr 40 min 5 hr 25 min BN VF823U 3 hr 40 min 8 hr 10 min LTo detach the battery pack NOTE You can also use the camcorder with just the AC adapter The actual recording time may shorten depending on the recording e...

Page 19: ...ck is advanced one hour from the normal time which you set OFF Deactivates the function SET FOR DAYLIGHT SAVING TIME SET DAYLIGHT SAVING TIME NOV 1 2009 04 55PM OFF DAYLIGHT SAVING TIME DST SET QUIT 8 Set the date and time Select the item by using the touch sensor and select to set CLOCK SETTING DATE TIME GMT 9 00 NOV 1 2009 4 55 PM SAVE QUIT 9 Select SAVE To reset the setting select QUIT Setting ...

Page 20: ...Bottom of the Camcorder Language Setting The language on the display can be changed 1 Open the LCD monitor to turn on the camcorder 2 Touch MENU 3 Select DISPLAY SETTINGS CONFIGURE ON SCREEN DISPLAY VIDEO WIND CUT AUTO SWITCH REC MEDIA DISPLAY SETTINGS BASIC SETTINGS SET QUIT 4 Select LANGUAGE ON SCREEN DISPLAY LANGUAGE DISPLAY SETTINGS LANGUAGE CLOCK ADJUST DATE DISPLAY STYLE MONITOR BRIGHT SET Q...

Page 21: ... Firmly insert the card with its clipped edge first 3 Close the SD card cover LTo remove an SD card Push the SD card once After the card comes out a little pull it out Clipped Edge NOTE Insert and remove the SD card only while the power is turned off Otherwise data on the card may be corrupted Do not touch the terminal on the reverse side of the label R Change the recording medium The camcorder is...

Page 22: ...e quality Change the settings in VIDEO QUALITY Z pg 58 LTo change the aspect ratio of the image 16 9 4 3 Change the settings in SELECT ASPECT RATIO Z pg 59 Slide the mode switch to select video mode NOTE The video recording mode is automatically selected when you turn off the camcorder and then on again If the camcorder is not operated for 5 minutes while the power is on it turns itself off automa...

Page 23: ... the photo picture FINE 9999 PHOTO NOTE DIS Digital Image Stabilizer does not function during still image recording If the camcorder is not operated for 5 minutes while the power is on it turns itself off automatically to conserve power LTo view the last recorded image Select A after shooting Selecting during playback deletes that image LTo change the picture quality Change the settings in IMAGE Q...

Page 24: ...ct or mode Press the PLAY REC button to select recording mode 1 Touch MENU 2 Select LIGHT 3 Select the desired setting ON The LED light remains on regardless of the surrounding conditions AUTO The LED light turns on automatically when shooting in insufficient light conditions OFF Deactivates this function Checking the Remaining Battery Power Preparation Attach the battery pack Press the PLAY REC b...

Page 25: ...ct QUIT Registering Files to Events If you select an event to register the file to before starting recording the file will be registered to the selected event thus making the file easy to find at playback Preparation Slide the mode switch to select mode Press the PLAY REC button to select recording mode 1 Touch MENU 2 Select REGISTER EVENT VIDEO LIGHT FOR EASY SEARCHING ARRANGE VIDEO QUALITY ZOOM ...

Page 26: ...e of the file O Go to the first scene of the next file L Return to the index screen J Reverse search during playback E Frame by frame playback in reverse direction during pause F Playback Q Pause K Forward search during playback G Frame by frame playback in forward direction during pause Slow playback starts when you keep touching the sensor button under E G for a while LSpeaker volume VIDEO PLAYB...

Page 27: ...r next page Touch v or V for over a second LTo delete a still image Select LTo change the number of thumbnails 6 thumbnails 20 thumbnails Move the zoom lever to T or W LOperations during Still Image Playback On screen buttons P Change playback order of slide show in reverse direction F Change playback order of slide show in forward direction L Return to the index screen N Display the previous file...

Page 28: ...index screen Select LTo quit the screen Select QUIT NOTE The contents of the group may be changed depending on the interval of the recording time To change the contents register the event Z p 25 The created groups may not be listed by recording date such as when copying the files to an SD card Date Index Screen You can search the desired file by the recording date 1 Select In case of mode go to st...

Page 29: ... the damaged file playback might fail or may not run smoothly Event Screen You can search the desired file by the event that you registered the file to when recording Z p 25 After searching by the event you can search by the recording date to narrow down the search 1 Select 2 Select the SEARCH EVENT VIDEO PLAYBACK 1 2 SD NOV 01 2009 04 55PM GROUP SEARCH DATE SEARCH EVENT SET 3 Select the event SET...

Page 30: ...ght compensation Select again NOTE If the LCD monitor is turned upside down is not displayed Change the setting when the LCD monitor is in the normal position Manual Setting Menu In the manual recording mode 1 Touch MENU 2 Select MANUAL SETTING VIDEO USE DETAIL SETTINGS BASED SET QUIT MANUAL SETTING LIGHT VIDEO QUALITY REGISTER EVENT 3 Select the desired menu VIDEO SCENE SELECT FOCUS THE BRIGHTNES...

Page 31: ...manually When zooming the subject will not go out of focus if you adjust the focus at the telephoto T side before zooming to the wide angle W side g ADJUST BRIGHTNESS Adjusts the brightness mode AUTO The brightness is adjusted automatically 3 MANUAL 6 to 6 Corrects the brightness within this range in increments of 1 mode AUTO The brightness is adjusted automatically 3 MANUAL 2 0 to 2 0 EV Corrects...

Page 32: ... spot when backlight compensation does not work well 6 WHOLE SCREEN Brightness is adjusted automatically for whole screen 7 SPOT Brightness for the specified spot is adjusted automatically w EFFECT Enables you to record videos or still images with special effects 1 OFF No effect is used J SEPIA The image has a brownish tint like old still images B W MONOTONE The image becomes black and white like ...

Page 33: ...After the connection with TV is completed 1 Turn on the camcorder and the TV 2 Set the TV to its VIDEO mode 3 Only when connecting the camcorder to the VCR DVD recorder Turn on the VCR DVD recorder and set the VCR DVD recorder to its AUX input mode 4 Start playback on the camcorder Z p 26 27 LTo display camcorder s on screen display on TV Set DISPLAY ON TV to ON Z p 61 Viewing Files on TV AV Input...

Page 34: ...was recorded in 4 3 The image can be elongated in the horizontal or vertical directions depending on the quality of the source video file The continuous shooting function cannot be used to capture images You cannot capture video during playback Deleting Files Protected files cannot be deleted To delete them release the protection first Once files are deleted they cannot be restored Check files bef...

Page 35: ...t QUIT Deleting Selected Files After performing steps 1 2 Z pg 34 3 Select FILE SELECT SET QUIT CURRENT FILE SELECT DELETE ALL VIDEO DELETE SELECT AND DELETE SCENE 4 Select the desired file and select CHECK EXEC QUIT VIDEO DELETE 1 2 SD The mark appears on the file To select other files repeat this step To check the content of the file select CHECK 5 Select EXEC 6 Select YES YES NO SET QUIT VIDEO ...

Page 36: ...ation Slide the mode switch to select or mode Press the PLAY REC button to select playback mode 1 Touch MENU 2 Select EDIT REC EDIT PLAYLIST DUBBING PLAYBACK PLAYBACK MPG FILE EDIT CAN BE SET TO PREVENT COPY VIDEO SET QUIT 3 Select PROTECT CANCEL REC PLAYBACK PLAYLIST EDIT PLAYLIST DUBBING PLAYBACK PLAYBACK MPG FILE PROTECT VIDEO FROM DELETION VIDEO SET QUIT COPY MOVE PROTECT CANCEL TRIMMING Prote...

Page 37: ...older name DATE TIME Date and time of the recording PB TIME mode Playback time length of the file SIZE mode Image size QUALITY Video quality Image quality Z pg 58 PROTECT File protection status Z pg 36 LTo turn off the file information display Press INFO again Protecting All Files After performing steps 1 3 Z pg 36 4 Select PROTECT ALL SET QUIT SET QUIT CURRENT FILE SELECT PROTECT ALL CANCEL ALL P...

Page 38: ...it the screen Select QUIT Changing the Event Registration Preparation Slide the mode switch to select mode Press the PLAY REC button to select playback mode 1 Touch MENU 2 Select EDIT REC EDIT PLAYLIST DUBBING PLAYBACK PLAYBACK MPG FILE EDIT CAN BE SET TO PREVENT COPY VIDEO SET QUIT 3 Select CHANGE EVENT REG REC PLAYBACK PLAYLIST EDIT PLAYLIST DUBBING PLAYBACK PLAYBACK MPG FILE CAN SET OR CHANGE T...

Page 39: ...4 Select the desired file SET QUIT TRIMMING 1 2 SD 5 Select SET at the start point It is recommended to select SET after the pause button is pressed QUIT SET 0 12 05 S E TRIM FROM HERE Use these controls to locate the start point 6 Select SET at the end point It is recommended to select SET after the pause button is pressed CANCEL QUIT SET 0 08 05 0 12 05 S E TRIM UNTIL HERE To cancel the start po...

Page 40: ...play all the files listed by recording date CREATE BY GROUP Display all files listed by group CREATE BY EVENT Search for an event and display the corresponding files listed by recording date 5 Select the file to add to playlist SELECT QUIT CHECK NOV 01 2009 FROM SCENE TOTAL 00h00m To preview scenes select the file and select CHECK 6 Select the insertion point SELECT SAVE QUIT CHECK NOV 01 2009 FRO...

Page 41: ...e 1 In step 3 select CHECK The index screen for playlist appears 2 Select the desired scene Other Operations of Playlists You can perform additional editing and delete files in a created playlist Adding Deleting Files in Playlist After performing steps 1 2 Z pg 40 3 Select EDIT 4 Select the playlist you want to edit To add or delete files follow the steps 5 to 8 Z pg 40 Deleting Playlist Original ...

Page 42: ...AY REC button to select playback mode Make sure that SD card is inserted in the SD slot Make sure that enough free space is left in the copy move destination medium 1 Touch MENU 2 Select EDIT SET QUIT EDIT PLAYLIST DUBBING PLAYBACK PLAYBACK MPG FILE EDIT VIDEO CAN BE SET TO PREVENT COPY REC 3 Select COPY or MOVE REC E D P COPY FILES BETWEEN VIDEO SET QUIT COPY MOVE PROTECT CANCEL TRIMMING COPY Fil...

Page 43: ... that came with the DVD burner DVD Burner DC Connector USB Connector To AC Outlet USB Cable USB Connector 5 Select the desired menu SET QUIT COPY VIDEO SELECT AND COPY SELECT THE OBJECT TO BE COPIED COPY ALL COPY ALL MOVE ALL Select this to transfer all files in the recording medium When the size of all files in the built in memory is larger than the free space of the SD card only the files that c...

Page 44: ... NO YES Displays the thumbnails by group NO Displays the thumbnails by date 5 Select EXECUTE The files are copied on the disc When COMPLETED appears touch OK When INSERT NEXT DISC PRESS STOP TO EXIT CREATE appears change the disc Remaining files are copied on the second disc To cancel copying select STOP Copying Video Files that Have Never Been Copied Files that have never been copied to the DVD d...

Page 45: ...OM SCENES Select files individually 1 Select the desired file To select other files repeat this process 2 Select SAVE 3 Select the desired disc number ALL TOTAL 3 SET QUIT CHECK DVD CREATION LIST DVD1 DVD2 DVD3 If you select ALL all discs in the list are created To preview scenes select CHECK mark shows that the disc is created already 4 Select YES or NO YES Displays the thumbnails by group NO Dis...

Page 46: ... one chapter in the title JAN 11 2009 file 3 and 4 were recorded JAN 10 2009 file 1 and 2 were recorded Create a DVD File 1 File 2 File 4 File 3 1 2 3 4 Title Chapter File 1 File 2 File 3 File 4 JAN 10 2009 JAN 11 2009 Digest Playback You can play back a few seconds from each select scene of the recorded videos in the created DVD Create a DVD using a DVD burner CU VD50 CU VD3 1 Load the created DV...

Page 47: ...5 GHz or higher RAM At least 512 MB LTo check the PC specification Right click on Computer or My Computer in the Start menu and select Properties NOTE Make sure your PC has a recordable DVD drive If your system does not meet the requirements it is recommended to copy files using the DVD burner Z p 43 Macintosh users may use the software included with their Macintosh iMovie 08 iPhoto to copy files ...

Page 48: ... Connector USB Connector USB Cable Everio MediaBrowser starts on the PC 3 Click All volume in camcorder and click Next 4 Click Start Backup starts LTo disconnect the camcorder from the PC 1 Right click the icon Safely Remove Hardware on the task bar and select Safely remove USB Mass Storage Device 2 Follow the on screen instructions and make sure that the device can be safely removed 3 Disconnect ...

Page 49: ...he subject into the user list Preparation Make backup on the PC 1 Double click icon and open the calendar 2 Select Movies only 3 Click 4 Input the name of the new user list and click OK 5 Double click the recording date The files recorded on the day are displayed 6 Drag the file and drop into the user list To add other files into the user list repeat steps 5 and 6 ...

Page 50: ...tep 4 3 Drag the file and drop into the part at the bottom and click Next 4 Input the disc name select the top menu style and click Next 5 Click Start NOTE For detail on operating Everio MediaBrowser click Help and refer to MediaBrowser Help Adobe Reader must be installed to read MediaBrowser Help Adobe Reader can be loaded from Adobe s web site http www adobe com For assistance in operating the p...

Page 51: ...ing medium X number Management information Contains the video file folders Contains the still image folders Management information for the media as a whole Video file Management information for the video files Contains management information files of event and or DVD creation information for the files taken with the camcorder Video file which management information is corrupted Folder Structure an...

Page 52: ...our questions depending on their subject matter JVC cannot answer questions regarding basic operation of your PC or questions regarding specifications or performance of the OS other applications or drivers Pixela Region Language Phone USA and Canada English 1 800 458 4029 toll free Europe UK Germany France and Spain English Germany France Spanish 1 800 1532 4865 toll free Other Countries in Europe...

Page 53: ... the camcorder 1 Touch MENU 2 Select DUBBING PLAYBACK 3 Select the desired playlist 4 Select YES A black screen is displayed for 5 seconds at the first and the last scene 4 At the point you want to start dubbing start recording on the VCR DVD recorder Refer to the VCR DVD recorder s instruction manual LTo stop dubbing Stop recording on the VCR DVD recorder LTo hide the date or icons on the screen ...

Page 54: ...EXPORT twice EXPORT LTo turn off the export mode Press EXPORT twice Using with a Portable Media Player Changing the Export Setting You can set the recorded videos to the export setting Preparation Slide the mode switch to select mode Press the PLAY REC button to select playback mode 1 Press EXPORT EXPORT 2 Select the file and select LIB LIB DONE CHECK EXPORT SETTINGS 1 3 SD LIB LIB To check the co...

Page 55: ...Select EXPORT TO LIBRARY SET QUIT CREATE DVD UPLOAD BACK UP EXPORT TO LIBRARY USB MENU EASY VIDEO REGISTRATION LIB All the files with the export setting turned on are transferred to PC LCannot export the file to iTunes Refer to Q A Latest Information Download Information etc in Click for Latest Product Info in the help of the provided Everio MediaBrowser software ...

Page 56: ...cording is finished Uploading Files to Websites Upload Trimming You can select the necessary part of the video and save it as a new video file ready for uploading Preparation Slide the mode switch to select mode Press the PLAY REC button to select playback mode 1 Touch MENU 2 Select UPLOAD SETTINGS SET QUIT DELETE SEARCH UPLOAD SETTINGS VIDEO SELECT SCENE FOR UPLOADING PLAYBACK PLAYLIST 3 Select t...

Page 57: ...r detalis on uploading files refer to the operation guide of MediaBrowser in the CD ROM 1 Connect the camcorder to the PC with the USB cable 2 Select UPLOAD SET QUIT PLAYBACK ON PC CREATE DVD UPLOAD EXPORT TO LIBRARY USB MENU EASY UPLOAD TO VIDEO LCannot upload the file to YouTube You need your YouTube account to upload files to YouTube Create your account Refer to Q A Latest Information Download ...

Page 58: ...T button is pressed OFF 2SEC 10SEC NOTE You can confirm the countdown on the camcorder screen It is recommended to attach the camcorder to a tripod and use this function to prevent the vibration after SNAPSHOT is pressed 8 SHUTTER MODE Records still images continuously while SNAPSHOT is pressed RECORD ONE SHOT Records one still image at a time CONTINUOUS SHOOTING Records still images continuously ...

Page 59: ...cally brightens the scene in dark place AUTO Automatically brightens the scene when it is dark Becomes brighter than AGC The motion of a subject may look unnatural if recorded in some condition mode only SELECT ASPECT RATIO Selects the aspect ratio for videos 16 9 Records videos in 16 9 size 4 3 Records videos in 4 3 size NOTE If the VIDEO QUALITY is set to ECONOMY you cannot record in 16 9 size I...

Page 60: ...ill automatically be set to BRIGHTER when using outdoors and to STANDARD when using indoors when using the battery pack Y BASIC SETTINGS Select BASIC SETTINGS then select sub menus DEMO MODE Introduces special features of the camcorder when there is no operation for about 3 minutes during recording mode OFF Deactivates the function ON Activates the function NOTE The demonstration only works when t...

Page 61: ... recording This enables you to save more power than leaving the power on REMOTE Turns on off reception of the operation signal from the remote control OFF Does not receive the signal from the remote control ON Enables operation with the remote control UPDATE Updates and improves the system software YES Performs this function NO Cancels this function NOTE Information about obtaining system update w...

Page 62: ...ncluding protected files will be erased by the formatting process FORMAT SD CARD You have to format newly purchased SD cards with this camcorder before using them This will also ensure stable speeds and operation when accessing the SD card FILE Initializes all files in the SD card FILE MANAGEMENT NO Initializes all files and management numbers in the SD card NOTE Be aware that all files and data i...

Page 63: ...effective pixels but 0 01 of fewer pixels may be ineffective Trouble Action Power No power is supplied Connect the AC adapter securely Recharge the battery pack After the low temperature message is displayed the power turns off when the camcorder warms up When the camcorder has warmed up after being cold the camcorder may switch itself off to check it is operating correctly Turn on the camcorder a...

Page 64: ...hing OK until the B indicator appears White balance setting cannot be activated This cannot be used if SEPIA or MONOTONE are selected as effects Do not use TWILIGHT from scene select The continuous shooting speed is slow The continuous shooting speed will drop after continuous shots Continuous shooting speed may drop depending on the recording media or under certain recording conditions Band of br...

Page 65: ...pack is being recharged outside the permitted temperature range recharging may stop to protect the battery pack The remote control does not work Replace the battery Set REMOTE to ON The remote control may not operate outdoors or in places exposed to strong light Cannot upload the file to YouTube You need your YouTube account to upload files to YouTube Create your account Refer to Q A Latest Inform...

Page 66: ...s deleted MEMORY CARD ERROR Turn off the camcorder and turn it on again Remove and re insert the SD card MultiMediaCard cannot be used Remove any dirt from the SD card terminals Insert the SD card before switching the power on Turn off the camcorder and turn it on again If the problem persists backup all data and then perform formatting All data is deleted CANNOT TAKE MORE STILL IMAGES AT THE MOME...

Page 67: ...E MANAGEMENT NO in FORMAT BUILT IN MEM or FORMAT SD CARD UPPER LIMIT OF RECORDABLE NUMBER OF FOLDERS FILES HAS BEEN REACHED SCENE QUANTITY LIMIT EXCEEDED PLAYLIST QUANTITY EXCEEDS LIMIT When creating a DVD reduce the number of playlists to be saved Reduce the number of the playlist to 99 files or less NO REGISTERED SCENES IN PLAYLIST SOME OF SCENES MAY NOT BE PLAYED BACK Delete the playlist and th...

Page 68: ... soap and wring it out well before wiping Then wipe again with a dry cloth LTo clean the LCD monitor Wipe gently with a soft cloth Be careful not to damage the monitor LTo clean the lens Wipe gently with lens cleaning paper NOTE Avoid using strong cleaning agents such as benzine or alcohol Mold may form if the lens is left dirty When using a cleaner or chemically treated cloth refer to the caution...

Page 69: ... 5 mm LCD monitor 2 7 diagonally measured LCD panel TFT active matrix system LED Light Within 1 5 m 4 9 ft recommended shooting distance LFor video Audio Format SD VIDEO Recording Playback format Video MPEG 2 Audio Dolby Digital 2 ch Signal format NTSC standard Recording mode video ULTRA FINE 720 x 480 pixels 8 5 Mbps VBR FINE 720 x 480 pixels 5 5 Mbps VBR NORMAL 720 x 480 pixels 4 2 Mbps VBR ECON...

Page 70: ... Card 256 MB 512 MB 1 GB 2 GB 4 GB 8 GB 16 GB 32 GB 4 3 640 x 480 FINE 1450 2920 5930 9999 9999 9999 9999 9999 640 x 480 STANDARD 2080 4180 8480 9999 9999 9999 9999 9999 4 3 832 x 624 FINE 970 1950 3950 7590 9999 9999 9999 9999 832 x 624 STANDARD 1450 2920 5930 9999 9999 9999 9999 9999 16 9 640 x 360 FINE 1820 3660 7420 9999 9999 9999 9999 9999 640 x 360 STANDARD 2420 4880 9890 9999 9999 9999 9999...

Page 71: ... warmer temperatures can prevent complete charging store in a cool dry place Extended exposure to high temperatures will increase natural discharge and shorten service life fully charge and then fully discharge the battery every 6 months when storing the battery pack over a long period time remove from charger or powered unit when not in use as some machines use current even when switched off ATTE...

Page 72: ...r to the tripod securely If the camcorder drops you may be injured and the camcorder may be damaged When a child uses the unit there must be parental guidance Declaration of Conformity Model Number GZ MS130U Trade Name JVC Responsible party JVC AMERICAS CORP Address 1700 Valley Road Wayne N J 07470 Telephone Number 973 317 5000 This device complies with Part 15 of FCC Rules Operation is subject to...

Page 73: ...73 ENGLISH FURTHER INFORMATION Memo ...

Page 74: ...ge Quality 58 iTunes 54 L Language Setting 20 60 LCD Monitor 16 71 LED Light 24 M Manual Recording 30 Menu Settings 58 Monitor Backlight 60 Monitor Bright 60 Moving Files 42 N Number of Images 70 O On screen Recording Control 22 On screen Zoom Control 24 Operation Sound 60 P Photometry Area 32 Playlist 40 Portable Media Player 54 Protecting Files 36 Q Quick Restart 61 Quick Review 22 23 R Recordab...

Reviews: