

16
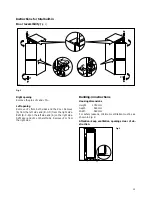
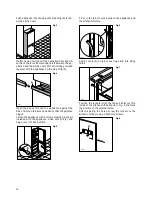
Push appliance into housing until stop strip (A) touch-
es the kitchen unit.
Fig. 3
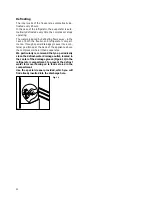
If after having carried out the operation described in
section 3 there is still some space left between the ap-
pliance and the kitchen unit, fit the trimming provided
together with the appliance on the stop strip (A).
Fig. 4
Open the door and push the appliance against the
side of kitchen furniture opposite to that of appliance
hinges.
Fasten the appliance with 4 screws provided in the kit
included with the appliance. Snap vent grill (C) and
hinge cover (D) into position.
Fig. 5
A
D023
D265
A
D092
D
C
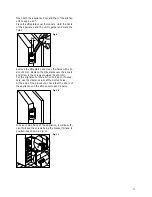
Press in the joint covers between the appliance and
the kitchen furniture.
Fig. 6
Apply covers (B) on joint cover lugs and into hinge
holes.
Fig. 7
Position the runners (H) at the top and bottom of the
inside of the kitchen unit as shown in Fig. 8 and mark
the position of the external holes.
After preparing the holes, screw the runners to the
kitchen unit door using 3.5x16 mm screws.
Fig. 8
D098
D339
B
D094
20mm
H


