

21
MAINTENANCE
Unplug the appliance before carrying out any
maintenance operation.
Warning
This appliance contains hydrocarbons in its cooling
unit; maintenance and recharging must therefore only
be carried out by authorized technicians.
Periodical cleaning
Never use metal objects for cleaning your appliance
as it may get damaged.
Wash the interior of the appliance with lukewarm wa-
ter and sodium bicarbonate.
Idle periods
During periods when the appliance is not used, you
should take the following precautions:
remove the plug from the wall socket;
remove all food from the appliance;
defrost and clean the interior and all accessories;
leave the door slightly open, thus letting air circulate
and preventing the formation of mould and unpleasant
smells.
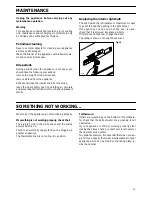
Replacing the interior light bulb
The light inside the refrigerator compartment is easy
to get at through the opening in the light holder.
If the light does not go on when the door is open,
check that it is screwed into place properly.
If it still does not light up, change the bulb.
The rating is shown on the light bulb cover.
Fig. 15
D206
SOMETHING NOT WORKING...
What to do if the appliance is not functioning properly.
If something is not working properly, check that:
The plug is firmly in the wall socket and the mains
power switch is on:
There is an electricity supply (find out by plugging in
another appliance);
The thermostat knob is not on the «
O
» position.
Furthermore:
If there are water drops on the bottom of the refrigera-
tor check that the defrost water drain opening is not
obstructed.
If your appliance is still not working properly after
making the above checks, contact your local dealer or
the nearest service center.
To obtain fast service, it is essential that when you ap-
ply for it you specify the model & serial number of your
appliance which can be found on the rating plate, in-
side the cabinet.


