background image

Performing Initial Connection and Configuration

„

37

Configuring the Device

3.

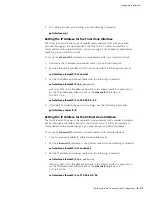
To confirm the new port settings, use the following command:

get interface mgt

Setting the IP Address for the Trust Zone Interface

The NetScreen-5000 Series system usually communicates with your protected 
network through an interface bound to the Trust zone. To allow an interface to 
communicate with internal devices, you must assign it the IP address and subnet 
mask for your protected network.

To set up the 

ethernet2/2

 interface to communicate with your trusted network:

1.

Determine the IP address and subnet mask of your trusted network.

2.

Set the ethernet2/2 interface to the Trust zone with the following command:

set interface ethernet2/2 zone trust

3.

Set the IP address and subnet mask with the following command:

set interface ethernet2/2


ip


ip_addr

/

mask

where 

ip_addr

 is the IP address and 

mask

 is the subnet 

mask

. For example, to 

set the IP address and subnet mask of the 

ethernet2/2

 interface to 

10.250.2.1/16:

set interface ethernet2/2 ip 10.250.2.1/16

4.

(Optional) To confirm the new port settings, use the following command:

get interface ethernet2/2

Setting the IP Address for the Untrust Zone Interface

The NetScreen-5000 Series system usually communicates with external (untrusted) 
devices through an interface bound to the Untrust zone. To allow an interface to 
communicate with external devices, you must assign it a public IP address.

To set up the 

ethernet2/3

 interface to communicate with external devices:

1.

Choose an unused public IP address and subnet mask.

2.

Set the 

ethernet2/3

 interface to the Untrust zone with the following command:

set interface ethernet2/3 zone untrust

3.

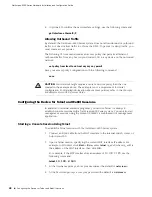
Set the IP address and subnet mask with the following command:

set interface ethernet2/3


ip


ip_addr

/

mask

where 

ip_addr

 is the IP address and 

mask

 is the subnet 

mask

. For example, to 

set the IP address and subnet mask of the 

ethernet2/3

 interface to 

172.16.20.1/16:

set interface ethernet2/3 ip 172.16.20.1/16

Summary of Contents for NetScreen-5000 Series

Page 1: ...works Inc 1194 North Mathilda Avenue Sunnyvale CA 94089 USA 408 745 2000 www juniper net Part Number 093 1698 000 Revision E Security Products NetScreen 5000 Series Hardware Installation and Configura...

Page 2: ...ense The following information is for FCC compliance of Class B devices The equipment described in this manual generates and may radiate radio frequency energy If it is not installed in accordance wit...

Page 3: ...and 5000 8G2 G4 SPMs 15 5000 2XGE and 5000 2XGE G4 SPMs 16 5000 2G24FE SPM 17 Chapter 2 Installing the Device 19 General Installation Guidelines 19 Equipment Rack Installation Guidelines 20 Mounting t...

Page 4: ...regate Interfaces 41 Using CLI Commands to Reset the Device 42 Chapter 4 Servicing the Device 45 Removing and Reseating Modules 45 Replacing a DC Power Supply 47 Replacing an AC Power Supply 48 Replac...

Page 5: ...port configurations Together these modules provide a wide range of performance and security gateway configurations Because the modules can work in many combinations you can customize the NetScreen 500...

Page 6: ...s and LED Status provides descriptions of port and LED behavior Web User Interface Conventions In the Web user interface WebUI the set of instructions for each task is divided into navigational path a...

Page 7: ...ace type Variables are in italic type Technical Documentation and Support To obtain technical documentation for any Juniper Networks product visit www juniper net techpubs For technical support open a...

Page 8: ...NetScreen 5000 Series Hardware Installation and Configuration Guide 8 Technical Documentation and Support...

Page 9: ...ge 11 DC Power Supply on page 11 AC Power Supply on page 12 Fan Modules on page 13 NetScreen 5000 Modules on page 13 Management Modules on page 14 Secure Port Modules on page 15 NetScreen 5000 Series...

Page 10: ...top slot slot 1 holds the management module and the bottom slots slots 2 4 hold up to three Secure Port Modules SPMs for flexible high density port configurations The device has three hot swappable p...

Page 11: ...e operational then the Alarm LED is off For more information on power supply LEDs see Port Descriptions and LED Status on page 61 NetScreen 5400 Power Recommendations When the NetScreen 5400 contains...

Page 12: ...AC Power Supply The AC power supply weighs about three pounds The faceplate contains a power LED a power switch a male power outlet and a cooling fan vent Figure 4 shows the NetScreen 5200 AC power su...

Page 13: ...s NetScreen 5000 management modules NetScreen 5000 Secure Port Modules SPMs Table 1 shows the modules supported by each slot Table 2 shows the configurations for each management module and SPM and sho...

Page 14: ...dule include A management port for WebUI management or CLI sessions An RJ 45 console port for connecting serial terminal emulation programs such as HyperTerminal Two HA ports A modem port The manageme...

Page 15: ...5000 8G 5000 8G2 and 5000 8G2 G4 SPMs provide eight 1 Gigabit Small Form factor Pluggable SFP sockets These SPMs are supplied with SX gigabit fiber SFP transceivers The 5000 2XGE and 5000 2XGE G4 SPM...

Page 16: ...d disconnecting Gigabit Ethernet cables see Servicing the Device on page 45 The 5000 2XGE SPM provides port Link and Activity LEDs in addition to Power and Status LEDs Table 4 Capacities and Managemen...

Page 17: ...0 2G24FE SPM is only supported by the 5000 M and 5000 M2 management modules Also you cannot mix this SPM with the 5000 8G2 or 5000 2XGE SPMs The 5000 2G24FE provides port Link and Activity LEDs in add...

Page 18: ...NetScreen 5000 Series Hardware Installation and Configuration Guide 18 NetScreen 5000 Modules...

Page 19: ...Power Supply on page 26 Establishing a High Availability Connection on page 27 Connecting the NetScreen 5000 Series to a Router or Switch on page 28 General Installation Guidelines Observing the foll...

Page 20: ...op equipment higher in the rack can draw heat from the lower devices Always provide adequate ventilation for equipment at the bottom of the rack Baffles can isolate exhaust air from intake air The bes...

Page 21: ...e 23 NetScreen 5400 Front Mount on page 24 NetScreen 5200 Front and Rear Mount To mount the NetScreen 5200 with support from the front and rear you need four fitted screws a phillips screwdriver the r...

Page 22: ...ach the rear mount bracket to the rear rack posts 3 Slip the slides into the rear mount brackets then push the NetScreen 5200 forward until the left and right brackets contact the front rack posts as...

Page 23: ...river and brackets To center mount the device 1 Use the screws to attach the left and right brackets to the middle of each side of the chassis as shown in Figure 11 Figure 11 Installing NetScreen 5200...

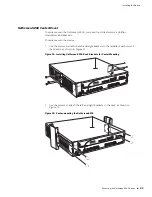
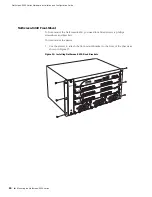
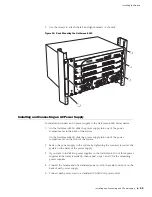
Page 24: ...s NetScreen 5400 Front Mount To front mount the NetScreen 5400 you need four fitted screws a phillips screwdriver and brackets To front mount the device 1 Use the screws to attach the front mount brac...

Page 25: ...back of the system On the NetScreen 5400 slide the power supply into one of the power compartments on the front of the system 2 Fasten the power supply to the system by tightening the corner screws i...

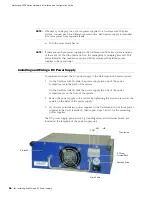
Page 26: ...tall two power supplies in the NetScreen 5200 or three power supplies in the NetScreen 5400 then repeat steps 1 and 2 for the remaining power supplies The DC power supply power switch grounding screw...

Page 27: ...he backup Should the master fail the backup is promoted to master and takes over the traffic processing To physically connect the master and backup devices the management modules provide a pair of hig...

Page 28: ...lish a high speed connection to a router or switch and provide firewall and general security for your network by connecting a Secure Port Module SPM to a fiber optic or copper wire backbone There are...

Page 29: ...00 Interfaces on page 31 NetScreen 5400 Interfaces on page 32 Configurable Interfaces on page 33 Performing Initial Connection and Configuration on page 33 Establishing a Terminal Emulator Connection...

Page 30: ...curity policies Route Mode In Route mode a NetScreen 5000 Series system operates at Layer 3 Because you can configure each interface using an IP address and subnet mask you can configure individual in...

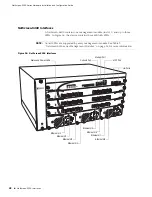
Page 31: ...logical interfaces NetScreen 5200 Interfaces A NetScreen 5200 contains one management module in slot 1 and one SPM In Figure 15 the device contains one 5000 8G SPM Figure 15 NetScreen 5200 Interfaces...

Page 32: ...In Figure 16 the device contains three 5000 8G SPMs Figure 16 NetScreen 5400 Interfaces NOTE Not all SPMs are supported by every management module See Table 3 Netscreen 5000 series Management Modules...

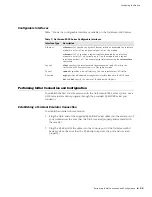
Page 33: ...port of the NetScreen 5000 Series system Be sure that the RJ 45 clip snaps into the port and is seated properly Table 7 NetScreen 5000 Series Configurable Interfaces Interface Type Description Ethern...

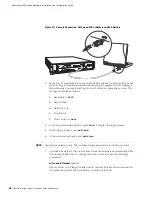
Page 34: ...ws Baud Rate to 9600 Parity to No Data Bits to 8 Stop Bit to 1 Flow Control to none 4 At the HyperTerminal window press Enter to display the login prompt 5 At the login prompt enter netscreen 6 At the...

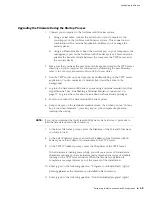
Page 35: ...ch as HyperTerminal See Establishing a Terminal Emulator Connection on page 33 Log in as the root admin or an admin with read write privileges 5 Power on or reboot the NetScreen 5000 Series system 6 K...

Page 36: ...he configuration process it is advisable to view existing port settings with the following command get interface This command displays current port names IP addresses MAC addresses and other useful in...

Page 37: ...ubnet mask For example to set the IP address and subnet mask of the ethernet2 2 interface to 10 250 2 1 16 set interface ethernet2 2 ip 10 250 2 1 16 4 Optional To confirm the new port settings use th...

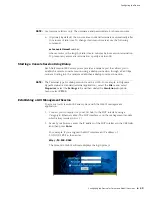
Page 38: ...nsole sessions with a NetScreen 5000 Series system You can also start management sessions using the ScreenOS WebUI a web based GUI management application Starting a Console Session Using Telnet To est...

Page 39: ...shing a GUI Management Session To access a NetScreen 5000 Series system with the WebUI management application 1 Connect your computer or your LAN hub to the MGT interface using a Category 5 Ethernet c...

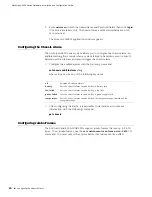
Page 40: ...the following command set chassis audible alarm string where string can be any of the following keywords 2 After configuring the alarm it is advisable to view alarm environment information with the fo...

Page 41: ...1 Optional To see what physical ports are available on your NetScreen 5000 Series system get interface 2 To create an aggregate interface name set interface string zone zonename where string is a leg...

Page 42: ...he login prompt enter the serial number of the NetScreen 5000 Series system 2 At the password prompt enter the serial number again The following message appears Lost Password Reset You have initiated...

Page 43: ...ion a permanent counter will be incremented to signify that this device has been reset This is your last chance to cancel this command If you proceed the device will return to factory default configur...

Page 44: ...NetScreen 5000 Series Hardware Installation and Configuration Guide 44 Using CLI Commands to Reset the Device...

Page 45: ...s on page 54 Removing and Installing SFP and XFP Transceivers on page 55 Removing and Reseating Modules Although NetScreen 5000 Series modules are preinstalled before shipping you may find it necessar...

Page 46: ...f the chassis To install a module in a NetScreen 5000 Series system 1 Be sure the module is right side up and the ejector injector levers are extended 2 Slide the module into the appropriate slot of t...

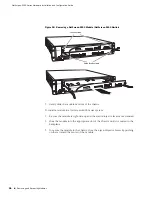
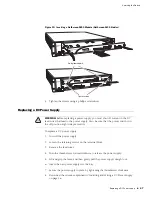
Page 47: ...terclockwise to release the power supply 5 Lift and grip the lever and then gently pull the power supply straight out 6 Insert the new power supply into the bay 7 Secure the power supply in place by t...

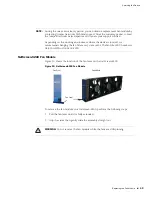
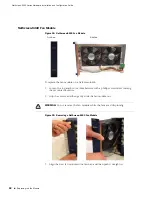
Page 48: ...ng the Fan Module The front panel of each device includes an air vent for cooling purposes The NetScreen 5000 Series fan modules differ according to the device model The NetScreen 5200 fan module has...

Page 49: ...he assembly straight out NOTE During the one year warranty period you can obtain a replacement fan module by contacting Juniper Networks Technical support After the warranty period contact the Juniper...

Page 50: ...er flat against the front panel NetScreen 5200 Fan Tray Filter Before you replace the fan tray filter make sure you have the following tools Flashlight or other light source 18 inch wooden ruler To re...

Page 51: ...Filter 6 Carefully insert a new filter into the chassis Use the wooden ruler as an aid to guide the back edge of the filter to reach the end of the Velcro wall 7 Once the filter is fully inserted pus...

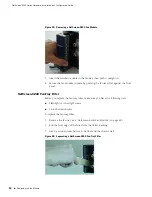
Page 52: ...n a NetScreen 5400 1 Loosen the top and bottom thumbscrews with a phillips screwdriver turning them counterclockwise 2 Grip the screws and then gently slide the fan module out Figure 25 Removing a Net...

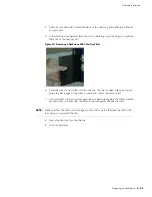
Page 53: ...an module in place by tightening the thumbscrews clockwise NetScreen 5400 Fan Tray Filter To replace the fan tray filter 1 Remove the fan tray see NetScreen 5400 Fan Module on page 52 2 Lay the fan tr...

Page 54: ...er the clip Do not depress the clip ejector on top of the clip 2 Slide the clip into the transceiver port until it clicks into place Because the fit is close you may have to apply some force to seat t...

Page 55: ...cks into place disengaging the transceiver 2 Grasp the transceiver at both sides and then pull the transceiver toward you to remove it from the module To install an SFP or XFP transceiver into a modul...

Page 56: ...NetScreen 5000 Series Hardware Installation and Configuration Guide 56 Removing and Installing SFP and XFP Transceivers...

Page 57: ...n page 58 Connectors on page 59 Physical Table 9 lists the physical specifications for NetScreen 5000 Series devices Table 9 NetScreen 5200 Physical Specifications Specification NetScreen 5200 NetScre...

Page 58: ...C 10 AC Watts 150 DC Watts 150 Fuse Rating AC 3 15 Amps 240 Volts DC 6 Amps 250 Volts NetScreen 5200 and 12 Amps 250 Volts NetScreen 5400 Table 11 NetScreen 5000 Series Environmental Specifications En...

Page 59: ...es for the different types of connectors used with the NetScreen 5000 Series systems Table 13 One Gigabit Media Types and Distances for NetScreen 5000 Series Connectors Standard Media Type Mhz Km Rati...

Page 60: ...NetScreen 5000 Series Hardware Installation and Configuration Guide 60 Connectors...

Page 61: ...erial connection to establish terminal sessions with the system Used for launching CLI sessions RJ 45 9600 Bps RS 232 Modem Enables a serial modem connection for establishing dial up sessions RJ 45 96...

Page 62: ...t of 4Gbps SFP 1 Gbps Gigabit Ethernet 5000 8G2 Network ports 1 through 8 Eight 2 Gigabit ports with an aggregate throughput of 8 Gbps SFP 2 Gbps Gigabit Ethernet 5000 8G2 G4 Network ports 1 through 8...

Page 63: ...in a redundancy cluster Off No HA activity has been defined ALARM Red An alarm that could mean a system failure Blinking red A self test failure occurred during startup Off The system has not detected...

Page 64: ...epends upon whether the NetScreen 5400 contains a single Secure Port Module SPM or multiple SPMs Single SPM Installed Table 21 describes the LED behaviors for different combinations of functioning pow...

Page 65: ...lies NetScreen 5400 Power Supply 1 Present Power Supply 2 Present Power Supply 3 Present Power LED Alarm LED Yes No No Green Off Yes Yes not functioning or turned off No Green Red Yes Yes No Green Off...

Page 66: ...NetScreen 5000 Series Hardware Installation and Configuration Guide 66 Fan LED...

Page 67: ...50 fan modules installing 13 replacing 48 G guide organization 6 H high availability establishing an HA connection 27 I installation guidelines 19 center mount rack 23 front and rear rack 21 L LED sta...

Page 68: ...ower supplies AC description 12 replacing 48 power supplies DC ground posts 27 replacing 47 terminal blocks 27 wiring 26 power supplies replacing AC 48 power supplies replacing DC 47 R racks installat...

Reviews: