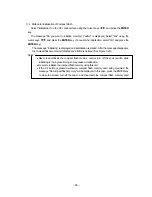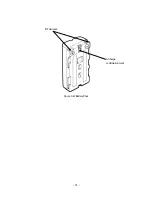
Table 4-1 Printer's Main Parts and Functions
No.
Name
Function
1
Power button
Turns "ON or "OFF" the power.
To turn on the power, hold the button down until the power lamp
turns on. To turn the power off, hold the button down until the
power lamp turns off.
2
FEED button
Paper is fed a small amount each time this button is pressed.
To continuously feed paper, hold down the button.
3
POWER lamp
Lights when the power is turned on.
4
ERROR lamp
Lights when a printer error has occurred.
5
IrDA light receiver-emitter
Light receiver-emitter for IrDA (infrared data communication)
6
Interface connector
Connects the interface cable.
Open the rubber cover, and insert the connector.
7
Paper ejection port
Paper is ejected from this port equipped with a paper cutter.
While the platen cover is closed, paper is ejected from the top of
the printer.
8
Thermal head
Records data on paper.
Be careful that the thermal head is hot immediately after printing.
9
Platen cover
The thermal head is released from paper when this cover is
opened.
Open the cover to remove paper or clean the thermal head.
10
Platen roller
Brings the thermal head into contact with paper.
Paper is fed by turning the roller.
11
Power connector
Connects the AC adapter.
12
Paper insertion port
Paper is inserted through this port.
13
Battery connection terminal
Used to connect the battery pack.
14
Button for releasing the
battery
Used to remove the battery pack from the printer.
4.1.2
Printer Specification
The specification for the printer is shown below.
Printing system:
:
Thermal line dot system
Printing width/printing paper width:
:
104/112mm
Interface:
:
RS-232C, IrDA
Operating temperature range:
:+5〜+40℃
External dimensions:
:
160
x
89
x
29.5mm
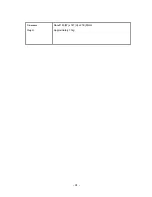
Weight:
:
About 250 g (the printer alone)
‑ 76 ‑
Summary of Contents for Handy Search NJJ-95B
Page 1: ...Handy Search Instruction Manual...
Page 8: ...Appearance of the NJJ 95B vii...
Page 21: ...Rear view Units in trigonometry mm 9...
Page 24: ...8 14 15 Figure 2 2 Side View 16 17 14 18 Figure 2 3 Rear View 12...
Page 73: ...Display of thumbnails Figure 3 17 CF Control Screen 61...
Page 83: ...B Terminals ACharge confirmation mark Figure 3 22 Battery Pack 71...
Page 85: ...Shutter Charge lamp Figure 3 23 Battery Charger 73...
Page 96: ...Concrete Rebar D 75mm L 75mm D 75mm Difficult to implement 84...
Page 103: ...Dimensions Weight About 149 W x 147 H x 216 D mm Approximately 1 1kg 91...


