Acapella Installation Guide
21
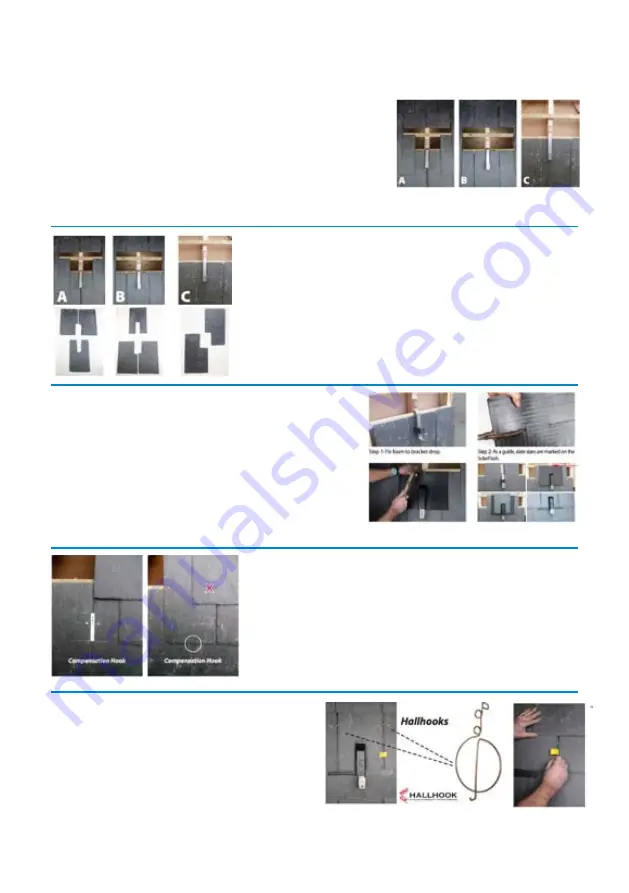
Once the roof is opened and the rafter located, the position of
the roof anchor/bracket is now determined.
The position of A, B and C (see below) are the only places that
the rafter can land in relation to the slate.
A rafter lands where the 2 slates join on the rafter
B Rafter lands in the middle of the slate
C Rafter lans somewhere between the middle & the edge of a slate
When installing on an exisiting roof, the bottom slates do
not need to be removed and can be cut in situ with an angle
grinder.
Note: One cut below the roof anchor/bracket means two cuts
above the flashings (A) and vice versa (B)
Note: Position C could fall either side of centre and only needs
two cuts, one under and one over the roof anchor/bracket.
Step 1: Fix foam to the bracket drop
Step 2: As a guide, slates sizes are marked on the solar
flash
Step 3: Solar flash can be trimmed or nailed through. If
nailing through, ensure relevant line for slate size cen-
tres on the batten. Apply pressure to hold Solarflash
solid when nailing through.
Step 4: Cut slates around the hood of the Solar flash as
previous diagram.
The comp hook is used where it is not possible to access
both nail holes and prevents the head of the slate tilting off
the batten.
Unable to access nail hole under this slate
Step 1: Mark position of the bottom of the object slate and
fix comp hook to this line
Step 2: Slide the slate into position on the comp hook and
nail the accessible hole. Slate cannot tilt.
Step 1: Position the hallhook between the slates.
Use the nail hole that positions the bottom hook
at least 10mm up from the finished slate line. The
hallhook will stretch up to 40mm. Hang the hook-
pull on the hallhook as per illustration.
Step 2: Slide the object slate into position then
using the hookpull, pull firmly until the hallhook
locates the base of the object slate. Remove the
hookpull.


