Document Number: SE00458000-00
Page 14
3.4.
BONDING THE DRIVING STRIP TO THE
CARRIAGE
The Driving Strip provides the interface between the motor's tips and the Carriage. It must present
a solid surface to ensure accuracy of movement as well as long operating life.
3.4.1.
MOUNTING CERAMIC STRIP ON LINEAR STAGE
The Driving Strip is supplied with double-sided tape along one surface for mounting to the carriage.
The Driving Strip must be fully supported by the carriage along its full length and
width.
The Driving Strip must be secured to the Carriage at its center with epoxy to
ensure rigidity along the direction of motion.
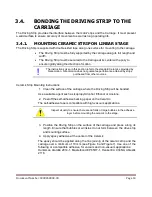
The instructions given in this section refer to the standard Ceramics provided by
Nanomotion. Nanomotion does not guarantee performance attained by strips
purchased from other sources.
Ceramic Strip Mounting Instructions:
1. Clean the surface of the carriage where the Driving Strip will be bonded.
Use a suitable agent such as Isopropyl Alcohol, Ethanol or Acetone.
2. Peel off the self-adhesive backing paper on the Ceramic.
The self-adhesive tape is compatible with high-vacuum applications. .
Inspect visually to ensure there are no folds or large bubbles in the adhesive
layer before mounting the ceramic to the stage.
3. Position the Driving Strip on the surface of the carriage and press along its
length. Ensure that bubbles or wrinkles do not form between the drive strip
and mounting surface.
4. Apply epoxy adhesive at the center of the Ceramic.
The epoxy should be applied along the line joininig of the ceramic strip and the
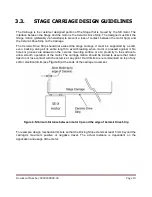
carriage over a minimum of 10 mm (see Figure 6 and Figure 7). Use one of the
following or a compatible adhesive, for vacuum and non-vacuum applications:
Huntsman Araldite 2014-1, Masterbond EP65HT-1, Henkel EA 934NA, Ablestik
2116.


