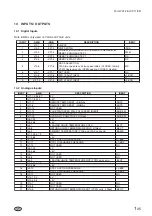
The ‘RANGE’ setting takes into account the number of
compressors on the unit and the temperature difference
between leaving (LCHLT) and return chilled liquid at full
load.
The 'RANGE' is programmed for +/- X.X° C.
The 'SETPOINT' is in the centre of the control
range.
For further details of cooling setpoint programming refer
to Capacity Control.
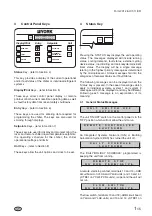
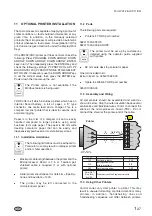
Pressing the 'SETPOINTS' key a second time will
display the remote 'SETPOINT' and 'RANGE'. The
range value is the value entered under the previous
display:
This message automatically updates every 2 seconds.
This setpoint is not programmable, but is controlled by a
remote device such as an ISN control or EMS-PWM
temperature reset signal. This setpoint would only be
valid if the unit is operating in the 'REMOTE' mode.
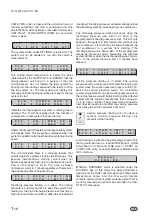
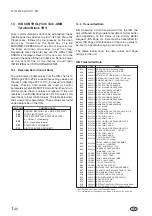
Pressing the 'SETPOINTS' a third time will allow the
maximum remote EMS-PWM temperature reset to be
programmed:
The temperature reset value is the maximum allowable
reset of the temperature 'SETPOINT' . The 'SETPOINT'
can be reset upwards by the use of a timed contact
closure on the PWM input (-XTBC1 terminals 13 - 20)
Activated on request.
Pressing the 'UP ARROW' or 'DOWN ARROW' will
change the temperature reset value in 1.0°C
increments. The 'ENTER/ADV' key must be pressed to
enter the value into memory.
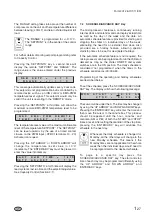
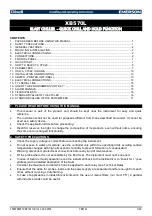
Pressing the 'SETPOINTS' a forth time will display the
lead system’s last run time and the setpoint adjust value.
See Capacity Control (Section 2.1).
7.2
SCHEDULE/ADVANCE DAY Key
The microprocessor features a continuously running
internal clock and calendar and can display actual time
as well as the day of the week and the date. An
automatic schedule feature is provided for starting and
stopping the chiller on individual days of the week,
eliminating the need for an external time clock. Also
provided are a holiday feature, allowing special
start/stop times to be set for designated holidays.
If the automatic schedule feature is not required, the
microprocessor can be programmed to run the chiller on
demand as long as the chiller ON/OFF and system
switches are in the ON position. The daily schedule is
considered 'not programmed' when the times in the
schedule are all zeros (00:00 AM).
Programming of the operating and holiday schedules
are described below.
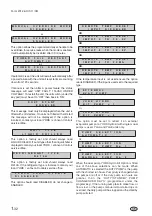
To set the schedule, press the 'SCHEDULE/ADVANCE
DAY' key. The display will show the following message:
The cursor will be under the 0. The time may be changed
by using the 'UP ARROW' and 'DOWN ARROW' keys.
Pressing the 'ENTER/ADV' key will enter the time and
then move the cursor to the minute box. This process
should be repeated until the hour, minutes, and
meridian (AM or PM) of both the 'START' and 'STOP'
times are set. After setting the meridian of the stop time,
pressing the 'ENTER/ADV‘ key will advance the
schedule to the next day.
Whenever the daily schedule is changed for
Monday, all the other days will change to the
new Monday schedule. This means if the
Monday times are not applicable for the whole
week then the individual days would need to
be reprogrammed to the desired schedule.
T o
p a g e
t o
a
s p e c i f i c
d a y
p r e s s
t h e
'SCHEDULE/ADVANCE DAY' key. The start and stop
time of each day may be programmed differently using
t h e ' U P A R R O W ' a n d ' D O W N A R R O W ' a n d
'ENTER/ADV' keys.
1
-
27
Form 201.26.OI1(11/09)
R E M
S E T P
=
6 . 7 ° C
R A N G E
=
+ / - 1 . 1 ° C
M A X
E M S -
P W M
R E M O T E
T E M P
R E S E T
=
1 1 .
0 ° C
L A S T
R U N
T I
M E
=
1 6 7 S
S E T P
A D J U S T
=
1 .
7 ° C
M O N
S T A R T
=
0 0 :
0 0
A M
S T O P
=
0 0 :
0 0
A M


