Johnson Controls YORK YCAS0098-0208 Start-Up Checklist Download Page 2

FORM 201.19-CL1 (309)

2


JOHNSON CONTROLS

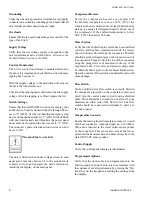
Grounding

Verify that the unit’s protective terminal(s) are properly 

connected to a suitable grounding point. Ensure that all 

unit internal ground connections are tight.

Overloads

Ensure that the fan overloads settings are correct for the 

type of fan fitted.

Supply Voltage

Verify that the site voltage supply corresponds to the 

unit requirement and is within limits.  

Reference the 

Technical Data Section in the IOM.

Control Transformer

The 3-wire control transformer is mounted external to 

the panel. It is important to check that the correct primary 

tapping has been used:

With the supply voltage to the unit turned off, remove 

the lid to the transformer box.

Check that the tapping used conforms to the site supply 

voltage. After the tapping is verified, replace the lid.

Switch Settings

Ensure that the unit ON/OFF switch on the display door 

and the micro board system switches S2 through S5 are 

set to “0” (OFF). Set the red handled emergency stop 

device on the options panel to “1” (ON). For units fitted 

with door interlocked circuit breakers the power panel 

doors must be closed and the devices set to “1” (ON). 

The customer’s power disconnection devices can now 

be set to ON.

The machine is now live!

The unit is fitted with an under voltage circuit in each 

panel and it may take between 5 to 10 seconds for its 

contacts to close and energize the unit’s electronics, 

including the display on the main panel.

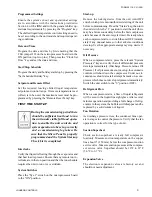
Compressor Heaters

Verify  the  compressor  heaters  are  energized.  If 

the  ambient  temperature  is  above  96°F  (36°C)  the 

compressor heaters must be on for at least 8 hours before 

start-up to ensure all refrigerant liquid is driven out of 

the compressor. If the ambient temperature is below 

86°F (30°C) then allow 24 hours.

Water System

Verify that the chilled liquid system has been installed 

correctly, and has been commissioned with the correct 

direction of water flow through the evaporator. The inlet 

should be at the refrigerant pipework connection end of 

the evaporator. Purge air from the top of the evaporator 

using the plugged air vent mounted on the top of the 

evaporator body. Flow rates and pressure drops must 

be within the limits given in the Technical Data Section. 

Operation outside of these limits is undesirable and could 

cause damage.

Flow Switch

Verify a chilled water flow switch is correctly fitted in 

the customer’s pipework on the evaporator outlet, and 

wired into the control panel correctly using shielded 

cable. There should be a straight run of at least 5 pipe 

diameters on either side of the flow switch. The flow 

switch should be connected to terminals 13 and 14 in 

the micro panel.

Temperature Sensor(s)

Ensure the leaving liquid temperature sensor is coated 

with heat conductive compound (part no. 013-00890-

000) and is inserted in the water outlet sensor pocket 

of the evaporator. This sensor also acts as the freeze 

protection thermostat sensor and must always be in the 

water OUTLET sensor pocket.

Control Supply

Verify the control panel display is illuminated.

Programmed Options

Verify that the options factory programmed into the 

Microcomputer Control Center are in accordance with 

the customer’s order requirements by pressing the 

Op-

tions

 key on the keypad and reading the settings from 

the display.


Summary of Contents for YORK YCAS0098-0208

Page 1: ...rating charge Reference the Technical Data Section in the IOM Valves Open each compressor suction economizer and dis charge valve fully counter clockwise then close one turn of the stem to ensure operating pressure is fed to the pressure transducers Open the liquid line service valve fully and ensure the oil return line ball valve is open in each system Compressor Oil To add oil to a circuit conne...

Page 2: ... above 96 F 36 C the compressor heaters must be on for at least 8 hours before start up to ensure all refrigerant liquid is driven out of the compressor If the ambient temperature is below 86 F 30 C then allow 24 hours Water System Verify that the chilled liquid system has been installed correctly and has been commissioned with the correct direction of water flow through the evaporator The inlet s...

Page 3: ...position Start up Remove the locking device from the unit Auto OFF switch which prevents unauthorized starting of the unit before commissioning Press the Status key then turn the unit switch to the 1 position to start the unit there may be a few seconds delay before the first compressor starts because of the anti recycle timer Be ready when each compressor starts to switch the unit OFF immedi atel...

Page 4: ...line temperature on the copper line beside the main liquid line service valve Measure liquid pressure at the liquid line service valve Sub cooling should be 12 F to 15 F 6 7 C to 8 3 C No bubbles should show in the sight glass If subcooling is out of range add or remove refrigerant as required Do not overcharge the unit The liquid flow to the main evaporator TXV is subcooled further by the economi...

Page 5: ...delivery tubing With the bottom suction end of the pump submerged in oil to avoid entrance of air operate the pump until oil drips from the flare nut joint allowing the air to be expelled and tighten the flare nut Open the oil charging valve on the oil separator and pump in oil until it reaches the proper level as described above In actual operation due to splashing an oil level may be seen in bot...

Page 6: ...lve electronic should always be selected when an EEV is installed Verify the selections by pressing the OPTIONS Key on the control panel Check them off in the chart above Damage to the chiller could result if switches are improperly pro grammed 5 Program the required operating values into the micro for cut outs safeties etc and record them in the chart below Record programmed values in the chart b...

Page 7: ...scharge condensing pressure can be found in the refriger ant temperature pressure chart use entering air temperature 30 F 17 C for normal condens ing temperature b The temperature of the liquid refrigerant out of the condenser should be not be more than 15 F 8 C less than the condensing temperature The temperature corresponding to the condensing pressure from the refrigerant temperature pres sure ...

Page 8: ...on superheat should be checked The superheat should be checked only after steady state operation of the chiller has been established the leaving water temperature has been pulled down to the required leaving water temperature and the unit is running in a fully loaded condition Correct superheat setting for a system is 10 12 F 6 7 C The superheat is calculated as the difference between the actual t...

Page 9: ...mately 15 minutes between adjustments for the system and the thermal expansion valve to respond and settle out Assure that superheat is set between 10 12 F 6 7 C 1 Record the motor gas temperature economizer pressure economizer pressure converted to temperature and economizer superheat below SYS 1 SYS 2 Economizer Press PSIG kPa Economizer Temp F C Economizer Press Converted to Temp F C Superheat ...

Reviews: