10
- For interconnecting lines of over 25 metres, oil should be
added (30 gr/m. of length).
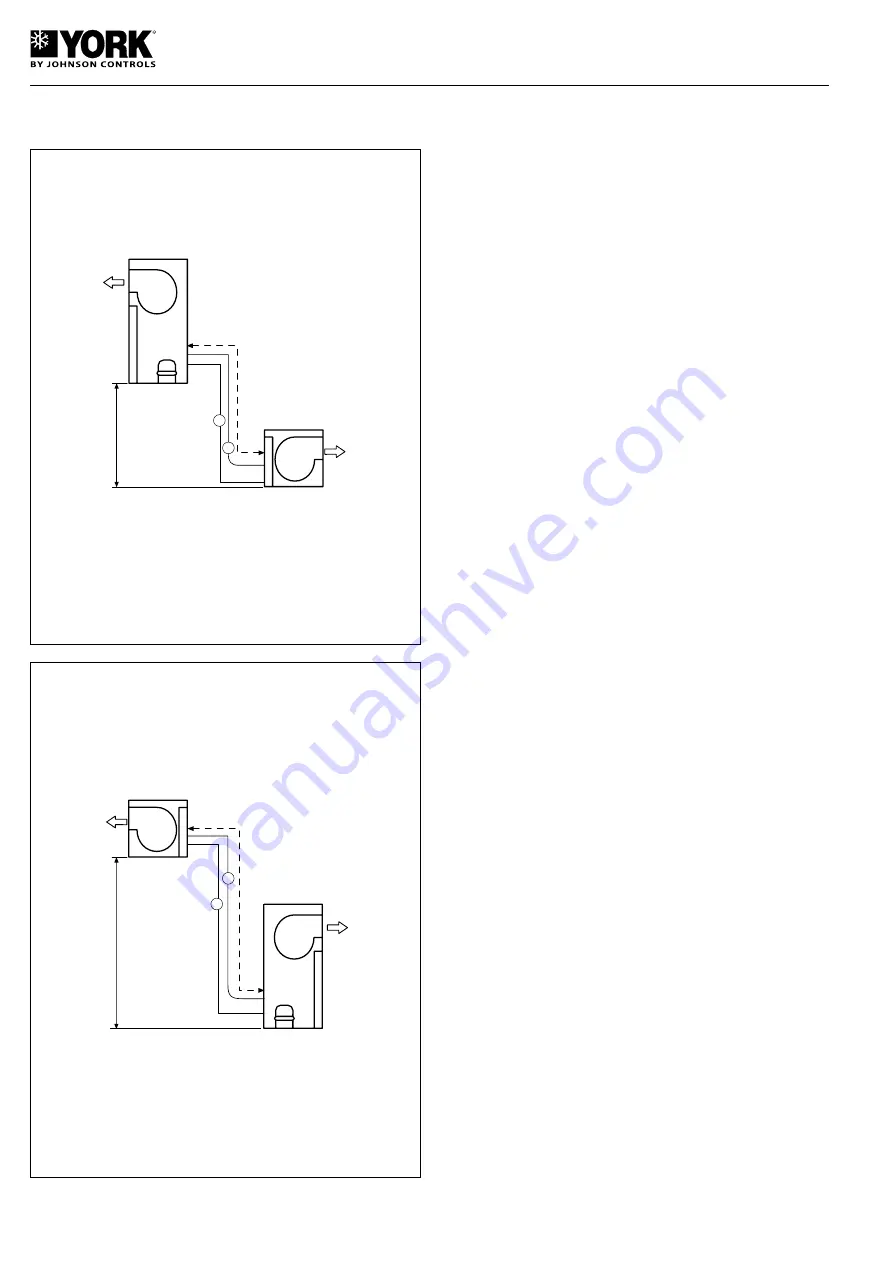
Layout 1 (Outdoor unit up)
L: Total piping length (ve horizontal sections)
in course and in one only direction.
H: Vertical distance between units.
A: Cooling liquid line.
B: Cooling gas line.
Layout 2 (Indoor unit up)
L: Total piping length (ve horizontal sections)
in course and in one only direction.
H: Vertical distance between units.
A: Cooling liquid line.
B: Cooling gas line.
Pipes to be used
When installing the pipes that join the two units, take special
care in checking that the pipes used are kept clean and dry
prior to installation.
It is advisable to take the following recommendations into
account:
- Use cooling quality copper pipes only (K or L type,
S/ASTMB88).
- Do not work outside when raining.
- The ends of the pipes should remain closed throughout
the installation.
- Do not leave the filter-dryers nor the compressor out in the
open.
- When welding, use low melting point rods. These should
contain 5% silver minimum.
- While welding and as long as the pipe remains hot, maintain
a current of dry nitrogen so as to avoid rust and scaling
inside the pipe. This could cause contamination and ob-
structions.
- Do not use strippers at the copper-copper joints.
- Connection to the units should be carried out by using the
flaring method.
Insulation of refrigerant pipes
Since the interconnecting distribution pipes to the coil are
installed in the outdoor unit, both the larger and the smaller
diameter pipes are on the relative low pressure side of the
system.
Consequently, to avoid condensed water from the pipes
dripping on the floor, both must be insulated with adequate
insulation. The thickness of same should be at least 8 mm.
Draining and drying
Air does not act as refrigerant because it cannot be liquefied
by the compressor.
The air and humidity that remain in the cooling system have
undesirable effects, such as those listed below. Consequently,
they should be eliminated completely.
- High pressure increases.
- Consumed power increases.
- The performance of the unit decreases.
- The water contained in the air can freeze and block the
capillaries.
- Water can cause the corrosion of certain parts of the circuit
and the deterioration of the compressor.
Process
In each circuit:
1- Connect a vacuum pump and a service pressure
gauge.
2- Carry out a vacuum of up to 50 microns, minimum.
3- Check for leaks.
Refrigerant charge
The refrigerant charge is calculated with a pipe length of
7.5 meters.
See the refrigerant charge in the table below, by models
and size.
�
�����������
������������
�
�
�
�������������
�
�
�����������
������������
�
�
�������������
Summary of Contents for York VCH 20A
Page 17: ...17 Technical characteristics General dimensions mm VCH 20A and 25A ...
Page 18: ...18 General dimensions mm VCH 30A and 40A ...
Page 19: ...19 General dimensions mm VCH 45A and 60A ...
Page 20: ...20 General dimensions mm VCH 75A and 90A ...
Page 21: ...21 General dimensions mm VIR 25A VIR 40A ...
Page 22: ...22 General dimensions mm VIR 45A and 60A VIR 75A and 90A ...
Page 23: ...23 Cooling diagram Variant chart ...
Page 31: ...31 Electric diagram VCH 20 25 30 40A 400 3 50 ...
Page 32: ...32 Electric diagram VCH 45 60 75 90A 400 3 50 ...
Page 33: ...33 Electric diagram VCH 45 60 75 90A 400 3 50 ...
Page 34: ...34 Configuration of switches ...
Page 43: ...43 Wiring diagram VIR 45 90 ...
Page 48: ...48 Wiring diagram Heater 10 15kW 400 3 50 VIR 25A 40A 45A and 60A ...
Page 49: ...49 Wiring diagram Heater 20 30 40kW 400 3 50 VIR 40A 45A 60A 75A and 90A ...
Page 59: ...59 VCH 20A to 40A VCH 45 to 90A ...
Page 61: ...61 Wiring diagrams ...
Page 62: ...62 Wiring diagrams ...
Page 69: ...69 Wiring diagram ...
Page 71: ......
Page 72: ...www johnsoncontrols com ...


