JLG EcoLift50 Service And Maintenance Manual Download Page 19

SECTION 2 - GENERAL SERVICE INFORMATION

2-6

31215861

Components Removal and Installation

Use  adjustable  lifting  devices,  whenever  possible,  if

mechanical assistance is required. All slings 

(chains, cables,

etc.)

 should be parallel to each other and as near perpen

-

dicular as possible to top of part being lifted.
Should  it  be  necessary  to  remove  a  component  on  an

angle, keep in mind that the capacity of an eyebolt or sim

-

ilar bracket lessens, as the angle between the supporting

structure  and  the  component  becomes  less  than  90

degrees.
If  a  part  resists  removal,  check  to  see  whether  all  nuts,

bolts,  cables,  brackets,  wiring,  etc.,  have  been  removed

and that no adjacent parts are interfering.

Component Disassembly and Reassembly

When disassembling or reassembling a component, com

-

plete  the  procedural  steps  in  sequence.  Do  not  partially

disassemble or assemble one part, then start on another.

Always recheck your work to assure that nothing has been

overlooked.  Do  not  make  any  adjustments,  other  than

those recommended, without obtaining proper approval.

Pressure-Fit Parts

When assembling pressure-fit parts, use an “anti-seize” or

molybdenum  disulfide  base  compound  to  lubricate  the

mating surface.

Bearings

When a bearing is removed, cover it to keep out dirt and

abrasives.  Clean  bearings  in  nonflammable  cleaning  sol

-

vent  and  allow  to  drip  dry.  Compressed  air  can  be  used

but do not spin the bearing.
Discard bearings if the races and balls (or rollers) are pit

-

ted, scored, or burned.
If bearing is found to be serviceable, apply a light coat of

oil  and  wrap  it  in  clean  (waxed)  paper.  Do  not  unwrap

reusable or new bearings until they are ready to install.
Lubricate new or used serviceable bearings before instal

-

lation. When  pressing  a  bearing  into  a  retainer  or  bore,

apply  pressure  to  the  outer  race.  If  the  bearing  is  to  be

installed on a shaft, apply pressure to the inner race.

Gaskets

Check  that  holes  in  gaskets  align  with  openings  in  the

mating parts. If it becomes necessary to hand-fabricate a

gasket, use gasket material or stock of equivalent material

and thickness. Be sure to cut holes in the right location, as

blank gaskets can cause serious system damage.

Bolt Usage and Torque Application

Use  bolts  of  proper  length.  A  bolt  which is  too  long  will

bottom before the head is tight against its related part. If a

bolt is too short, there will not be enough thread area to

engage and hold the part properly. When replacing bolts,

use only those having the same specifications of the origi

-

nal, or one which is equivalent.
Unless specific torque requirements  are given  within the

text,  standard  torque  values  should  be  used  on  heat-

treated bolts, studs, and steel nuts, in accordance with rec

-

ommended shop practices.

Go to

Discount-Equipment.com 

to

order your 

parts

Summary of Contents for EcoLift50

Page 1: ...nd Maintenance Manual Models EcoLift50 SN P900004791 to Present EcoLift70 SN P900004840to Present 31215861 January 15 2020 Rev A G o t o D i s c o u n t E q u i p m e n t c o m t o o r d e r y o u r p...

Page 2: ...ith a quote for the right part that your machine needs We sell worldwide for the brands Genie Terex JLG MultiQuip Mikasa Essick Whiteman Mayco Toro Stone Diamond Products Generac Magnum Airman Haulott...

Page 3: ...ATOR B HYDRAULIC SYSTEM SAFETY 1 It should be particularly noted that the machines hydraulic systems operate at extremely high and poten tially dangerous pressures Every effort should be made to relie...

Page 4: ...Inspection Schedule 2 3 2 3 Servicing and Maintenance Guidelines 2 5 General 2 5 Safety and Workmanship 2 5 Cleanliness 2 5 Components Removal and Installation 2 6 Component Disassembly and Reassembl...

Page 5: ...2 31215861 TABLE OF CONTENTS G o t o D i s c o u n t E q u i p m e n t c o m t o o r d e r y o u r p a r t s...

Page 6: ...44mm W WorkingFootprint 38 8inx28 3in 985mmx700mm 50 3inx29 1in 1280mmx740mm MaximumPlatformCapacity PlatformandToolTrayCombined 330lb 150kg 1person tools MaximumToolTrayCapacity 33lb 15kg MaximumManu...

Page 7: ...215861 1 4 OPERATING SPECIFICATIONS EcoLift50 EcoLift70 OAR00590 13 ft 4 m 9 8 ft 3 m 6 5 ft 2 m 3 3 ft 1 m 0 0 14 ft 4 2 m 9 84 ft 3 m 6 5 ft 2 m 3 28 ft 1 m G o t o D i s c o u n t E q u i p m e n t...

Page 8: ...dardgeargrease LubricationTypes OGG Open Gear Grease Omega73 Grade 2 Harsh Environment Grease NOTE Recommended lubricating intervals are based on normal use If machine is subjected to severe operating...

Page 9: ...4 31215861 1 6 TORQUE CHARTS In the event of maintenance or a loose fastener use the following torque charts to determine proper torque value SAE Fasteners G o t o D i s c o u n t E q u i p m e n t c...

Page 10: ...SECTION 1 MACHINE SPECIFICATIONS 31215861 1 5 G o t o D i s c o u n t E q u i p m e n t c o m t o o r d e r y o u r p a r t s...

Page 11: ...SECTION 1 MACHINE SPECIFICATIONS 1 6 31215861 G o t o D i s c o u n t E q u i p m e n t c o m t o o r d e r y o u r p a r t s...

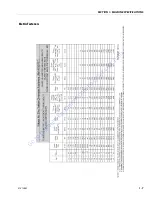
Page 12: ...SECTION 1 MACHINE SPECIFICATIONS 31215861 1 7 MetricFasteners G o t o D i s c o u n t E q u i p m e n t c o m t o o r d e r y o u r p a r t s...

Page 13: ...ith a quote for the right part that your machine needs We sell worldwide for the brands Genie Terex JLG MultiQuip Mikasa Essick Whiteman Mayco Toro Stone Diamond Products Generac Magnum Airman Haulott...

Page 14: ...lease or rental delivery The Frequent Inspection shall be accomplished for each machine in ser vice for 3 months or 150 hours out of service for a period of more than 3 months or when purchased used...

Page 15: ...used Owner Dealer or User QualifiedJLGMechanic ServiceandMaintenanceManual andapplicableJLGinspectionform Annual Machine Inspection Annually nolaterthan13monthsfromthe dateofthepriorinspection Owner D...

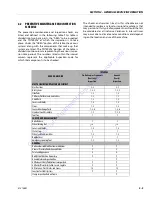
Page 16: ...l times may occur due to climate and or conditions and depend ing on the location and use of the machine AREA ON MACHINE INTERVAL Pre Delivery1 or Frequent 2 Quarterly Inspection Annual3 Yearly Inspec...

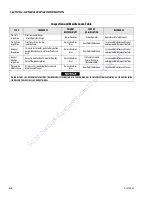
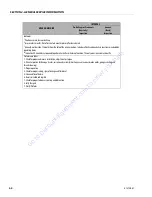
Page 17: ...life PerformanceCodes 1 Checkforproperandsecure installation adjustment ortorque 2 Visualinspectionfordamage cracks corrosion abrasions distortion excessivewear brokenwelds gouges chafingand threadssh...

Page 18: ...PLATFORM HAS BEEN SAFELY RESTRAINED FROM ANY MOVEMENT BY BLOCKING OR OVERHEAD SLING Cleanliness The most important single item in preserving the long ser vice life of a machine is to keep dirt and fo...

Page 19: ...e cleaning sol vent and allow to drip dry Compressed air can be used but do not spin the bearing Discard bearings if the races and balls or rollers are pit ted scored or burned If bearing is found to...

Page 20: ...ith a quote for the right part that your machine needs We sell worldwide for the brands Genie Terex JLG MultiQuip Mikasa Essick Whiteman Mayco Toro Stone Diamond Products Generac Magnum Airman Haulott...

Page 21: ...form without weight in the platform The mast contains a charged gas cylinder under constant pressure to help assist the lifting process EcoLift70 1 FrameCover 2 Screws andWashers 3 LockNut Qty 4 4 Eme...

Page 22: ...r the mast mounting sockets 4 With the aid of an assistant remove platform from mast by pulling each rail out from it s mastsocket then lifting the platform off and setting aside NOTE When assembling...

Page 23: ...of the chassis frame housing and remove the locking nut and washer on the bot tom of the castor wheel assembly inside the castor wheel frame 4 Slide castor and mount assembly out bottom of frame Insta...

Page 24: ...LYWHEEL CRANK COVERINSTALLATION DO NOT RELEASE THE FLYWHEEL CRANK AND ATTEMPT TO RAISE THE PLAT FORM WITHOUT WEIGHT IN THE PLATFORM THE MAST CONTAINS A GAS CHARGED CYLINDER UNDER CONSTANT PRESSURE TO...

Page 25: ...Outer Mast Section Rear Half 5 Outer Mast Section FrontCover 6 BeltDriveSystem 7 Stationary BeltClamp Assembly andMountingHoles 8 BeltSpringTensioner and Interlock Plate 9 Mast Safety Interlock Pin 1...

Page 26: ...l the interlock pin out and rotate 90 to lock the pin in the retracted position 11 Remove the outer mast front cover assembly from the mast a Remove the 14 screws 7 each side from the front cover asse...

Page 27: ...components requiring lubrication anti seize compound or thread locking compound during assembly Thread Locking Compound Required Apply to threads of lanyard attach eyelet on item 4 Belt tensioner sto...

Page 28: ...st assembly is almost fully compressed AMBIENT TEMPERATURE IN RECHARGING AREA PRESSURE 5 F to 23 F 15 0to 5 1 C 928PSI 7PSI 64bar 0 5bar 23 F to 41 F 5 0to 4 9 C 972PSI 7PSI 67bar 0 5bar 41 F to 59 F...

Page 29: ...ith a quote for the right part that your machine needs We sell worldwide for the brands Genie Terex JLG MultiQuip Mikasa Essick Whiteman Mayco Toro Stone Diamond Products Generac Magnum Airman Haulott...

Page 30: ...G o t o D i s c o u n t E q u i p m e n t c o m t o o r d e r y o u r p a r t s...

Reviews: