25
Beveling
To cut a bevel, lock the fence at the required angle
and run the work piece across the knives while
keeping it firmly against the fence and tables.
Several passes may be necessary to achieve the
desired result.
Although the fence may be
tilted in or out for a bevel cut, it is
recommended for safety reasons that the fence
be tilted in toward the operator, making a
cradled cut.
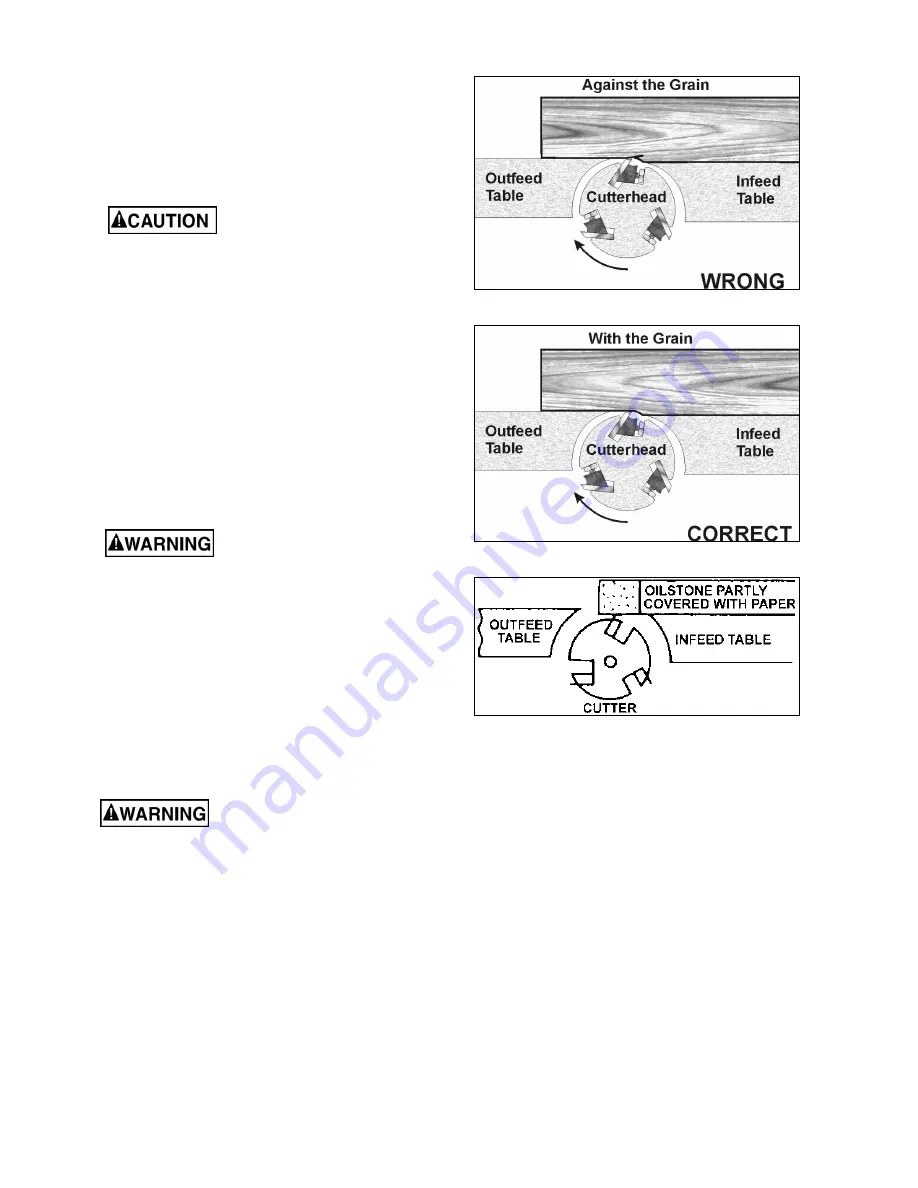
Direction of Grain
Avoid feeding work into the jointer against the
grain. This may result in chipped and splintered
edges. See Figure 39. Feed
with
the grain to
obtain a smooth surface, as shown in Figure 40.
Maintenance
Blade Care
Blades are extremely sharp!
Use caution when cleaning or
changing. Failure to comply may cause serious
injury!
When gum and pitch collect on the blades,
carefully remove with a strong solvent. Failure to
remove gum and pitch build up may result in
excessive friction, blade wear and overheating.
When blades become dull, touch up blades. See
Sharpening the Knives
. NOTE: This does not apply
to the JJ-6CSDX or JJ-6HHDX models – knives or
inserts must be rotated or replaced on these.
Sharpening the Knives (JJ-6CSX only)
Blades are extremely sharp!
Use caution when handling.
Failure to comply may cause serious injury!
1. Disconnect the machine from the power
source.
2. Remove the blade guard and belt cover.
3. To protect the infeed table from scratches,
partially cover the sharpening stone with paper
(Figure 41).
4. Lay the stone on the infeed table.
5. Lower the infeed table and turn the cutterhead
by turning the cutterhead pulley. The infeed
table height is set properly when the stone's
surface is flush with the knife bevel.
Figure 39
Figure 40
Figure 41
6. Keep the cutterhead from rotating by grasping
the cutterhead pulley while sliding the stone
back and forth across the table.
7. Take the same amount of passes for all three
blades.
When the blades have been sharpened and still are
not cutting efficiently, trying to touch up the blades
further will only cause the formation of a second
beveled edge. When this starts to happen, it is time
to replace blades with another set. It is
recommended to keep a second set of blades on
hand so that they may be installed while the first set
is being professionally sharpened.
Summary of Contents for JJ-6CSDX
Page 31: ...31 Fence Assembly All Models ...
Page 35: ...35 Stand Assembly JJ 6HHDX only ...
Page 37: ...37 54 5F H051 Rivet 6 55 TS 0207021 Socket Head Cap Screw JJ 6CSDX 1 4 20x1 2 1 ...
Page 42: ...42 Notes ...
Page 43: ...43 ...


