background image

15

RESETTING THE UNIT

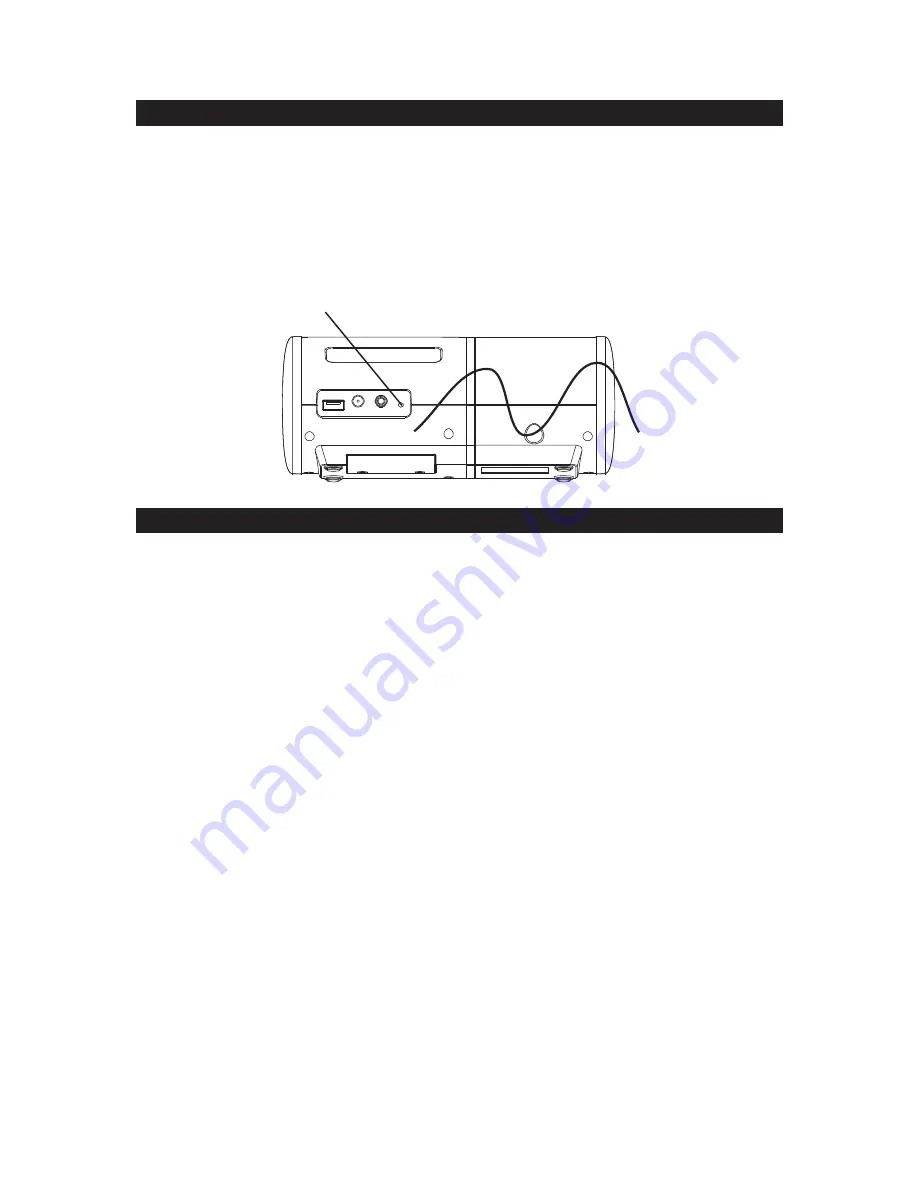
If the unit experiences a power surge or electric shock, it is possible that the internal 
micro-controller may lock up and the unit will not respond to any commands from the 
panel controls. In this event, use a straightened paper clip, toothpick or similar objects 
to press the RESET button located at rear of the unit (see the below figure). The reset 
operation clears the system memory and all of your previous settings will be erased.

CAUTION: DO NOT USE A SHARP OR POINTED OBJECT TO PRESS THE 

RESET BUTTON. IT MAY DAMAGE THE RESET SWITCH INSIDE THE UNIT.

CARE AND MAINTENANCE

1. Do not subject the unit to excessive force, shock, dust or extreme temperature.

2. Do not tamper the internal components of the unit.

3. Clean your unit with a dry cloth. Solvent or detergent should never be used.

4. Avoid leaving your unit in direct sunlight or in hot, humid or dusty places.

5. Keep your unit away from heating appliances and sources of electrical noise such 

as fluorescent lamps or motors.

CLEANING THE UNIT

To prevent fire or shock hazard, disconnect your unit from the AC power source 
when cleaning.

The finish on the unit may be cleaned with a dust cloth and cared for as other 

furniture, Use caution when cleaning and wiping the plastic parts.

If the cabinet becomes dusty wipe it with a soft dry dust cloth. Do not use any wax 

or polish sprays on the cabinet.

If the front panel becomes dirty or smudged with fingerprints it may be cleaned 

with a soft cloth slightly dampened with a mild soap and water solution. Never use 

abrasive cloths or polishes as these will damage the finish of your unit.

CAUTION:

Never allow any water or other liquids to get inside the unit while cleaning. 

RESET BUTTON

Summary of Contents for JiMS-75i

Page 1: ...KING DIGITAL CLOCK RADIO FOR iPod AND iPhone USER MANUAL JiMS 75i iPhone iPod Not Included PLEASE READ THIS USER MANUAL COMPLETELY BEFORE OPERATING THIS UNIT AND RETAIN THIS BOOKLET FOR FUTURE REFEREN...

Page 2: ...safe level Start your volume control at a low setting Slowly increase the sound until you can hear it comfortably and clearly and without distortion Once you have established a comfortable sound level...

Page 3: ...be cleaned only as recommended by the manufacturer 7 Do not block any ventilation openings Install in accordance with the manufacturer s instructions The appliance should be situated so that its locat...

Page 4: ...correctly replaced Replace only with the same or equivalent type 16 Do not attempt to dismantle open or repair this product yourself If a fault occurs seek advice from your local qualified service tec...

Page 5: ...nterference by one or more of the following measures Reorient or relocate the receiving antenna Increase the separation between the equipment and receiver Connect the equipment into an outlet on a cir...

Page 6: ...on 3 ALARM 1 button ALARM 2 button 4 iPhone iPod docking connector 5 SKIP FORWARD TUNING UP button SKIP BACK TUNING DOWN button 6 VOLUME UP VOLUME DOWN button 7 SLEEP button 8 SNOOZE DIMMER button 9 P...

Page 7: ...Back up Battery Installation 2 Install 2 AAA UM 4 batteries not included in the battery compartment following the polarity markings shown on it 3 Replace the battery compartment cover Note The unit w...

Page 8: ...e battery may explode or leak Do not try to recharge a battery that is not intended to be recharged the battery can overheat rupture and leak Follow the battery manufacturer s directions 1 Firmly and...

Page 9: ...TO SET THE TIME MANUALLY 1 In Standby mode press and hold the TIME SET MEMORY button of the unit 12 Hr will blink 2 Tap the or button to set the unit to the 24 hour mode or 12 hour mode 3 Press the T...

Page 10: ...alarm setting The alarm indicator or will appear to indicate it is enabled 9 To disable the alarm in Standby mode tap the or button twice for the alarm you want to disable relative alarm indicator wil...

Page 11: ...and then turn off automatically if the snooze button is not pressed To stop the beep alarm sound immediately tap the respective alarm button Wake to iPod iPhone The docked iPod iPhone will automatical...

Page 12: ...ging from the back of the cabinet This wire should be totally unwrapped and fully extended for the best reception NOTE Automatic tuning depends on the signal strength of the broadcasting station so we...

Page 13: ...USE button to pause or resume playback 4 Press the VOLUME button to adjust your desired volume level NOTE The volume level cannot be adjusted by the volume control on your iPod iPhone after being dock...

Page 14: ...and it cannot support any other voltage range 2 Make sure the device you want to charge has a battery charge rating of DC 5V only 3 The USB port of this unit is designed for smart phone or portable de...

Page 15: ...ten to them through the speakers of this unit 1 Use an audio cable not included with one 3 5 mm stereo plug on each end of the cable 2 Plug one end into the Aux in jack on the main unit and the other...

Page 16: ...dry cloth Solvent or detergent should never be used 4 Avoid leaving your unit in direct sunlight or in hot humid or dusty places 5 Keep your unit away from heating appliances and sources of electrica...

Page 17: ...the dock and check for obstruction on the connectors in the dock and on your iPod Then carefully reseat it in the dock iPod iPhone is locked up or frozen iPod iPhone battery has problem Please make s...

Page 18: ...iPhone mean that an electronic accessory has been designed to connect specifically to iPod and iPhone respectively and has been certified by the developer to meet Apple performance standards Apple is...

Page 19: ...re to provide reasonable care and necessary maintenance as outlined in the user manual 3 Warranty of all SPECTRA products applies to residential use only and is void when products are used in a nonres...

Reviews: