CD6111
1
INTRODUCTION
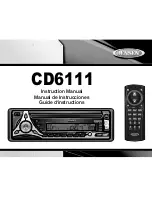
Congratulations on your purchase of the Jensen CD6111 Mobile AM/FM/CD Receiver. It’s a
good idea to read all of the instructions before beginning the installation. We recommend
having your Jensen CD6111 installed by a reputable installation shop.
Features
CD
•
CD-R/RW compatible
•
Last position memory
•
Random/repeat/intro
•
High-speed audible track search
•
1-Bit D/A converter
•
Anti-shock mechanism
AM/FM TUNER
•
24 station presets (12 FM, 6 AM)
•
JENSEN Plus Tuner II
•
Auto station store/preset scan
•
One-touch memory
•
Manual stereo/mono, local/distance, and up/down tuning
•
Auto seek tuning up/down and 5-second scan tuning
Chassis
•
Electronic detachable face with hard case
•
Import ISO/DIN mountable
•
20-pin power harness
General
•
High contrast Liquid Crystal Display (LCD)
•
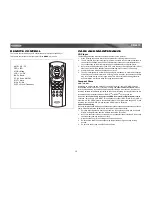
Infrared remote control (included)
•
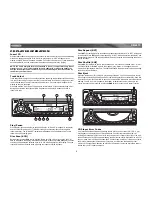
iEQ3 - instant EQ with 3 selectable EQ curves - Classic, Pop and Rock
•
1 pair each rear RCA auxiliary inputs and pre-amp outputs
•
Rotary encoder audio control with electronic volume, bass, treble, balance, fader
•
Multi-button power on
•
Keyless CD eject
•
4V Peak / 2V RMS RCA pre-amp output voltages
•
Rear RCA pre-amp outputs
•
200-ohm low impedance preamp output
•
Flex-Fader
•
True Blue LED preset illumination
•
Loudness
•
Clock
•
Mute
•
Theft deterrent LED
Optional Accessories
jPORT (Sold Separately)
•
Controls your iPod and CD Changer
•
jLink Apple approved iPod cable (included)
•
jLink Adapter (included)
iAux (Sold Separately)
•
Converts 3.5mm Input to RCA outputs for auxiliary devices
•
Under-dash adapter allows for quick installation of portable media devices
PREPARATION
Tools and Supplies
The following tools and supplies are needed to install the radio.
•
Torx type, flathead and Philips screwdrivers
•
Wire cutters and strippers
•
Tools to remove existing radio (screwdriver, socket wrench set or other tools)
•
Electrical tape
•
Crimping tool
•
Volt meter/test light
•
Crimp connections
•
18 gauge wire for power connections
•
16-18 gauge speaker wire
SPEAKER REQUIREMENTS: Only connect speakers rated in the load impedance of 4
ohms. Speakers with a load impedance less than 4 ohms could damage the unit.
Pre-installation
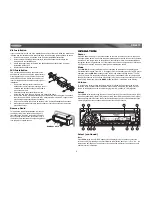
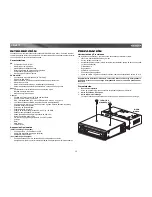
1.
Disconnect Battery
Before you begin, always disconnect the battery negative terminal.
2.
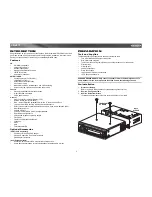
Remove Transport Screws
3.
Remove Radio from Sleeve
Lift latches on both sides of sleeve to remove half-sleeve from radio.
TRANSPORT
SCREWS
HALF
SLEEVE
Summary of Contents for CD6111
Page 2: ......
Page 4: ...ii CD6111...

