background image

17

RECORDING

Using the Manual mode

You can manually set the shutter speed and aperture to achieve a particular effect.

 NOTE: 

If the image would be underexposed or overexposed and correct exposure cannot be 

obtained, press the shutter release button halfway, the exposure value display on the LCD 
monitor turns red.

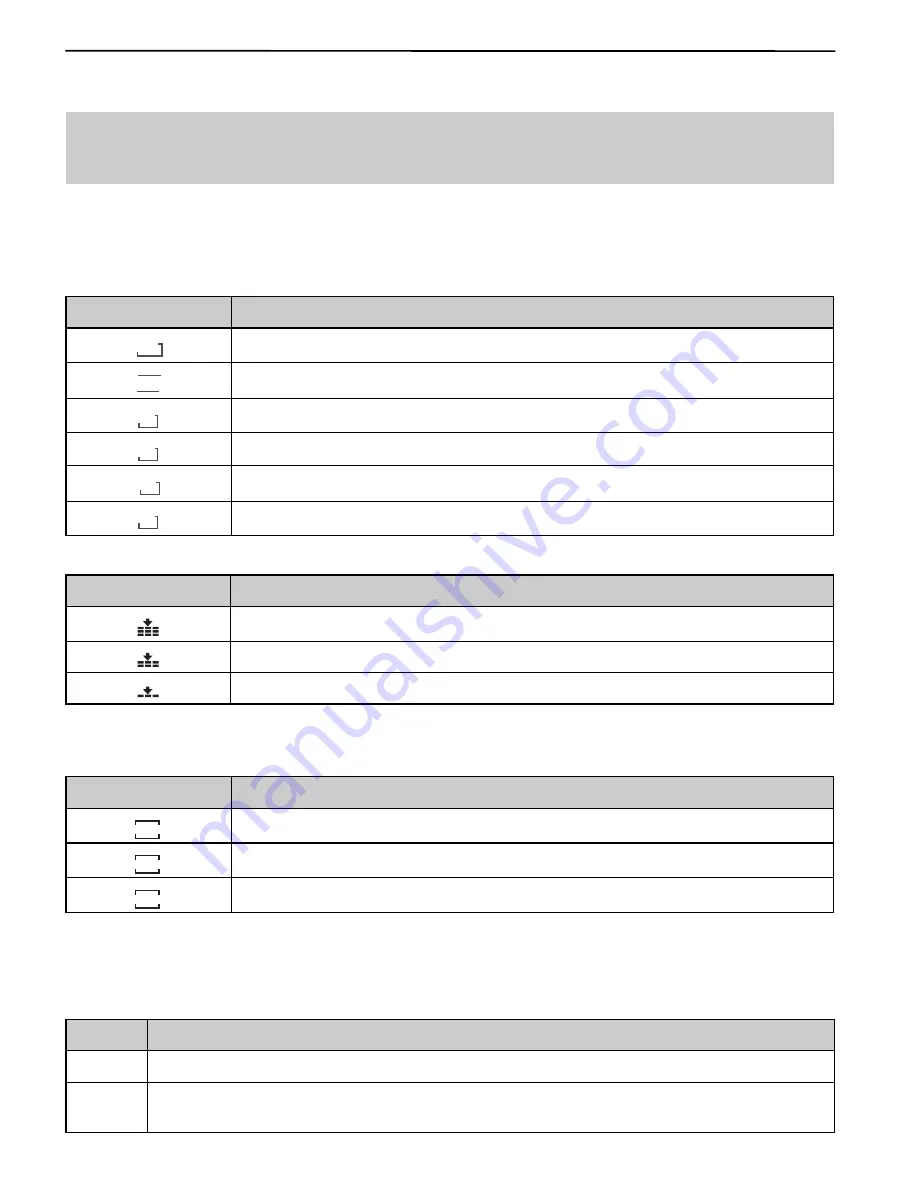
Setting the Resolution and Quality

You can select lower image resolution and quality to decrease the image size to capture more images.  
Choose a suitable setting according to the desired image quality and purpose.

Resolution

Option

Description

640
320
160

10M

3648x2736 - Suitable for printing large size paper.

3:2

640
320
160

3648x2432 - Printing in 3:2 ratio.

8M

640
320
160

3264x2448 - Suitable for printing normal size paper.

5M

640
320
160

2560x1920 - Suitable for printing on A4 paper.

640
320
160

3M

2048x1536 - Suitable for printing on A5 paper.

VGA

640
320
160

640x480 - Suitable for attaching to e-mails or using in websites.

Quality

Option

Description

640
320
160

Stores the image with an extremely low compression.

640
320
160

Stores the image with a low compression.

640
320
160

Stores the image with normal compression.

Setting the Movie Size

Movie clips can be shot with different size.

Option

Description

640

640

640
320
160

640x480 - Suitable for viewing on TV.

640

320

320

320
160

320x240 - Suitable for viewing on PC.

640
320

160

160

160

160x128 - Suitable for attaching to e-mails or using in websites.

Setting the Stabilizer

Use this function to create smooth, gliding shots when you’re walking or moving around, reducing the 
camera shakes. It only works when the memory card has been inserted and the camera is ensured to 
set in video mode.

Option

Description

Off

Turn off the frame stabilizer.

On

Helps you to prevent camera shake. When you turn on this function, the frame range 
becomes narrow and preview frames may not display smoothly.

Summary of Contents for 10.0z3 EasyShot

Page 1: ...User s Guide User s Guide www jenoptik camera com 10 0z3 EasyShot...

Page 2: ...11 Switching the Screen Display 11 RECORDING 12 RECORDING STILL IMAGES 12 Using the Zoom Function 12 Using the Flash 13 Using the Self timer Burst 13 Using the Macro mode 14 RECORDING MOVIE CLIPS 15...

Page 3: ...27 SETTING THE TV OUT 27 SETTING USB PORT 27 CHOOSING A STARTUP IMAGE 27 FORMATTING THE MEMORY 28 RESETTING TO DEFAULT SETTINGS 28 MAKING CONNECTIONS 28 CONNECTING THE CAMERA TO A TV 28 CONNECTING TH...

Page 4: ...Installation CD ROM Quick Start Guide Battery charger NOTE Items marked with are available as optional accessories Note that the shape of the charger plug depends on the area where you purchased the...

Page 5: ...wer button Speaker Flash Strap ring Self timer lamp Lens Microphone LCD monitor Zoom W button Thumbnail Zoom T button Digital zoom playback mode button MENU button Operation lamp 5 function button Mod...

Page 6: ...ars Note Do not use manganese batteries Manganese batteries cannot supply sufficient power to support camera operation Replace all batteries at the same time Never mix old and new batteries Remove bat...

Page 7: ...urers SETTING THE DATE AND TIME When the camera is first turned on the date and time setting will not be correct So before using be sure to set date and time 1 Press the MENU button using 640 320 160...

Page 8: ...USB connector During a slideshow Recording movies or voices Playing back a video or audio file SWITCHING BETWEEN RECORD AND PLAYBACK You can switch between the Record mode and the Playback mode in fo...

Page 9: ...ll image Resolution 640 320 160 10M 3 2 640 320 160 8M 640 320 160 5M 640 320 160 640 320 160 3M 2M 640 320 160 VGA 640 320 160 Quality 640 320 160 640 320 160 640 320 160 Metering 640 320 160 640 320...

Page 10: ...nu Menu Item Available Setting Aperture Value F2 8 F3 2 F3 6 F4 0 F4 5 F5 1 F5 7 F6 4 Shutter Speed 8 5 6 4 2 8 2 1 4 1 0 7 1 2 1 3 1 4 1 5 1 8 1 11 1 16 1 23 1 30 1 42 1 60 1 85 1 125 1 177 1 250 1 3...

Page 11: ...Sets the date time Language English Spanish German French Italian Portuguese Dutch Czech Hungarian Polish Turkish Russian Japanese Korean S Chinese T Chinese File No Series Reset TV Out NTSC PAL USB...

Page 12: ...19 Resolution 10Shots remaining In Playback 1 Mode icon 6 Storage media 2 Protect 7 Capture date time 3 Voice memo 8 DPOF Date stamp 4 File number Total 9 DPOF indicator 5 Battery 10 Resolution Switch...

Page 13: ...or to make sure that it is appropriate for the lighting conditions Using the Zoom Function Your camera has a combination of optical and digital zoom functions that allow you to zoom in on far away sub...

Page 14: ...n to take the actual image The digital camera will detect the subject brightness and use the flash only when required 640 320 160 Always on Flash fires every time you take a photo regardless of lighti...

Page 15: ...r function be sure to use a tripod or place the digital camera on a level stable surface Using the Macro mode Your camera is equipped with a macro function that allows you to focus on very close subje...

Page 16: ...es using this camera 1 Set the camera to the 640 320 160 mode The LCD monitor displays the available recording time 2 Press the shutter to start recording 3 Press the shutter again to end recording Th...

Page 17: ...apture fast moving subjects Fireworks Slow shutter speed to take fireworks exploding Using the Program Mode In this mode you can specify any settings other than the shutter speed and aperture The aper...

Page 18: ...itable for printing on A5 paper VGA 640 320 160 640x480 Suitable for attaching to e mails or using in websites Quality Option Description 640 320 160 Stores the image with an extremely low compression...

Page 19: ...nder fluorescent lighting without a flash 640 320 160 For more accurate adjustment or when the light source cannot be specified Note Point the camera at a white piece of paper or similar object under...

Page 20: ...noise may occur in the recording image 640 320 160 The edges of the image are sharp This is suitable for printing 640 320 160 The edges of the image are softened This is suitable for editing images o...

Page 21: ...y the image and the central portion of the image is displayed You can use the arrow button to view different parts of the magnified image Press the MENU button to return to the normal size 4 Press the...

Page 22: ...tton to start recording for 30 seconds or press the MENU button to cancel it 5 Press the SET button again to end recording Note The voice memo cannot be added to a movie clip or a protected image You...

Page 23: ...or on a memory card can be protected to prevent accidental deletion 1 Set the camera to the Playback mode 2 Press the MENU button then press 640 320 160 or 640 320 160 to select PROTECT 3 Press 640 3...

Page 24: ...n to confirm the change or press the MENU button to cancel The rotated image will be saved as a new file name Changing the Image Size The resolution of still images that had already been recorded can...

Page 25: ...l be saved as a new file SETTING THE DPOF The Digital Print Order Format DPOF setting allows you to select images on the memory card for printing and specify the number of print copies in advance usin...

Page 26: ...your digital camera 2 Set the camera to the Playback mode 3 Press the MENU button using 640 320 160 or 640 320 160 to select COPY TO CARD and press the SET button 4 Press 640 320 160 or 640 320 160 t...

Page 27: ...Set the camera to the Setup Menu 2 Press 640 320 160 or 640 320 160 to select LANGUAGE 640 320 160 then press 640 320 160 or the SET button to launch the submenu 3 Press 640 320 160 or 640 320 160 to...

Page 28: ...L depending on your region Option Description NTSC America Japan Taiwan Korea PAL All of Europe SETTING USB PORT You can set USB mode to connect the camera with a printer or computer Option Descriptio...

Page 29: ...tial default 1 Set the camera to the Setup Menu 2 Press 640 320 160 or 640 320 160 to select RESET ALL 640 320 160 then press 640 320 160 or the SET button to launch the submenu 3 Press 640 320 160 or...

Page 30: ...the computer s PC card slot Connecting the Camera to a Computer with a USB Cable 1 Install the USB software driver included with the bundled CD ROM 2 Connect the supplied USB cable to the computer s U...

Page 31: ...o print the pictures Printing Pictures by Using a USB Cable 1 Set the camera to the Playback mode 2 Press the MENU button using 640 320 160 or 640 320 160 to select SETUP menu and press the SET button...

Page 32: ...Media Player 9 Enables you to playback the video clips taken with the camera Arcsoft Photoimpression 5 Enables you to edit and enhance pictures Adobe Acrobat Reader Enables you to view the electronic...

Page 33: ...applications or software you may be running Step 4 Insert the supplied CD ROM into the CD ROM drive The installer will pop up automatically Note If the installer does not appear automatically double...

Page 34: ...install XviD Codec Step 1 Make sure that your camera is not connected to the computer Step 2 Make sure the computer is powered on and Windows 98SE ME 2000 XP is running Step 3 Close any other applica...

Page 35: ...TION FOR WINDOWS USERS Step 6 The installation screen will appear Click on Install XviD Codec Step 7 Select the language Click OK Step 8 Click Next Step 9 Select I accept the agreement then click Next...

Page 36: ...35 SOFTWARE INSTALLATION FOR WINDOWS USERS Step 11 Click Next Step 12 Click Next Step 13 Click Next Step 14 Click Install...

Page 37: ...ME 2000 XP is running Step 3 Close any other applications or software you may be running Step 4 Insert the supplied CD ROM into the CD ROM drive The installer will pop up automatically Note If the ins...

Page 38: ...n shows installing progress bars Step 10 When the installing is complete the screen shows welcome page Click Next Step 11 Choose the privacy options according to your preference then click Next Step 1...

Page 39: ...USERS OPTIONAL Step 1 Make sure your camera is powered off and not connected to the computer Step 2 Make sure the computer is powered on and Windows is running Step 3 Close any other applications or s...

Page 40: ...39 SOFTWARE INSTALLATION FOR WINDOWS USERS Step 6 The installation screen will appear Click on Install ArcSoft PhotoImpression 5 Step 7 Click Next Step 8 Click Yes Step 9 Click Next...

Page 41: ...Step 2 Make sure the computer is powered on and Windows is running Step 3 Close any other applications or software you may be running Step 4 Insert the supplied CD ROM into your computer s CD ROM driv...

Page 42: ...Note for Win 2000 users As Adobe Reader 6 need the support of Win 2000 SP2 you may see below information In this case please click OK to close the message screen and then click Finish to terminate th...

Page 43: ...The files will be saved into C Program Files Adobe Acrobat 6 0 automatically You may change the default folder by clicking Change Destination Folder and selecting a different folder in your computer...

Page 44: ...le clicking the icon representing the software on the desktop The screen as shown in figure 1 1 appears Fig 1 1 3 Click on Removable Media The screen as shown in fig 1 2 appears Fig 1 2 Fig 1 3 Fig 1...

Page 45: ...ip file under Mac OS9 folder to start installing the software 4 Follow the on screen instructions to complete the installation then restart your computer to ensure the successful installation 5 Copy f...

Page 46: ...the flash to any mode except off Image is blurry or out of focus The camera was moving when the image was captured Hold the camera steady when shooting picture The subject was beyond the range within...

Page 47: ...Night Scene Text Backlight Kids Beach Snow Close up Sports Fireworks Sensitivity Auto ISO 50 ISO 100 ISO 200 White Balance Auto Daylight Cloudy Tungsten Fluorescent H Fluorescent L Custom Exposure Con...

Page 48: ...System Camera Serial Number Computer Maker and Model Exact Error Message Received For ArcSoft Technical Support on Photo Editing Software please contact In the USA and Canada China ArcSoft Inc ArcSoft...

Page 49: ...e or animals When taking photographs never point the lens of the camera directly into very strong light Please do not use this product in close proximity to flammable or explosive gases as this could...

Page 50: ...ange the attributes read only etc of the files pictures JPEG or video clips AVI on the card Doing so may prevent the camera from working properly when deleting etc Do not change the file names or the...

Page 51: ...r relocate the receiving antenna Increase the separation between the equipment and receiver Connect the equipment into an outlet on a circuit different from that to which the receiver is connected Con...

Page 52: ...Visit Concord on the Internet www jenoptik camera com JD 10 0z3 EasyShot User s Guide Copyright 2006 Concord Camera Corp Version 1 0 586220 00 R1...

Reviews: