background image

6

Gas tube opening:

 Gas must flow freely throughout the gas  

tube opening for the burner to light properly. Keep this area free 

of soil and do not allow spills, food, cleaning agents, or any other 

material to enter the gas tube opening. Keep spillovers out of the 

gas tube by always using a burner cap.

Burner ports:

 Check burner flames occasionally for proper size and 

shape as shown in the previous illustration. A good flame is blue in 

color, not yellow. Keep this area free of soil and do not allow spills, 

food, cleaning agents, or any other material to enter the burner ports.

To Clean:

IMPORTANT:

 Before cleaning, make sure all controls are OFF and 

the oven and cooktop are cool. Do not use oven cleaners, bleach, 

or rust removers.

1. 

Remove the burner cap from the burner base and clean 

according to the “General Cleaning” section.

2. 

Clean the gas tube opening with a damp cloth.

3. 

Clean clogged burner ports with a straight pin as shown. Do not 

enlarge or distort the port. Do not use a wooden toothpick. If the 

burner needs to be adjusted, contact a trained repair specialist.

4. 

Replace the burner cap, making sure the alignment pins  

are properly aligned with the burner cap. Each round burner 

cap is marked with letters indicating the burner size. Place 

the burner caps on the appropriate burner bases.

IMPORTANT: 

The bottom of the small and medium caps are 

different. Do not put the wrong size burner cap on the burner 

base. 

5. 

Turn on the burner. If the burner does not light, verify the 

burner cap placement and check cap and burner base 

alignment. If the burner still does not light, do not service the 

sealed burner yourself. Contact a trained repair specialist.

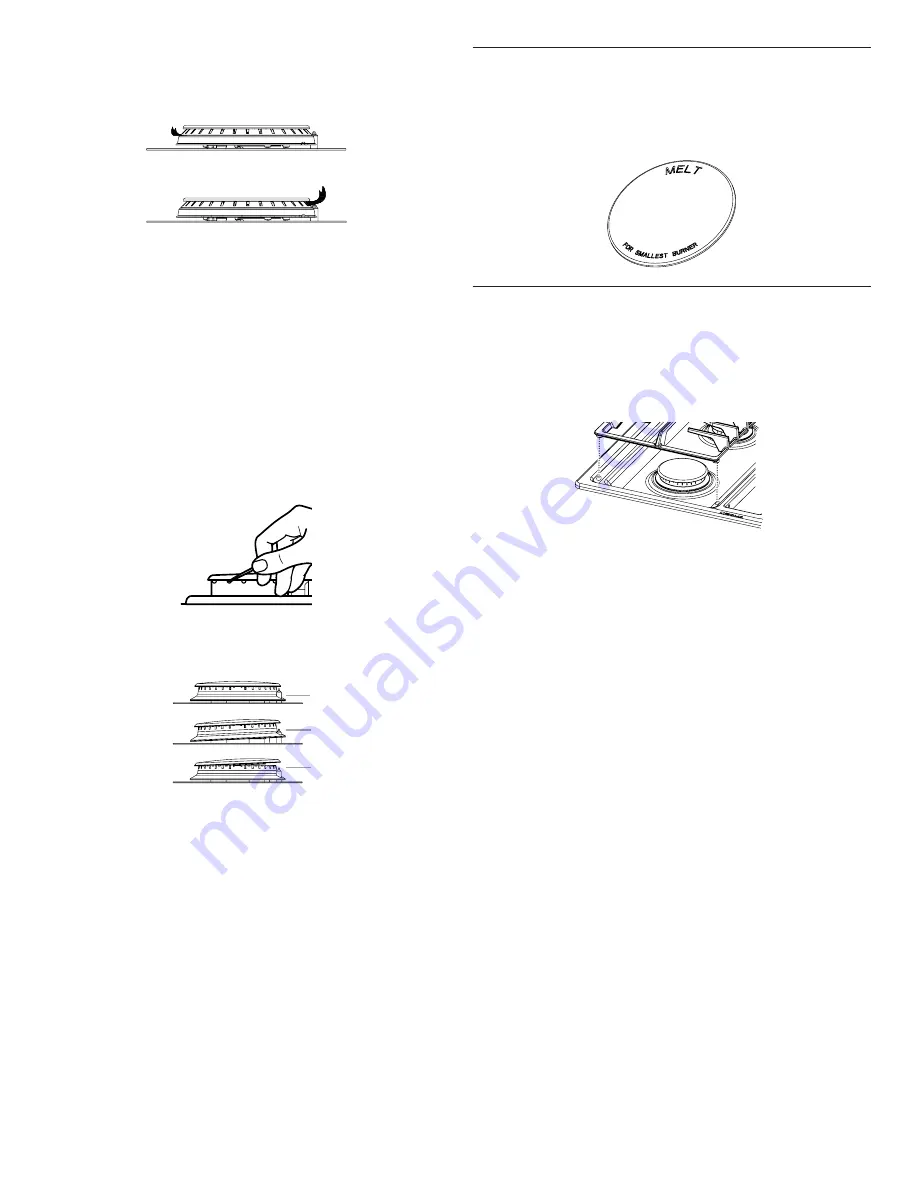
Melt Cap

For melting chocolate or butter or an even more delicate simmer, the 

melt cap can be used in place of the standard burner cap. The melt 

cap should only be used on the small burner (right rear). Remove the 

small burner cap and replace it with the larger melt cap for delicate 

simmering. For less delicate simmering, use the small cap.

Surface Grates

The grates must be properly positioned before cooking. In the proper 

position the grates should be flush and level. Improper installation of 

the grates may result in chipping or scratching of the cooktop.
To ensure proper positioning, align bumpers on grate bottom with 

the indentations in the cooktop. See cooktop illustrations in the 

“Parts and Features” section for proper grate positioning.

Although the burner grates are durable, they will gradually lose 

their shine and/or discolor due to the high temperatures of the  

gas flame.

A

B

A.  Low flame
B.  High flame

A

B

B

A. Correct
B. Incorrect

Summary of Contents for JGD3536GB

Page 1: ...NNAIR 1 800 536 6247 or visit our website at www jennair com In Canada call 1 800 JENNAIR 1 800 536 6247 or visit our website at www jennair ca Guide d utilisation et d entretien Pour des questions pr...

Page 2: ...rt symbol and either the word DANGER or WARNING These words mean follow instructions instructions DANGER WARNING COOKTOP SAFETY 2 PARTS AND FEATURES 4 COOKTOP USE 5 Cooktop Controls 5 Sealed Surface B...

Page 3: ...able vapors and liquids Storage on the cooktop Flammable materials should not be stored on or near surface units Top burner flame size should be adjusted so it does not extend beyond the edge of the c...

Page 4: ...aft vent grille C Right rear 15 000 Btu h burner D Control panel E Right front 10 000 Btu h burner F Right side grate G Left front 17 000 Btu h burner H Left side grate A B C D E F G A Surface burner...

Page 5: ...ll automatically spark to reignite the burner all igniters will spark when any flame is extinguished however only the selected burner will reignite If intermittent sparking occurs increase flame rotat...

Page 6: ...with letters indicating the burner size Place the burner caps on the appropriate burner bases IMPORTANT The bottom of the small and medium caps are different Do not put the wrong size burner cap on t...

Page 7: ...base they can leave permanent marks on the cooktop or grates Cookware material is a factor in how quickly and evenly heat is transferred which affects cooking results A nonstick finish has the same ch...

Page 8: ...ber 31617 not included See the Assistance or Service section to order SURFACE BURNERS AND ELECTRONIC IGNITER Surface Burners See the Sealed Surface Burners section Electronic Igniter Cleaning Method C...

Page 9: ...r caps and heads are positioned improperly See the Sealed Surface Burners section Propane gas is being used The cooktop may have been converted improperly Contact a service technician Surface burner m...

Page 10: ...d vision etc For further assistance If you need further assistance you can write to Jennair with any questions or concerns at Jennair Appliances Customer eXperience Center 553 Benson Road Benton Harbo...

Page 11: ...ux Appeler imm diatement le fournisseur de gaz partir du t l phone d un voisin Suivre ses instructions d faut de joindre votre fournisseur de gaz appeler les pompiers L installation et l entretien doi...

Page 12: ...ualifi La table de cuisson est munie d une fiche de liaison la terre trois broches pour votre protection contre les risques de choc lectrique et doit tre branch e directement dans une prise de courant...

Page 13: ...de commande avant droit F Bouton de commande du ventilateur d vacuation 3 vitesses G A C B D E F H A Br leur arri re gauche de 5 000 BTU h B Grille de ventilation extraction par le bas C Br leur arri...

Page 14: ...la grille Allumage des br leurs IMPORTANT Tous les br leurs mettent un cliquetis et g n rent des tincelles lorsqu un bouton est enfonc Un br leur s allume uniquement si l on enfonce le bouton puis qu...

Page 15: ...cleur situ sur la cuisini re et d aligner galement l lectrode d allumage avec l encoche de la base du br leur Ouverture du tube d arriv e de gaz Pour que la flamme s allume convenablement il faut que...

Page 16: ...nt de leur lustre et ou se d coloreront en raison des fortes temp ratures produites par les flammes Syst me de ventilation avec aspiration par le bas JX3 Le syst me de ventilation incorpor aspiration...

Page 17: ...de cuisson ou les grilles Le mat riau d un ustensile de cuisson affecte la rapidit et l uniformit de la transmission de la chaleur et affecte les r sultats de cuisson Un fini antiadh sif a les m mes...

Page 18: ...ce ou service pour placer une commande Nettoyant tout usage Rincer l eau propre et s cher avec un chiffon doux sans charpie Vinaigre pour les taches d eau dure COMMANDES DE LA TABLE DE CUISSON Afin d...

Page 19: ...face la table de cuisson le sommet du filtre doit reposer contre le c t droit de l ouverture d a ration Le fond du filtre doit reposer contre le c t gauche de la chambre d vacuation au fond de celle c...

Page 20: ...tes Les orifices du br leur sont obstru s Voir la section Br leurs de surface scell s Les chapeaux et t tes de br leurs sont mal positionn s Voir la section Br leurs de surface scell s Du gaz propane...

Page 21: ...compagnie de service d sign e par la gamme des appareils lectrom nagers Jennair dans votre r gion vous pouvez galement consulter les Pages jaunes Pour plus d assistance Si vous avez besoin de plus d...

Page 22: ...22 REMARQUES...

Page 23: ...23 REMARQUES...

Page 24: ...W11508907A TM 2021 All rights reserved Used under license in Canada Tous droits r serv s Utilis sous licence au Canada 07 21 REMARQUES...

Reviews: