


3
4 SD Using SD Card
☆
The device supports up to 32GB storage card.
Insert the card into the card slot, and push it in with your finger until a “click” is heard. Now the card is
ready for use.
Removing SD card
Close all programs or files on the card first. Click Settings
→
Storage
→
Remove SD card
→
OK.
Then press the card with your finger, and simply remove it when it is ejected.
☆
Do not insert and remove the card repeatedly in a short time, this may cause damage to the card.
☆
We suggest you use the card of famous brand to ensure compatibility.
5 Getting Started
Charging the device
☆
Charge the device with USB cable is not recommended.
☆
You may operate the device while charging it, but this may prolong the charging time.
Connect one end of the AC adaptor to the mains supply and the other end to the power jack on the
device to charge it (it may take about 5 hours to fully charge the device).
Starting the device
Press and hold the power switch for 3 seconds and wait for system startup.
Wi-Fi setting
We suggest you configure your Wi-Fi network before using, as many functions require for it to work
normally.
1. Click
Settings
→
Wireless and Network
2. Switch
the
Wi-Fi
on.
The device will search and list all available
Wi-Fi
network. If an icon is displayed, you need to
enter a password to connect to such Wi-Fi network.
3. Click the desired
Wi-Fi
network
→
Enter the password (if any)
→
Click
Connect.
4. Click or press
“
BACK
”
key to return to desktop.
☆
The
Wi-Fi
set as hidden will not be searched automatically. In this case you need to click
Add Wi-Fi Network
and enter necessary information to add your
Wi-Fi
.
4
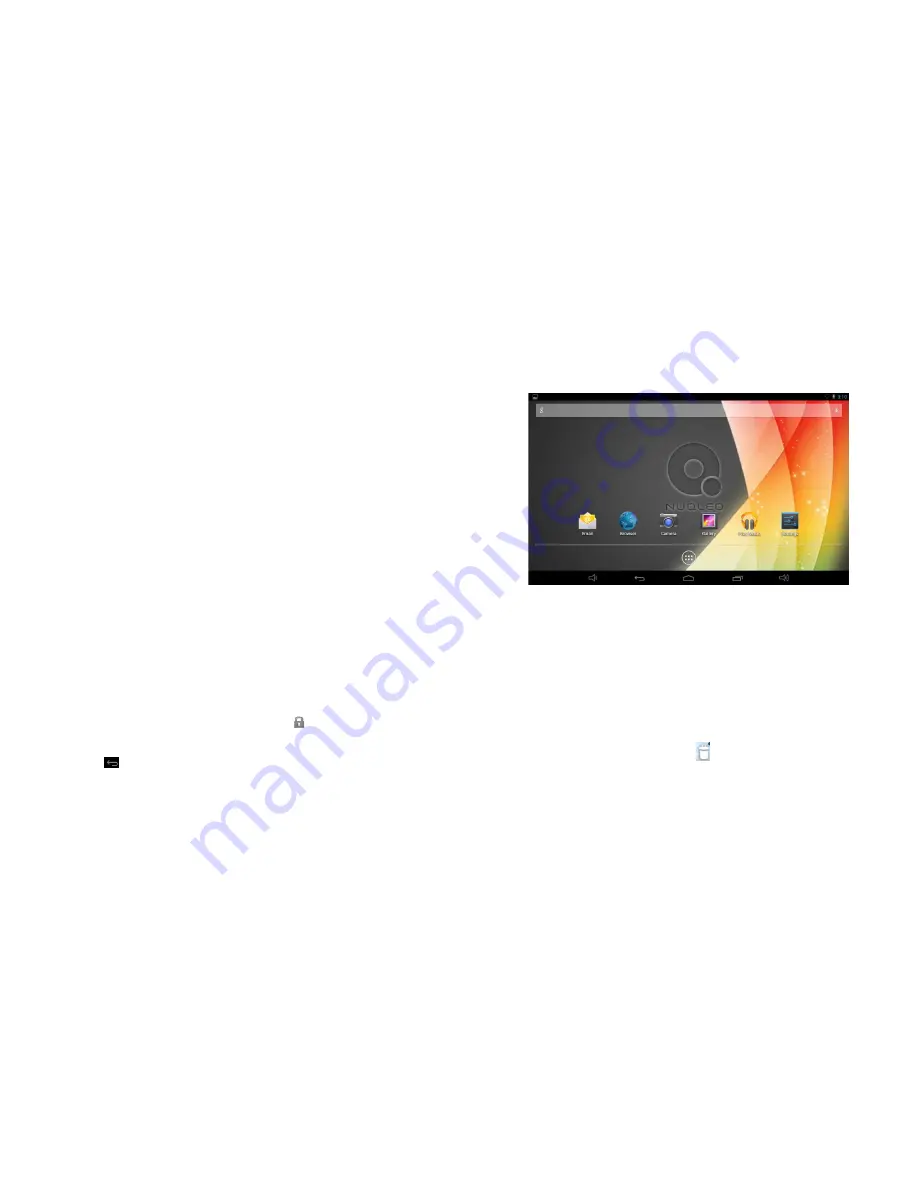
6. Desktop
○
1
○
2
○
3
○
4
○
5
○
6
○
7
○
8
○
1 Search
○
2
Battery status
○
3
Current time
-
○
4 Volume –
○
5 Return
○
6 Return to desktop directly
○
7 Task
○
8
☆
Click any icon to run it.
☆
Press and hold to drag the procedure or shortcut icon to other places on the screen.
☆
Press and hold to drag the procedure or shortcut icon to
for deleting it from desktop.
7. Lock Screen
You can set auto lock screen or lock screen manually by pressing the power switch. The lock screen
interface is as follow. Slide at the right to unlock the screen.


