background image


TABLE OF CONTENTS


/


TABLE DES MATIERES 

ENGLISH 

P3. WARNING / IMPORTANT SAFETY PRECAUTIONS 

P4. MAINTENANCE 

P5. NOTES ABOUT LCD PANELS 

P6. QUICK START GUIDE 

P7. CONTENTS OF THE PACKAGE / CONNECTORS  

P8. CONTROL BUTTONS 

P9. OSD MENU 

P12. REMOTE 

P13. FAQ & TROUBLE SHOOTING  


FRENCH 

P14. ATTENTION / CONSIGNES DE SECURITE 

P15. MAINTENANCE 

P16. INFORMATION A PROPOS DES ECRANS A CRISTAUX LIQUIDES

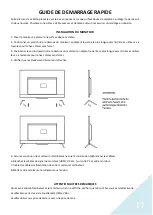
P17. GUIDE DE DEMARRAGE RAPIDE 

P18. CONTENU DE l’EMBALLAGE / CONNECTEURS

P19. BOUTONS DE REGLAGES 

P20. MENUS DE RE

G

LAGE (OSD) 

P23. TELECOM

M

ANDE 

P24. DEPANNAGE / FAQ 

INTERNATIONAL 

P25. 

TECHNICAL SPECIFICATION

P2

6

. COMPLIANT TIMMING

 / DIMENSIONS 

ENG For quality improvement we reserve the right to change this manual content or product specifications without 
notice. JAPANNEXT Corp. owns trademarks of this manual. 
FR      Nous nous réservons le droit de modifier le contenu de ce manuel, ou les caractéristiques de nos produits sans 
préavis à des fins d'amélioration de la qualité. JAPANNEXT Corp. détient les droits d'auteur de ce manuel. 

2

Summary of Contents for JN-IPS320UHD

Page 1: ...place for future reference FR Manuel d utilisation Ce manuel de l utilisateur contient les informations n cessaires l utilisation de votre moniteur prenez le temps de le lire avant d utiliser votre mo...

Page 2: ...E RAPIDE P18 CONTENU DE l EMBALLAGE CONNECTEURS P19 BOUTONS DE REGLAGES P20 MENUS DE REGLAGE OSD P23 TELECOMMANDE P24 DEPANNAGE FAQ INTERNATIONAL P25 TECHNICAL SPECIFICATION P26 COMPLIANT TIMMING DIME...

Page 3: ...n these specified may result in exposure to electrical and mechanicals hazards electrical shocks and may damage your monitor and or put yourself in danger If any sign of spark smoke noise or vibration...

Page 4: ...monitor is not designed for a 24 7 use Always use power cord provided with the monitor If the power cord is missing or damage please contact JAPANNEXT customer service or a technician Unplug the monit...

Page 5: ...ecommend positioning the screen below eye level at a distance of about 40 to 60 cm With prolonged use it is recommended to take a 10 minute break per hour of use Customer service assistance maintenanc...

Page 6: ...it Screw without force 3 Position the second foot against the underside of the monitor by placing the longest part backwards and use the 2 remaining screws to fix it Screw without force 4 Make sure t...

Page 7: ...V box etc 3 HDMI 2 0 Connectors 60Hz Can be use with both monitor and a large variety of AV products such as game console or HDD recorders net TV box etc 4 DP Display port 1 2 Connector When removing...

Page 8: ...RETURN In the OSD menu you can return to the previous menu or exit the menu UP Navigate the menu upwards Shortcut key automatic VGA adjustment DOWN Navigate the menu down Shortcut key Adjust the brig...

Page 9: ...ed contrast ratio OFF Normal contrast ratio Off HDMI Computer If connecting to a computer Video If connecting to DVD or box TV COLOR Gamma 1 8 Adjust the ganma 2 2 2 2 4 2 6 Picture Mode Standard Sele...

Page 10: ...w resolution images look better on a high resolution screen High Middle Low Dynamic Luminous Control On Dynamic Luminous Control ON or OFF Off FreeSync On Turn on or off FreeSync Off PICTURE DISPLAY A...

Page 11: ...p Right Adjust the PIP Position Top Left Bottom Right Bottom Left Swap PIP Window Swap OTHER SETTING Language English Change OSD menu language Chinese Korean Russian Espa ol Japanese French OSD H Posi...

Page 12: ...REMOTE 12...

Page 13: ...select Display then AUTO ADJUST VGA mode only Make sure the computer signal timing is within monitor s specification Image is blurring distort fuzzing etc In computer display settings set resolution t...

Page 14: ...rt seulement par un technicien qualifi L ouverture du moniteur peut vous exposer des risques d incendie des chocs lectriques une mise en danger Il contient des l ments haute tension Ne jamais introdui...

Page 15: ...XT Maintenance Pour prot ger votre moniteur contre de possibles dommages n appuyez pas sur l cran LED Lorsque vous le d placez saisissez le par le cadre ne mettez pas vos mains ni vos doigts sur l cra...

Page 16: ...de positionner l cran au dessous du niveau des yeux une distance d environ 40 60 cm En cas d utilisation prolong e il est recommand de prendre une pause de 10 minutes par heure d utilisation Service S...

Page 17: ...du moniteur en pla ant la partie la plus longue vers l arri re et utiliser les 2 vis restantes pour le fixer Visser sans forcer 4 V rifier que les pieds soient fermement attach s 5 Assurez vous que n...

Page 18: ...brancher non seulement des ordinateurs mais aussi une grande vari t de mat riel audio vid o comme des consoles de jeux vid o etc 4 Port DP Display port Pour enlever le c ble appuyez sur la fl che de m...

Page 19: ...OSD permet de revenir au menu pr c dent ou sortir du menu MONTER Naviguer dans le menu vers le haut Touche raccourci ajustement VGA automatique DECENDRE Naviguer dans le menu vers le bas Touche racco...

Page 20: ...e normal HDMI Mode Computer si branch sur un ordinateur Video si branch sur DVD ou box TV COULEUR Gamma 1 8 Ajustez le ganma 2 2 2 2 4 2 6 Format de l image Standard S lectionnez le format de l image...

Page 21: ...n lorsqu elle est affich e sur un cran haute r solution High Middle Low Dynamic Luminous Control On Dynamic Luminous Control on off Off FreeSync On FreeSync on off Off AFFICHAGE Ratio d affichage Ecra...

Page 22: ...P Haut Droite Ajustez la position de la fen tre PIP Haut Gauche Bas droit Bas gauche Swap Interposer les fen tres PIP AUTRES language Language English Changer la langue du menu OSD Chinese Korean Russ...

Page 23: ...TELECOMMANDE 23...

Page 24: ...eur et son adaptateur DC Si les sp cifications techniques semblent bonnes d branchez le moniteur imm diatement et contactez le SAV JAPANNEXT L image est floue scintille vibre ou est imparfaite Appuyer...

Page 25: ...HD 30HZ Input 5 DP 1 UHD 60HZ Output Terminal Earphone YES Speaker Typical 10W 2 Power Consumption Typical Max 60W Typ 49W Standby 0 5W Off 0 5W AC Power Range AC 100 240V 50 60Hz To DC 12V 6 5A Power...

Page 26: ...COMPLIANT TIMING DIMENSIONS e mail europe cs japannext net Europe 24 Rue de la Plaine 75020 Paris Japannext SA Japan 1 3 1 JAPANNEXT 26...

Reviews: