45
v
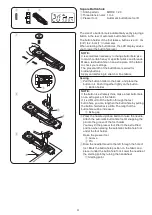
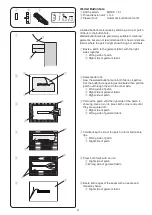
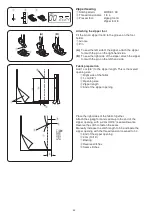
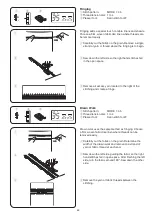
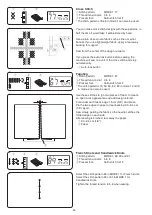
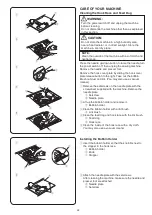
Open the fabric after sewing is finished.
NOTE:
If the needle pierces too far left, the stitch will show
through on the right side of the fabric.
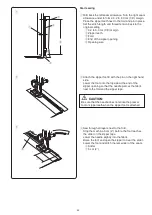
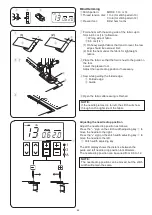
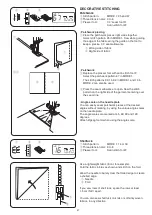
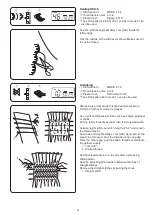
Blind Hemming
q
Stitch pattern:
MODE 1: 13 or 14
w
Thread tension dial: 1 to 4 (for stitch pattern 13)
3 to 6 (for stitch pattern 14)
e
Presser foot:
Blind hem foot G
z
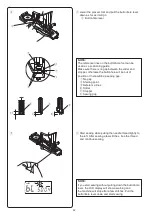
Fold a hem with the wrong side of the fabric up to
form a 0.5 cm (1/4˝) allowance.
q
Wrong side of fabric
w
0.5 cm (1/4˝)
(1) On heavyweight fabrics that tend to ravel, the raw
edge should be overcast first.
(2) Fold the hem under the fabric for lightweight
fabrics.
x
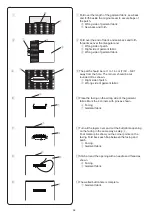
Place the fabric so that the fold is next to the guide on
the foot.
Lower the presser foot.
Adjust the needle drop position if necessary.
c
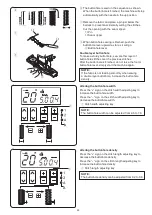
Sew while guiding the folded edge.
e
Folded edge
r
Guide
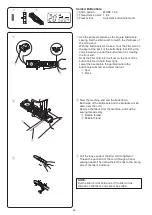
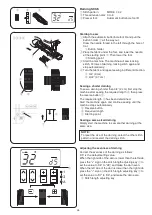
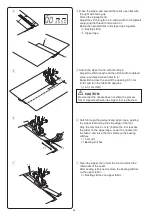
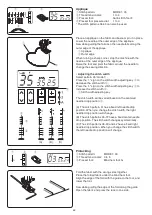
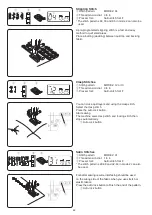
Adjusting the needle drop position
Adjust the needle drop position as follows:
Press the “–” sign on the stitch width adjusting key
q
to
move the needle to the right.
Press the “+” sign on the stitch width adjusting key
q
to
move the needle to the left.
q
Stitch width adjusting key
The LCD display shows the distance between the
guide and left needle drop position in millimeters.
The needle drop position can be varied from 0.0 to 1.2.
NOTE:
The needle drop position can be moved, but the stitch
width will remain the same.
z
x c
v
q
w
e
r
q
w
(1)
(2)
4
w
e
q
q
Summary of Contents for DM7200
Page 1: ...Instruction Book ...
Page 2: ......
Page 64: ...62 Stitch Chart MODE 1 MODE 2 ...
Page 65: ...63 Stitch Chart MODE A MODE Á ...
Page 66: ......
Page 67: ......
Page 68: ...812 800 021 EN ...

