www.janitza.de
JPC 100-WEB
15
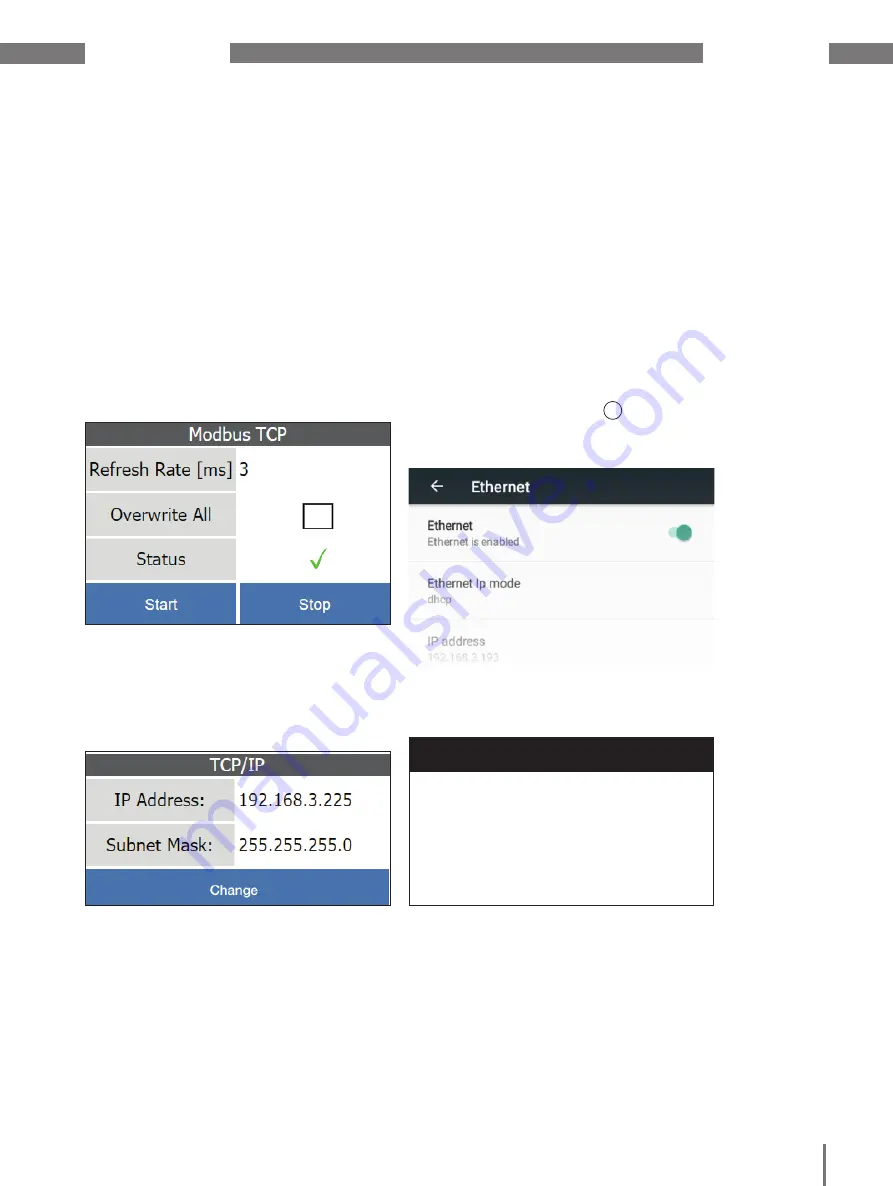
7. 1. 2 Modbus TCP
The
Modbus TCP
area displays the sampling
rate (
refresh rate
) at which the JPC 100-WEB
queries the measured values of the connect-
ed bus systems.
The number of meters connected infl uences
the
Refresh Rate
.
Use the
Overwrite All
checkbox to enable the
overwriting of the device confi gurations of all
connected slave devices. The confi guration is
only transferred if this function and the Mod-
bus communication are activated.
ATTENTION
Material damage due to incorrect net-
work settings.
Incorrect network settings can cause faults
in the IT network.
Consult your network administrator for
the correct network settings for your
device.
7. 1. 3 TCP/IP
The TCP/IP area shows the current IP ad-
dress and subnet mask of the JPC 100-WEB.
DHCP is active ex works, which means the
device is assigned an IP address dynamically
when it is connected to a network.
Changing IP-settings
1. Open the hardware settings by pressing
the
Change
button.
2. Open the Ethernet settings in the
Wire-
less & Networks
area.
You can activate/deactivate the interface
using the
Ethernet
toggle button.
Pressing the
Ethernet Ip mode
entry switches
the setting between DHCP and static (fi xed
IP address).
Use the
Back
button (Fig. 11
3
) to return to
the system settings.
Fig. 13: Modbus TCP settings
Fig. 15: TCP/IP settings
Fig. 14: Ethernet settings


