background image

Before You Begin (1)

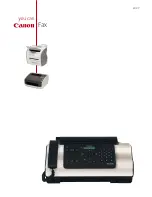
Power Cord and Foot Controller

Note

Please use common household
current.

Plug in cord.

Plug foot controller into machine.

Power Switch

Flip power switch to “I” position to
turn on.

To switch power off, flip switch to
“O” position.

Hand Wheel

Position needle using hand
wheel.

Always turn hand wheel towards
you.

Stitch Length Regulator

Adjust desired stitch length using
stitch length regulator dial.

Reverse Stitch Lever

Sewing in reverse is possible
when the reverse stitch lever is in
the lowered position.

Make sure to push the lever all
the way down when reverse sew-
ing is desired.

When the feed adjustment dial is
set between 5-7mm, the reverse
stitch length is always 5 mm.

Power Switch

I

O

Hand Wheel

1

2

3

4

5

6

7

Stitch Length Regulator

Reference Mark

Lower number 
= shorter stitches
Higher number 
= longer stitches

Stitch Length

Reverse Stitch 
Lever

Thread Tension Dial

When tighter thread tension is
desired, turn the tension dial to
the right. Upper and bobbin
threads will meet on right side of
the fabric.

When looser thread tension is de-
sired, turn tension dial to the left.
Upper and lower threads will then
meet on wrong side of fabric.

Upper Thread Tension

Loosen

Tighten

Tension Block

3

Power Cord

Foot Controller

Summary of Contents for Baby Lock A-LINE Series

Page 1: ......

Page 2: ......

Page 3: ...administered To disconnect turn the main switch to the symbol O position which represents off then remove plug from outlet Do not unplug by pulling on cord To unplug grasp the plug not the cord Keep f...

Page 4: ...supplied with this equipment you should contact your authorized retailer to obtain the correct lead FOR USERS IN AC INPUT 220 240V COUNTRIES AND MEXICO This appliance is not intended for use by perso...

Page 5: ...the wall outlet Do not use extension cords For a longer service life When storing your sewing machine avoid direct sunlight and high humidity locations Do not store the sewing machine beside a space h...

Page 6: ...6 Changing the Needle 6 Changing the Feed Pin 6 Changing Light Bulbs 6 Threading 7 Bobbin Winding 7 Bobbin Insertion 9 Upper Threading 10 Using the Needle Threader 10 Using the Spool Net 11 Stitch Sam...

Page 7: ...XC1407 051 9 General Purpose Foot XA1425 001 10 Bobbin 5 100376 051 11 Spool Cap XA2111 050 12 Flex Reaction Foot on machine 136021 001 13 Rolled Hem Foot X57138 101 14 Zipper Foot 112797 001 15 Invis...

Page 8: ...Page 5 Reverse Stitch Lever Page 3 Feed Dog Adjustment Knob Page 5 Knee Lift Page 4 Bobbin Winder Page 7 Hand Wheel Page 3 Power Switch Page 3 Foot Controller Jack Page 3 Power Socket Page 3 Spool Co...

Page 9: ...Make sure to push the lever all the way down when reverse sew ing is desired When the feed adjustment dial is set between 5 7mm the reverse stitch length is always 5 mm Power Switch I O Hand Wheel 1...

Reviews: