3
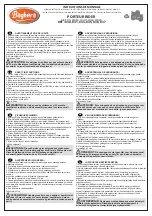
DE - Einlegen der Batterien
1.
EIN/AUS Schalter
2. Batteriefachdeckel
3. Batteriebox:
Legen Sie 4 x AA Batterien (nicht enthalten) in die
Batteriebox ein, achten Sie auf die
richtige Polung. Schieben Sie anschließend die Batteriebox
in das Batteriefach. Schließen Sie die Abdeckung und
schrauben Sie mit der Schraube fest.
4. Batteriefach
5. LED
6. Reset: Drücken Sie die Resettaste und der Roboter ruht
nachdem er sich verabschiedet. Das Modell befindet sich
im Standby-Modus.
Durch eine weitere Betätigung der Taste sind alle
Funktionen wieder aktiv.
GB - Inserting the batteries
1. On/Off Switch
2. Battery compartment lid
3. Battery box: Please insert the 4 x AA batteries (not inclu-
ded) in the battery box and pay attention to the correct
polarity. Now you push the battery box in the battery
compartment. Close the cover and tighten it with the screw.
4. Battery compartment
5. LED
6. Reset: Press the reset button and the robot will rest after he
says farewell. The model is now on standby mode. By
pressing the button again all functions will be enabled
again.
FR - Insertion des piles
1. Interrupteur Marche/Arrêt
2. Couvercle de batterie
3. Boitier de la batterie :
Insérez 4 x piles AA (non inclus) dans le comparti-
ment de batterie, faites attention à la polarité. Puis
glissez ensuite le boitier de la batterie dans le compar-
timent de la batterie. Fermez le couvercle et serrez-le
avec la vis.
4. Compartiment des piles
5. LED
6. Réinitialisation : appuyez sur le bouton de réinitialisa-
tion, le robot se reposera et vous dira au revoir par
la suite. Le modèle est maintenant en mode veille.
En appuyant sur le bouton, toutes les fonctions seront
à nouveau actives.
IT - Inserimento delle batterie
1. Interruttore On/Off
2. Coperchio della batteria
3. Box della batteria:
Inserire 4 x batterie AA (non incluse) nella box batterie,
prestare attenzione alla corretta polarità. In seguito,
far scorrere la box di batteria nel vano batteria.
Chiudere il coperchio e serrare la vite.
4. Vano batterie
5. LED
6. Reset: Premere il pulsante di reset e il robot riposa
dopo che saluta. Il modello è in modalità standby.
Premendo ulteriormente il pulsante tutte le funzioni
sono di nuovo attivi.
ES - Insertar las baterías
1. Interruptores On/Off
2. Tapa de la batería
3. Caja batería:
Inserir 4 x AA baterías (no incluido) en la caja de batería,
prestar atención a la polaridad correcta. A continuación,
deslice la caja de batería en el compartimiento de
la batería. Cierre la tapa y apriete el tornillo.
4. Compartimento de la batería
5. LED
6. Reset: Pulse el botón reset y el robot descansa
después que saluda. El modelo está en modo standby.
Pulsando el botón más todas las funciones están
activas de nuevo.
CZ - Vložení baterií
1. Přepínač On/Off
2. Kryt bateriového prostoru.
3. Prostor pro baterie: Do boxu pro baterie vložte 4 x AA
baterie (nejsou přiloženy) se správnou polaritou. Box
vsuňte do prostoru pro baterie. Kryt přišroubujte.
4. Prostor pro baterie
5. LED
6. Reset: Na robotovi stiskněte tlačítko RESET. Robot se s
Vámi rozloučí a přejde do pohotovostního režimu. Když
tlačítko znovu stisknete, robot se opět aktivuje.
PL -
Zakładanie baterii
1.
Włącz/wyłącz
2. Pokrywa komory baterii
3. Pojemnik na baterie:
Włóż 4 baterie AA (niedołączone do zestawu) do pojemnika
na baterie, upewniając się, że biegunowość jest
prawidłowa. Następnie wsuń pojemnik na baterie do
komory baterii. Zamknij pokrywę i dokręć śrubę.
4. Komora na baterie
5. LED
6. Reset: Naciśnij przycisk resetowania, a robot odpocznie
po pożegnaniu. Model jest w trybie gotowości. Po
ponownym naciśnięciu przycisku wszystkie funkcje są
ponownie aktywne.
NL - Batterij plaatsen
1.
Aan/uit schakelaar
2. Deksel van het batterijcompartiment
3. Batterijdoos:
Plaats 4 x AA batterijen (niet meegeleverd) in het
batterijvakje en let daarbij op de juiste polariteit. Duw
vervolgens de batterijhouder in het batterijvak. Sluit het
deksel en draai de schroef vast.
4. Batterijcontainer
5. LED
6. Reset: Druk op de reset-knop en de robot zal rusten nadat
hij afscheid heeft genomen. Het model staat in stand-by.
Door nogmaals op de toets te drukken, worden alle functies
weer actief.
SK -
Vloženie batérie
1.
Zapínač/vypínač
2. Kryt priestoru pre batérie
3. Skrinka na batérie:
Vložte 4 x AA batérie (nie sú súčasťou balenia) do
batériového boxu a uistite sa, že je polarita správna. Potom
zasuňte batériový box do priestoru pre batérie. Zatvorte
kryt a utiahnite skrutku.
4. Priestor pre batérie
5. LED
6. Reset: Stlačte tlačidlo resetovania a robot sa po rozlúčke
oddýchne. Model je v pohotovostnom režime. Opätovným
stlačením tlačidla sú všetky funkcie opäť aktívne.
1
3
4
2
5
6
2x AA 2x AA


