Dear Customer,
by choosing this commercial espresso machine, you have just purchased an Italian high quality product.
We wish to congratulate you on your machine choice, because, thanks to this purchase, another classic espresso machine has been
awakened back to life.
2.1
WARNINGS AND IMPORTANT ADVICE
Carefully read the warnings contained in this instruction manual before using the machine.
The instruction manual is part of the coffee machine and must be retained for future reference. In case of sale or transfer of the
machine to a third party, this manual should be delivered to the new user. In case of doubts or for further information, please
contact your dealer. The use of the espresso machine involves the observance of some basic rules, in particular:
•
Place the machine in a well-ventilated area and on a hard and horizontal surface; never place the machine on surfaces
that are too cold or hot.
•
Before starting up the machine, check that the mains voltage local power corresponds with that of the machine.
•
Do not touch the machine when parts of your body are wet. The machine can be used only by adults. Do not allow
children to approach it. It is recommended, in particular, do not touch the metal parts of the following components
because they are very hot during the operation:
•
The coffee brewing group;
•
Steam and hot water taps;
•
Filter holder.
2.2
TRANSPORTATION
The package must be always moved by keeping it in upright position, do not turn it upside down or lay it down, proceeding with
caution, avoiding collisions and the exposure to the bad weather.
When you receive the package, check that the machine is the one indicated on the delivery note, including any accessories.
Also, check that no damage has occurred during the transportation, and, if so, promptly inform the shipping company and our
customer care office. Please avoid to release the packing components into the environment, but enrtust them to the authority in
charge of this activity.
2.3
INSTALLATION AND START UP
Install the machine on a leveled, dry, smooth, solid surface and in a well-ventilated place.
Before using the espresso coffee machine, make sure that:
•
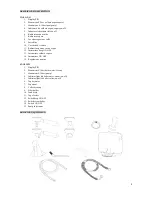
the coffee brewing lever is turned downwards (section 8 on page 3);
•
the knobs of the water and steam taps are closed (section 6 and 7 on page 3);
•
the switch is in position "0" or "OFF" (section 13 on page 3);
•
the drip tray is placed properly (section 10 on page 3).
WATER LOADING FROM THE RESERVOIR
After removing the upper grid, fill the reservoir with drinking water with low calcium content (for a better care and a better
result), being careful not to drop water into the machine.
WATER LOADING FROM THE WATER NET
Check that the tap (placed under the drip tray, section 11 on page 3) is in the desired position. If the user does not make this
control and the knob of the tap is in the opposite position to the water loading, the pump could be damaged.
Connect the water inlet pipe and the drainpipe (if the drain is placed nearby, otherwise keep the drip tray plugged), respectively
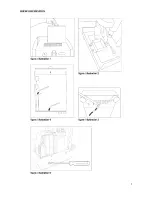
to the fitting of loading water and to the plastic tray, as shown in figure 2 and figure 3 on page 5, then select with the tap the
water inlet (section 11 on page 3), remembering to open the water tap, in case of loading directly from the water net.
If you use the machine with connection to the water net, remember to press the "ON-OFF beep" switch in the OFF position
(item 12 on page 3).
Insert the plug into the socket after making sure that the plate details correspond to those of the electricity distribution net and
turn the power switch on ON position (section 13-14 on page 3). Consequently the pump will start running by filling the boiler
automatically. After about 20 minutes the machine will be ready to be used.
IMPORTANT:
The lack of water might cause serious damages to the pump and to the heating element; therefore, in case of change of the
sound during the pump operation and, simultaneously, the reduction of the pressure by the pressure gauge, it is necessary to
SWITCH THE ESPRESSO MACHINE OFF IMMEDIATELY
.
16
Summary of Contents for Alex Duetto IV AUST. MK 606
Page 4: ...DESCRIZIONE DESCRIPTION 3...
Page 6: ...FIGURE ILLUSTRATION 5...
Page 7: ...SCHEMA ELETTRICO ELECTRICAL SCHEME 6...
Page 9: ...1 ITALIANO 8...
Page 16: ...2 ENGLISH 15...
Page 23: ...56 ReV1 1 del 22 12 2016 www mywayitaly com www alexduetto com...

