EN
EN
3-2. Operation Instruction
1. Set Up Welding Carriage With Welding Machine
Supply the welding carriage with 220V AC power. Connect the carriage operation panel to
the power box with an interconnection cable. Adjust the welding machine, like voltage/cur-
rent, equip the welding torch and plug with torch cable, adjust the torch angle. Move all the
sundries on the carriage traveling direction.
1. Make sure the power source, wire feeder and carriage are well connected according to the
instruction.
2. Switch on the power supply, regulate the gas flow rate and ready for operation.
3. Select the carriage traveling direction (Left / Right) from the operation panel.
4. Rotate the Speed ADJ. knob and change the carriage traveling speed until find the best
welding speed.
5. Place the carriage in welding area and make the guide wheels closely cling to the vertical
back-up plate.
6. Push down the magnetic control lever, let the carriage closely attract to the base metal and
get enough attraction force.
7. Adjust the torch position by Vertical - Horizontal move regulating unit.
8. Power on control supply from the operation panel.
9. Choose the welding mode, press down the start button, carriage start the welding operation
after arcing.
10. Press down the stop button after finishing the welding operation.
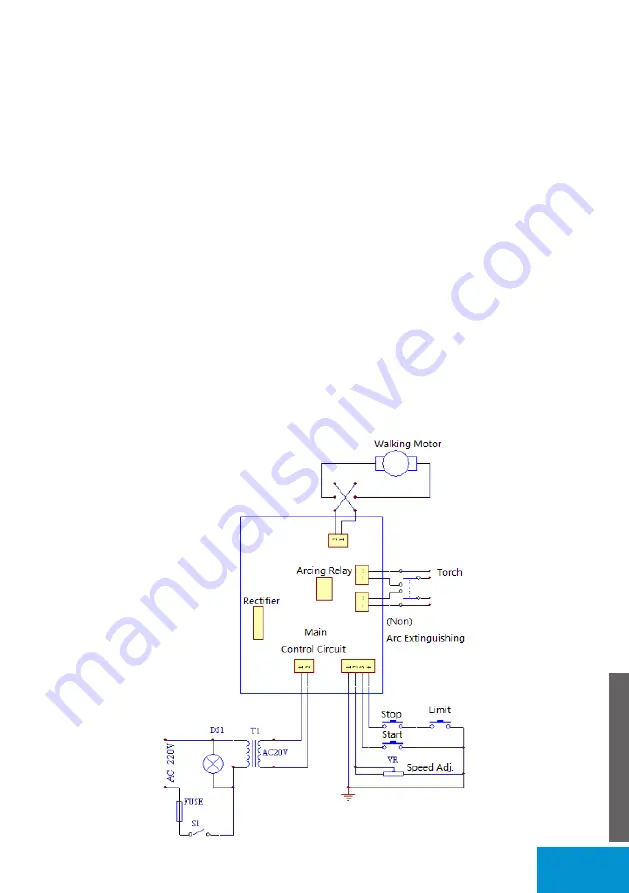
Wiring Diagram
57


