


28
Connecting to the power supply
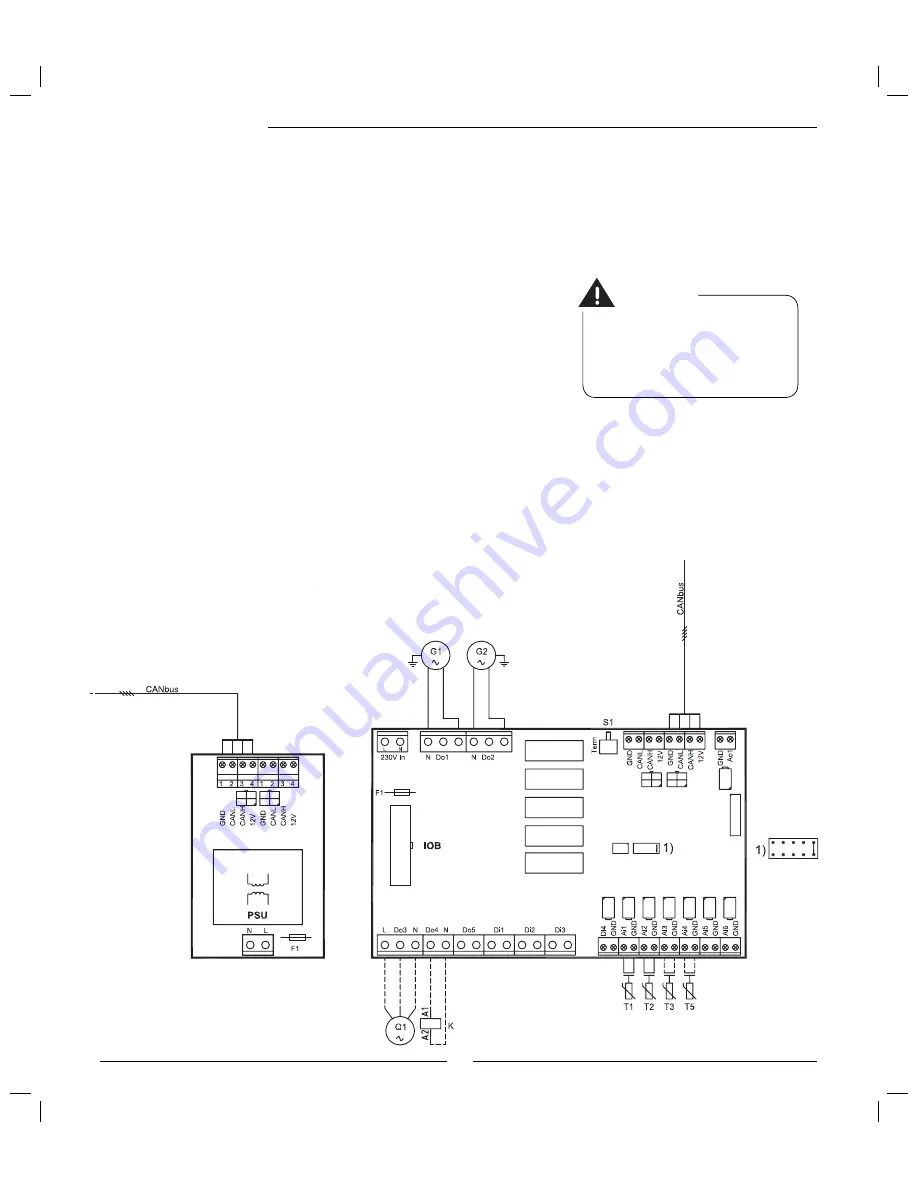
External connections Control cabinet
Power supply:
Connect to terminals L1, L2, L3, N and PE and then further feed
to the heat pump. Connect further supply to the accessory unit on
terminals 1, N and PE.
CANbus:
Communication cable between the circuit board in the control
cabinet, heat pump and optional unit. Connect to terminals GND,
CANL, CANH and 12V. See more under section
CANbus
.
T1, Flow sensor:
Connect to terminals Ai1 and GND.
T2, Outdoor sensor:
Connect to terminals Ai2 and GND.
T3, Hot water sensor:
Accessory. Connect to terminals Ai3 and GND.
T5, Room sensor:
Accessory. Connect if room sensor infl uence is
required. Connect to terminals Ai4 and GND.
G1, Heating system pump:
Connect to terminals Do1 and N.
G2, Heat carrier pump:
Connect to terminals Do2 and N.
Q1, Three-way valve:
Accessory. Connect to terminals L, Do3 (Open)
and N.
K:
Any contactors for the hot water heater’s electric element can be
connected to terminals Do4 and N.
Open
To Heat pump
To Accessory unit
Warning
Strap
Do not mix up the 12V and CAN-
bus connections!
If 12V (or other
incorrect voltage) is supplied to the
CANbus contacts the processors in the
CANbus are destroyed.


