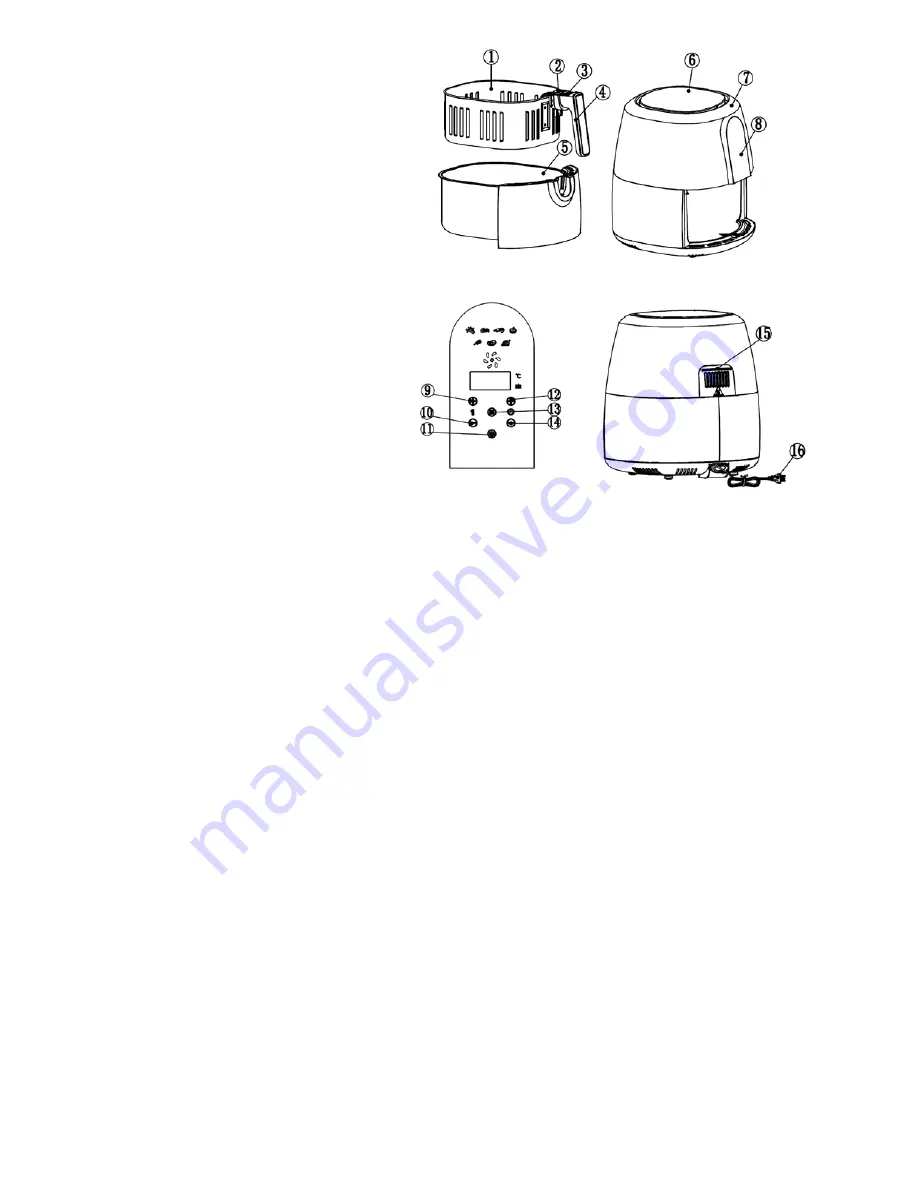
Parts
1. Fry
basket
2. Protective
cover
3. Push-release
button
4. Handle
5. Pan
6. Housing
7. Air
inlet
8. Control
panel
9. Temperature increase button
10. Temperature decrease button
11. ON/OFF button
12. Time increase button
13. Mode selection button
14. Time decrease button
15. Air outlet
16. Power cable
3
Operating Features
• Multiple preset cooking modes let you choose chips, chicken, steak, shrimp, meat, cake, and fish. Once the mode is selected
you can make custom adjustments using the timer and temperature settings. Adjust your time and temperature settings
according to the volume of food you are cooking.
• You can use the automatic shutoff feature or turn the unit off manually by pressing the ON/OFF button.
• No downtime – your air fryer does not need rest between uses; as soon as you complete one recipe, you can start the next.
• Reheat food by using a low temperature setting.
How to Use
1. Connect power cord to the unit and plug into outlet.
2. Pull the pan and basket out of the air fryer.
3. Place the food into the fry basket, being careful not to exceed the maximum volume or maximum weight.
4. Push the pan back into the air fryer.
5. Press the ON/OFF button.
6. Press the appropriate function button to choose cooking mode or time and temperature settings.
7. Press the ON/OFF button once more to start cooking.
8. You may have to shake the ingredients halfway through the cooking time to ensure even heating. To do so, pull the pan out of
the appliance by the handle, shake back and forth, then slide the pan back into the appliance; do not press the release button
on the handle while shaking. CAUTION: The pan will be hot.
9. When food is fully cooked, machine will beep 5 times.
10. Carefully pull the pan out and place it on a heat resistant-surface.


