FRANÇAIS
ENGLISH
ENGLISH
FRANÇAIS
FRANÇAIS
ENGLISH
ENGLISH
FRANÇAIS
!
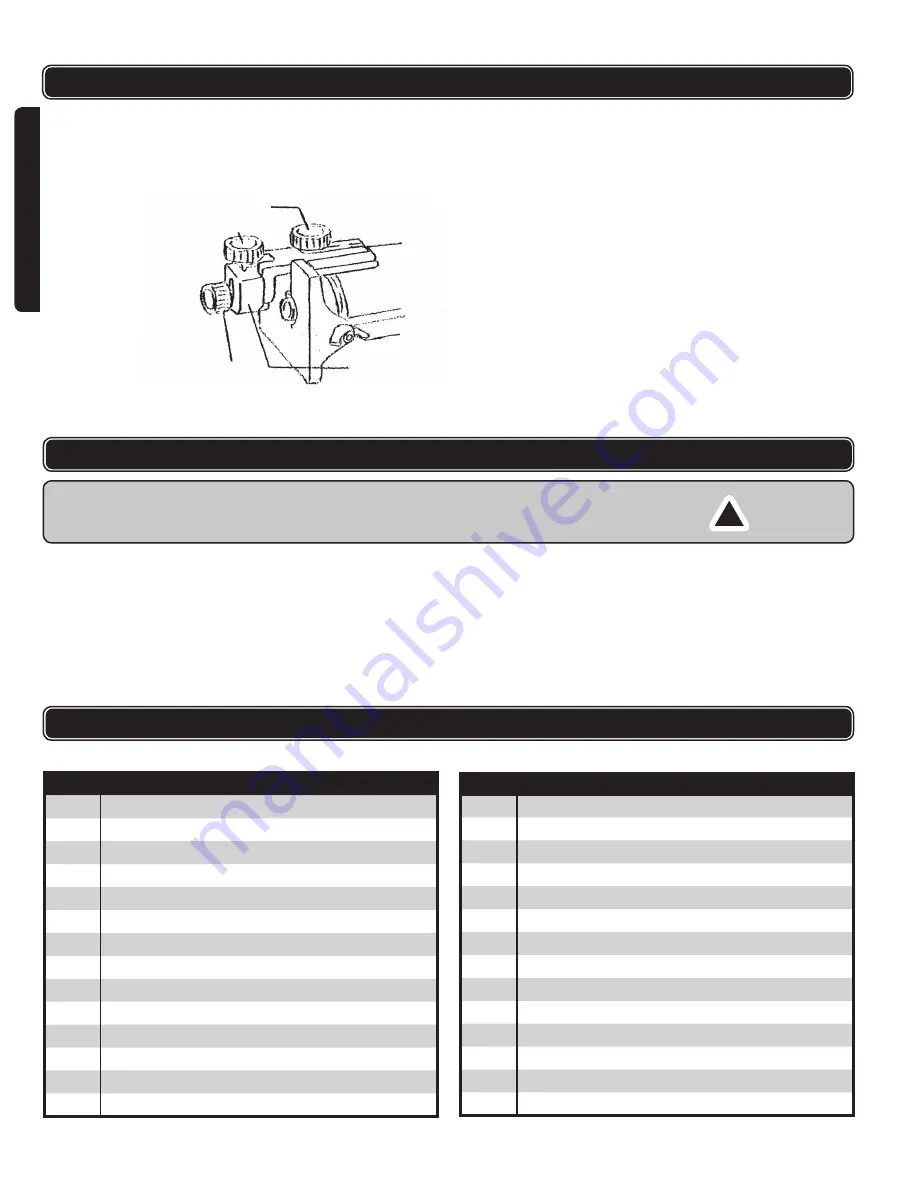
Install the trimmer guide on the tool base with the clamp screw (A). Loosen the
clamp screw (B) and adjust the distance between the bit and the trimmer guide
by turning the adjusting screw (1 mm or approx. 3/64
th
per turn.) At the desired
distance, tighten the clamp screw (B) to secure the trimmer guide in place.
OPERATION
When cutting, move the tool with the guide roller riding the side of the work piece.
MAINTENANCE
CAUTION:
Always be sure that the tool is switched off and unplugged before attempting to
perform inspection or maintenance.
Replacing Carbon Brushes
Remove and check the carbon brushes regularly. Replace when they wear down to
the limit mark. Keep the carbon brushes clean and free to slip in the holders. Both
carbon brushes should be replaced at the same time.
Use a screwdriver to remove the brush holder caps. Take out the worn carbon
brushes, insert the new ones and secure the brush holder caps.
N
O.
PART NAME
1
Label
2
Bolt Screw
3
Self Screw
4
Plank
Cover
Power Supply
Power Cord
8
Motor Housing
9
Brush Covers
10
Brushes
11
Field Assembly
12
Bearing
13
Insulated Pad
14
Bolt Screw
PARTS LIST
N
O.
PART NAME
1
Armature Assembly
1
Fan
1
Bearing
18
Rubber Washer
19
Housing
20
Rubber Pin
21
Switch Seat
22
Switch
23
Capacitor
24
Knob
2
Spring Sleeve
2
Sleeve Screw
2
Washer
28
Tool Base
Clamp Screw (A)
Adjusting Screw (B)
Trimmer Guide
Please refer to Schematic Drawing on page 15.


