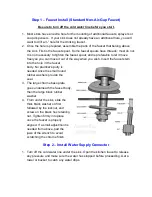
2. Disconnect the water supply line
from the cold water connection
underneath the sink. Wrap the male
end of the water supply connector
with 3-4 wraps of Teflon tape to
ensure a proper seal. Screw the
female side of the feed water
adapter onto the cold water line first,
and then screw on the cold water
line to the male end of the feed
water adapter. Ensure a proper
seal, but do not over-tighten.
3. When the handle of the feed water
adapter is turned perpendicular to
the water line, this is the "OFF"
position. When in line with the
water line, the connector is “ON”.
Step 3 – Install Filters
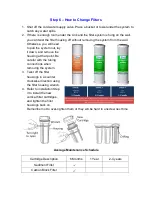
1. Make sure the O-ring is seated inside the
groove on top of the filter housing. A light
amount of food-grade silicon jelly may be
used to help the O-ring seal better, but is
not required.
2. The filter cartridges are preserved in shrink
wrap. Note the direction sign on the sticker
before removing the wrap.
3. When placing the filter cartridge into its
housing, make sure it is centered and the
knob protruding from the bottom of the
housing fits in the central hole of the filter.
4. Screw the housing, with filters attached, onto the housing. The cap also has a
center knob which should be inserted into the center hole of the filter cartridge.
Twist the housing on in a clockwise direction by hand, and then use the housing
wrench to tighten it another 1/4 – 1/2 of a turn.
Do not over-tighten. This can
cause leaks and make it difficult to unscrew the housing when replacing
filters.
Follow steps 1-4 to install the rest of filters.


