Programmable
(7 day, 5-1-1 day or Non-Programmable)
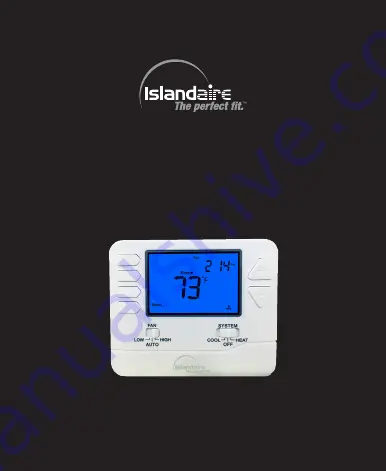
Wired Thermostat
6041228
Installation and Operation Manual
6140444 Rev. 04/09/21
Page 1: ...Programmable 7 day 5 1 1 day or Non Programmable Wired Thermostat 6041228 Installation and Operation Manual 6140444 Rev 04 09 21...
Page 2: ......
Page 3: ...Yes Remote Temperature Sensor Yes Table of Contents page Thermostat Application Guide Installation Tips 2 Thermostat Quick Reference 6 Wiring 7 Wiring Diagrams 9 Technician Setup 11 Time Setting Progr...
Page 4: ...n that is easy for the user to access The temperature of the location should be representative of the room Do not install thermostat in locations Close to hot or cold air ducts That are in direct sunl...
Page 5: ...crew on the right Electrical Hazard Failure to disconnect the power before beginning to install this product can cause electrical shock or equipment damage Mercury Notice All of our products are mercu...
Page 6: ...Mount Thermostat Align the 4 tabs on the subbase with corresponding slots on the back of the thermostat then push gently until the thermostat snaps in place 4 Installation Tips...
Page 7: ...s not have to be con nected when the thermostat is powered by batteries Battery installation is optional if thermostat is hardwired Note Installing batteries will enable the thermostat to remember the...
Page 8: ...rn the fan on only when the heating or cooling system is on Select LOW or HIGH for the fan to run continuously at the selected speed Fan Switch 2 3 4 Selects the operation mode on your HVAC system Sel...
Page 9: ...rminal Terminal 1 Heat 1 Cool Conventional System 1 Heat 1 Cool Heat Pump System 2 Heat 1 Cool Heat Pump System R Transformer power Transformer power Transformer power C Transformer common Transformer...
Page 10: ...trical shock or equipment damage Note When connecting the 6041228 thermostat to a PTAC refer to the PTAC unit s instructions to enable remote thermostat operation Wire Specifications Use shielded or n...
Page 11: ...RELAY 1 C R L1 L2 COMPRESSOR RELAY HEAT RELAY FAN RELAY 1 2 R Y W C GL GH O B 3 3 O B Typical 1H 1C Conventional System 2 Speed Fan 1 2 3 Power supply Splice together GL and GH wires O and B terminal...
Page 12: ...EOVER VALVE Typical 1H 1C Heat Pump System 2 Speed Fan Typical 2H 1C Heat Pump System 2 Speed Fan 1 2 3 Power supply Cap o W Terminal B or O is used on Heat Pump Systems B is energized in heating O is...
Page 13: ...OFF will disable this function You can adjust the filter change reminder from OFF to 2000 hours of fan runtime in 50 hour increments Room Temperature Calibration This feature allows the installer to...
Page 14: ...will operate a heat pump Y will be the first stage of heat cool W will be the second stage of heat OFF configures the thermostat for non heat pump systems ON configures the thermostat for heat pump sy...
Page 15: ...above this value Use the or key to set the maximum temperature setpoint 44 0 90 0 F 7 0 32 0 C Cooling Temperature Setpoint Limit This feature allows you to set a maximum cool setpoint value The setpo...
Page 16: ...all for heat For systems that control the fan during a call for heat put the switch in the GAS position Most PTAC systems will require ELEC Fan Operation Setup The thermostat operation switch should b...
Page 17: ...he current minutes 8 Press the Done button Programming The 6041228 Thermostat is shipped with an energy saving default program The thermostat can be re programmed as described in the paragraph entitle...
Page 18: ...8 AM 62 F 17 C 83 F 28 C Return 6 PM 70 F 21 C 75 F 24 C Sleep 10 PM 62 F 17 C 78 F 26 C Saturday Wake 6 AM 70 F 21 C 75 F 24 C Leave 8 AM 62 F 17 C 83 F 28 C Return 6 PM 70 F 21 C 75 F 24 C Sleep 10...
Page 19: ...een Use the or key to set the desired Wake time When using the 12 hour time setting ensure AM or PM is appropriately selected 5 Press the Next Step button 6 The Set At temperature will be flashing Use...
Page 20: ...flashing Use the or key to select the desired temperature setting for the Wake time period 7 Press the Next Step button 8 Repeat steps 4 through 7 for that day s Leave Return and Sleep time periods 9...
Page 21: ...etpoint temperature in the display The thermostat will now permanently stay at this setpoint and can be adjusted using the and keys At any time during permanent temperature hold press the Run Sched bu...
Page 22: ...erential Heating is adjustable from 0 2 to 2 0 Cooling is adjustable from 0 2 to 2 0 Power Source 18 to 30 VAC NEC Class II 50 60 Hz for hardware Battery power from 2 AAA Alkaline batteries Remote Tem...
Page 23: ...THIS PAGE INTENTIONALLY LEFT BLANK...
Page 24: ...Installation and Operation Manual 500 Middle Country Road St James NY 11780 1 800 886 2759 e mail sales islandaire com www islandaire com Ph 631 471 2900 Fax 631 471 2913...