background image

Chapter  4    COMPONENT  REPLACEMENT 

BC-4000 Service Manual    No. 085-6693-02 

4-3 

7.  Remove the screw fixing the roller bracket. 

8.  Remove the gear after pulling out the gear 

stopper, and remove the print roller.

Screw for roller bracket 

Gear stopper 

Summary of Contents for BC-4000

Page 1: ...nual Second Edition 2008 05 15 IMPORTANT x Do not carry out installation operation service or maintenance until thoroughly understanding the contents of this manual x Keep this manual available at all times for installation operation service and maintenance ...

Page 2: ...o patent liability is assumed with respect to the use of the information contained herein Moreover because Ishida is constantly striving to improve its high quality products the information contained in this manual is subject to change without notice Every precaution has been taken in the preparation of this manual Nevertheless Ishida assumes no responsibility for errors or omissions Neither is an...

Page 3: ...forming any installation operation inspection or maintenance procedure not specifically described in this manual or indicated on the machine itself CHANGE IN SPECIFICATIONS Machine specifications and accessories may be changed at any time due to improvements or other reasons Consult with your ISHIDA representative at any time to confirm the actual specifications of the purchased machine ERRORS AND...

Page 4: ... the protective ground wire to the main grounding provision Do not remove covers or enclosures To avoid personal injury and shock do not open or remove any covers or enclosures of the machine unless specified in the manual Do not perform unspecified maintenance For your personal safety do not perform any maintenance procedures which are not specified in the manual Disconnect power supply before se...

Page 5: ...xposed to direct cold air from air conditioners or refrigerators x Places where the floor or foundation is unstable x Places subject to a lot of dust or dirt x Places with large voltage fluctuations CAUTIONS FOR POWER SUPPLY Heed the following precautions about power supply x Use a power supply with rated voltage ground x Prepare a dedicated power source A power supply that generates voltage varia...

Page 6: ...assemble the machine f Do not allow any liquids to come into contact with the machine f Do not drop or apply a strong shock to the machine fWhen cleaning the machine only use a soft dry cloth or a cloth wetted with a neutral cleanser Never use thinner or other volatile liquids ...

Page 7: ...ries depending on the level of danger or seriousness of potential injury The definition for each of these warnings and precautions are shown below Failure to heed these warnings and precautions may result in bodily injury or damage to the machine Indicates information that if not heeded is likely to result in loss of life or serious injury Indicates information that if not heeded could possibly re...

Page 8: ... 2 15 2 3 7 Returning to B01 2 15 2 4 B03 BARCODE 2 16 2 4 1 B03 01 Item Code Position 2 16 2 4 2 B03 02 Department Code Position 2 16 2 4 3 B03 03 Group Code Position 2 17 2 4 4 Returning to B01 2 17 2 5 B04 DEFAULT SETTING 2 18 2 5 1 B04 01 Date Print 2 18 2 5 2 B04 02 Use By Days 2 18 2 5 3 B04 03 Pack Time Print 2 19 2 5 4 B04 04 Expiry Time Print 2 19 2 5 5 B04 05 Best Before Date Print 2 20 ...

Page 9: ... 23 Commodity Message 2 35 2 8 23 B08 24 Ingredients Message 2 36 2 8 24 B08 25 Nutrition information panel Message 2 36 2 8 25 B08 27 Coupon Message 2 37 2 8 26 B08 27 Logo Image 1 2 37 2 8 27 B08 28 Logo Image 2 2 38 2 8 28 B08 29 Label Format Number 2 38 2 8 29 B08 32 Upper Limit 2 39 2 8 30 B08 33 Lower Limit 2 39 2 8 31 B08 34 Unit Type 2 40 2 8 32 B08 35 Department Code 2 40 2 8 33 B08 36 Gr...

Page 10: ...C Address 2 61 2 10 8 B10 08 DHCP Communication Setup 2 62 2 10 9 B10 09 Network Status 2 63 2 11 B11 SYSTEM TIMER 2 65 2 12 B12 PASSWORD REGISTRATION 2 66 2 12 1 B12 01 Password for Registration Mode 2 66 2 12 2 B12 02 Password for Total Mode 2 66 2 12 3 B12 03 Password for Subtraction Mode 2 67 2 12 4 B12 04 Password for Setup Mode 2 67 2 12 5 B12 06 Password Change 2 67 2 12 6 Returning to B01 ...

Page 11: ... 1 C07 00 Peel Sensor 3 16 3 8 2 Returning to C01 3 16 3 8 3 Exiting the Mode 3 16 Chapter 4 COMPONENT REPLACEMENT 4 1 4 1 THERMAL HEAD REPLACEMENT 4 1 4 2 PRINT ROLLER REPLACEMENT 4 2 4 3 LOAD CELL REPLACEMENT 4 4 4 4 MAIN BOARD REPLACEMENT 4 6 4 5 KEY SHEET REPLACEMENT 4 8 4 6 A D BOARD REPLACEMENT 4 10 4 7 POWER SUPPLY BOARD REPLACEMENT 4 12 4 8 DISPLAY UNIT REPLACEMENT 4 14 Chapter 5 ERROR LIS...

Page 12: ...x BC 4000 Service Manual No 085 6693 02 ...

Page 13: ...Chapter 1 OVERVIEW BC 4000 Service Manual No 085 6693 02 1 1 1 OVERVIEW 1 1 FRONT VIEW 1 2 REAR VIEW Weigh platter Height adjustment foot Key sheet Operator display Customer display Printer ...

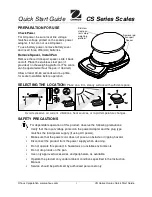
Page 14: ...Chapter 1 OVERVIEW 1 2 BC 4000 Service Manual No 085 6693 02 1 3 DISPLAY 1 4 KEY SHEET ...

Page 15: ...play 192 16dots 23 digit segment monochrome LCD 2 backlight colors Number of Keys 112 keys 92 membrane keys 20 tact keys Printing Method Direct thermal method Thermal Head 2 inch 448 dots 8 dots mm monochrome thermal head Printing Speed 80mm sec Effective Print Size Width 60mm Label Size Label external I100mm Paper core I40mm Label width Min 38mm Max 64mm Power Supply AC220V 10 50 60Hz Operating T...

Page 16: ...memo memo memo memo ...

Page 17: ...Service Manual No 085 6693 02 2 1 2 SETUP MODE B Mode 2 1 ENTERING SETUP MODE KEY IN ITEM No 0 000 0 000 0 00 0 00 Key in the numeric value 6000 and press the MODE key Then the machine enters Setup Mode Æ SETUP PRESS KEY b00 SETUP ...

Page 18: ...t number can be set Operation 1 Press the ENTER key to enter B01 01 01menu LABEL FORMAT No b01 01 01 LABEL FMT 30 2 Key in the desired label format number and press the ENTER key 01 04 Standard label format 01 default value 31 99 Can be additionally registered 2 2 1 2 B01 01 02 Label Length Gap Operation 1 Press the or ENTER key to enter B01 01 02 menu or LENGTH GAP 32 5to242 5 b01 01 02 LENGTH 39...

Page 19: ...Distance Operation 1 Press the or ENTER key to enter B01 01 04 menu or SENSOR DISTANCE 0 1mm b01 01 04 DISTANCE 73 0 2 Key in the label sensor distance between the label sensor and the thermal head and press the ENTER key Note Normally this value is fixed at 73 0mm 2 2 1 5 B01 01 05 Label Type Selection Operation 1 Press the or ENTER key to enter B01 01 05 menu or DIE CUT 0 CONTINUOU 1 b01 01 05 C...

Page 20: ...ed number 0 or 1 to determine whether or not to print the store name and address and press the ENTER key 0 Disable 1 Enable or 2 2 1 7 B01 01 07 Title Unit Price or Weight Print Selection Operation 1 Press the or ENTER key to enter B01 01 07 menu or FIELD TITLE 1 ENABLE b01 01 07 TITLE 1 2 Use the or key to confirm the meaning of each item code or 3 Key in the desired number 0 or 1 to determine wh...

Page 21: ...r or not to use the peel sensor and press the ENTER key 0 Disable 1 Enable or 2 2 1 9 B01 01 09 PLU Number Setting for Test Printing Operation 1 Press the or ENTER key to enter B01 01 09 menu or TEST ITEM No b01 01 09 ITEM 00000001 2 Key in the desired PLU number for test printing and press the ENTER key 2 2 1 10 B01 01 10 Thermal Head Check Selection Operation 1 Press the or ENTER key to enter B0...

Page 22: ...Number Operation 1 Press the or ENTER to enter B01 01 11 menu or SUB TOTAL FORMAT No b01 01 11 SUB TOTAL 20 2 Key in the desired label format number for subtotal and press the ENTER key 2 2 1 12 B01 01 12 Store Number Print Selection Operation 1 Press the or ENTER to enter B01 01 12 menu or STORE No PRN 1 ENABLE b01 01 12 STORE No 1 2 Use the or key to confirm the meaning of each item code or 3 Ke...

Page 23: ...he desired number 0 or 1 to determine whether or not to print the machine number and press the ENTER key 0 Disable 1 Enable or 2 2 1 14 Returning to B01 Operation Press the END key to return to B01 menu 1 LABEL FORMAT ENTER b01 LABEL FORMAT 2 2 2 B01 02 LABEL FORMAT Operation 1 Press the ENTER key to enter B01 01 menu Æ PRINT SETUP ENTER b01 01 PRINT 1 2 Press the key to enter B01 02 menu Æ LABEL ...

Page 24: ...ey Example Label format number 2 Æ FORMAT No PLU 02 b01 02 01 FORMAT No 02 Note Format 1 thorugh 4 are standard label formats and cannot be changed For format 31 thorugh 99 edit the format after copying a standard format 2 2 2 2 B01 02 02 Print Position Data Printing position can be set for each unit Operation 1 Press the key to enter B01 02 02 menu Æ UNIT ENTER b01 02 02 UNIT 2 Press the ENTER ke...

Page 25: ...ess the END key to return to the B01 02 01 menu Æ FORMAT No PLU 30 b01 02 01 FORMAT No 30 2 2 2 3 B01 02 03 Default PLU Number Operation 1 Press the key twice to enter 01 02 03 menu Æ DEFAULT PLU ENTER b01 02 03 PLU 00000001 2 Key in the desired PLU number and press the ENTER key Example PLU number 2 Æ DEFAULT PLU ENTER b01 02 03 PLU 00000002 3 Press the PRINT key to issue a test label to confirm ...

Page 26: ...ct the desired psotion using the keys 4 Key in the desired print unit data and press the ENTER key 2 2 2 6 Returning to B01 02 01 Operation Press the END key to return to B01 02 01 menu Æ FORMAT No PLU 30 b01 02 01 FORMAT No 30 2 2 2 7 B01 02 05 Number of Units Operation 1 Press the key repeatedly until 01 02 05 menu appears or key in 5 and press the key to enter 01 02 05 menu directly yyy NUMBER ...

Page 27: ...gth Gap Operation 1 Press the key repeatedly until 01 02 06 menu appears or key in 6 and press the key to enter 01 02 06 menu directly yyy LENGTH GAP 32 5 to 242 5 b01 02 06 LENGTH 0 0 2 Key in the desired data Length Gap in 0 1mm units and press the ENTER key 2 2 2 10 Returning to B01 01 Press the END key to return to B01 01 Æ PRINT SETUP ENTER b01 01 PRINT 1 2 2 2 11 Returning to B01 Operation P...

Page 28: ...y to enter B02 01 menu FLAG 8 1 Digit 13 2 Digits b02 01 POS FLAG 202 2 Key in the desired POS flag code barcode prefix and press the ENTER key 2 3 2 B02 02 10 DIGIT FLAG Operation 1 Press the or ENTER key to enter B02 02 menu or 10 DIGIT FLAG 8 13 2 Dig b02 02 10 DIG FLAG 4949 FFÄÄÄÄÄÄÄÄÄÄC D or FFÄÄÄÄÄC D 10 digit fixed POS code 5 digit fixed POS code 2 Key in the desired flag code for source ma...

Page 29: ...1 Press the or ENTER key to enter B02 03 menu or BAR TYPE 1 NON PLU 13 b02 03 BAR TYPE 1 2 Use the or key to confirm the meaning of each item code 1 NON PLU 13 EAN code 2 NON PLU 8 EAN code 3 PLU 13 EAN code 4 PLU 8 EAN code 5 ITF 18 or 3 Key in the desired barcode type number and press the ENTER key ...

Page 30: ... 10 F F C C C C C P P P P C D 11 F F C C C C C C W W W W C D 12 F F C C C C C P W W W W W C D 13 F F M M M C C P P P P P C D 14 F F M M C C C P P P P P C D 15 F F C C C C C 0 P P P P C D 16 F F C C C C C W W W W W C D 17 F F C C C C C P P P P P C D 18 F F C C C C C C P P P P P C D 19 F F C C C C C C P W W W W C D 20 F C C C C C P P P P P P C D 21 F F C C C C P P P P P P C D 22 F C C C W W W W P P ...

Page 31: ...rcode Type Number U Unit price 1 F F C C C C C P P P P P W W W W W W C D F F C C C C C P P P P P Q Q Q Q Q C D 2 F F C C C C C U U U U U W W W W W C D 3 F F C C C C C P P P P P W W W W W C D 4 F F C C C C C P P P P P Q Q Q Q Q C D 2 3 6 B02 06 MANUFACTURER CODE Operation 1 Press the or ENTER key to enter B02 06menu or MANUFACTURE CODE 4 Dig b02 06 MANUFACTURE 0000 2 Key in the desired manufacturer...

Page 32: ... digits in the barcode and press the ENTER key Note Three types are available 45 36 and 27 default value is 45 Example Item code 4567892 Set value 45 45 means 5 digits from the 4th digit of the item code In this example the item code is 67892 2 4 2 B03 02 DEPARTMENT CODE POSITION Operation 1 Press the or ENTER key to enter B03 02 menu or ITEM CODE SET DEPT b03 02 DEPARTMENT 34 2 Key in the item co...

Page 33: ...SET GROUP b03 03 GROUP 32 2 Key in the item code position starting position and the number of digits in the group code and press the ENTER key Example Item code 12345678 Set value 32 In this example the group code is 34 that are 2 digits from the 3rd digit 2 4 4 RETURNING TO B01 Operation Press the END key to return to B01 menu 1 LABEL FORMAT ENTER b01 LABEL FORMAT ...

Page 34: ... the ENTER key to enter B04 01 menu DATE PRINT 4 BOTH b04 01 DATE FLAG 4 2 Use the or key to confirm the meaning of each item code 1 Prohibit No print 2 Pack date 3 Use by date 4 Both Print both or 3 Key in the desired number to determine whether or not to print dates and press the ENTER key 2 5 2 B04 02 USE BY DAYS Operation 1 Press the or ENTER key to enter B04 02 menu or USE BY 0 to 999 b04 02 ...

Page 35: ...int 3 Designated time print or 3 Key in the desired number to determine whether or not to print the pack time and press the ENTER key 2 5 4 B04 04 EXPIRY TIME PRINT Operation 1 Press the or ENTER key to enter B04 04 menu or EXPIRY TIME 1 PROHIBIT b04 04 E TIME 1 2 Use the or key to confirm the meaning of each item code 1 Prohibit No print 2 Relative time print 3 Designated time print or 3 Key in t...

Page 36: ... 2 Use the or key to confirm the meaning of each item code 1 No print 2 Print or 3 Key in the desired number to determine whether or not to print the Best Before date and press the ENTER key 2 5 6 B04 06 BEST BEFORE DATE Operation 1 Press the or ENTER key to enter B04 06 menu or BEST BEFORE DATE 0 999 b04 06 BEFORE D 1 3 Key in the desired number of days for Best Before date and press the ENTER ke...

Page 37: ...YPE 5 2 Use the or key to confirm the meaning of each item code 1 oz 2 lb 3 kg 4 g 5 PC S 6 BOX ES 7 BUNDLE S 8 PACK S 9 CUT S 10 SLICE S 11 CUP S 12 PKT S 13 BAG S 14 BUCH S 15 BOTTLE S 16 LB or 3 Key in the desired number to select the unit type and press the ENTER key 2 5 8 RETURNING TO B01 Operation Press the END key to return to B01 1 LABEL FORMAT ENTER b01 LABEL FORMAT ...

Page 38: ...TAL 1 ENABLE b05 01 DAILY 1 2 Use the or key to confirm the meaning of each item code 0 Disable 1 Enable or 3 Key in the desired number to determine whether or not to use the daily total function and press the ENTER key 2 6 2 B05 02 WEEKLY TOTAL Operation 1 Press the ENTER key to enter B05 02 menu WEEKLY TOTAL 1 ENABLE b05 02 WEEKLY 1 2 Use the or key to confirm the meaning of each item code 0 Dis...

Page 39: ... MONTHLY TOTAL 1 ENABLE b05 03 MONTHLY 1 2 Use the or key to confirm the meaning of each item code 0 Disable 1 Enable or 3 Key in the desired number to determine whether or not to use the weekly total function and press the ENTER key 2 6 4 RETURNING TO B01 Operation Press the END key to return to B01 menu 1 LABEL FORMAT ENTER b01 LABEL FORMAT ...

Page 40: ...RICE 2 7 1 B07 01 OPEN PRICE SELECTION Operation 1 Press the ENTER key to enter B07 01 menu OPEN PRICE 0 ALLOW b07 01 OPEN PRICE 0 2 Use the or key to confirm the meaning of each item code 0 Allow 1 Prohibit or 3 Key in the number 0 or 1 to determine whether or not to allow open price function and press the ENTER key or 2 7 2 RETURNING TO B01 Operation Press the END key to return to B01 menu 1 LAB...

Page 41: ...ODE b08 02 SALES MODE 1 2 Use the or key to confirm the meaning of each item code 0 Disable 1 Enable or 3 Key in the number 0 or 1 to determine whether or not to use the sales mode function and press the ENTER key or 2 8 2 B08 03 UNIT PRICE Operation 1 Press the or ENTER key to enter B08 03 menu or UNIT PRICE 1 ENABLE b08 03 PRICE 1 2 Use the or key to confirm the meaning of each item code 0 Disab...

Page 42: ...sable 1 Enable or 3 Key in the number 0 or 1 to determine whether or not to use the markdown function and press the ENTER key or 2 8 4 B08 05 MARKDOWN PRICE Operation 1 Press the or ENTER key to enter B08 05 menu or MD PRICE 1 ENABLE b08 05 MD PRICE 1 2 Use the or key to confirm the meaning of each item code 0 Disable 1 Enable or 3 Key in the number 0 or 1 to determine whether or not to use the ma...

Page 43: ...0 Disable 1 Enable or 3 Key in the number 0 or 1 to determine whether or not to use the fixed weight function function and press the ENTER key or 2 8 6 B08 07 QUANTITY Operation 1 Press the or ENTER key to enter B08 07 menu or PCS 1 ENABLE b08 07 PCS 1 2 Use the or key to confirm the meaning of each item code 0 Disable 1 Enable or 3 Key in the number 0 or 1 to determine whether or not to use the q...

Page 44: ... item code 0 Disable 1 Enable or 3 Key in the number 0 or 1 to determine whether or not to use the tare function and press the ENTER key or 2 8 8 B08 09 DATE PRINT Operation 1 Press the or ENTER key to enter B08 09 menu or DATE PRINT 1 ENABLE b08 09 DATE PRNT 1 2 Use the or key to confirm the meaning of each item code 0 Disable 1 Enable or 3 Key in the number 0 or 1 to determine whether or not to ...

Page 45: ...Enable or 3 Key in the number 0 or 1 to determine whether or not to use the Shelf Life function and press the ENTER key or 2 8 10 B08 11 BEST BEFORE DATE FLAG Operation 1 Press the or ENTER key to enter B08 11 menu or B BEFORE FLAG 1 ENABLE b08 11 B BEF FLG 1 2 Use the or key to confirm the meaning of each item code 0 Disable 1 Enable or 3 Key in the number 0 or 1 to determine whether or not to us...

Page 46: ...Disable 1 Enable or 3 Key in the number 0 or 1 to determine whether or not to use the Best Before date data function and press the ENTER key or 2 8 12 B08 13 PACK TIME FLAG Operation 1 Press the or ENTER key to enter B08 13 menu or P TIME FLAG 1 ENABLE b08 13 P TIME FLG 1 2 Use the or key to confirm the meaning of each item code 0 Disable 1 Enable or 3 Key in the number 0 or 1 to determine whether...

Page 47: ...able 1 Enable or 3 Key in the number 0 or 1 to determine whether or not to use the pack time data function and press the ENTER key or 2 8 14 B08 15 EXPIRY TIME FLAG Operation 1 Press the or ENTER key to enter B08 15 menu or E TIME FLAG 1 ENABLE b08 15 E TIME FLG 1 2 Use the or key to confirm the meaning of each item code 0 Disable 1 Enable or 3 Key in the number 0 or 1 to determine whether or not ...

Page 48: ... 0 Disable 1 Enable or 3 Key in the number 0 or 1 to determine whether or not to use the expiry time data function and press the ENTER key or 2 8 16 B08 17 ITEM CODE Operation 1 Press the or ENTER key to enter B08 17 menu or ITEM CODE 1 ENABLE b08 17 ITEM CODE 1 2 Use the or key to confirm the meaning of each item code 0 Disable 1 Enable or 3 Key in the number 0 or 1 to determine whether or not to...

Page 49: ...0 Disable 1 Enable or 3 Key in the number 0 or 1 to determine whether or not to use the barcode type function and press the ENTER key or 2 8 18 B08 19 POS TYPE Operation 1 Press the or ENTER key to enter B08 19 menu or POS TYPE 1 ENABLE b08 19 POS TYPE 1 2 Use the or key to confirm the meaning of each item code 0 Disable 1 Enable or 3 Key in the number 0 or 1 to determine whether or not to use the...

Page 50: ...de 0 Disable 1 Enable or 3 Key in the number 0 or 1 to determine whether or not to use the POS function and press the ENTER key or 2 8 20 B08 21 POS CODE Operation 1 Press the or ENTER key to enter B08 21 menu or POS CODE 1 ENABLE b08 21 POS CODE 1 2 Use the or key to confirm the meaning of each item code 0 Disable 1 Enable or 3 Key in the number 0 or 1 to determine whether or not to use the POS c...

Page 51: ...0 or 1 to determine whether or not to use the open price function and press the ENTER key or 2 8 22 B08 23 COMMODITY MESSAGE Note that Commodity message can also be called Extra message Operation 1 Press the or ENTER key to enter B08 23 menu or COMMODITY MSG 1 ENABLE b08 23 COMMODITY MSG 1 2 Use the or key to confirm the meaning of each item code 0 Disable 1 Enable or 3 Key in the number 0 or 1 to...

Page 52: ...nable or 3 Key in the number 0 or 1 to determine whether or not to use the ingredients message function and press the ENTER key or 2 8 24 B08 25 NUTRITION INFORMATION PANEL MESSAGE Operation 1 Press the or ENTER key to enter B08 25 menu or NIP MESSAGE 1 ENABLE b08 25 NIP MESSAGE 1 2 Use the or key to confirm the meaning of each item code 0 Disable 1 Enable or 3 Key in the number 0 or 1 to determin...

Page 53: ...sable 1 Enable or 3 Key in the number 0 or 1 to determine whether or not to use the coupon message function and press the ENTER key or 2 8 26 B08 27 LOGO IMAGE 1 Operation 1 Press the or ENTER key to enter B08 27 menu or LOGO IMAGE 1 1 ENABLE b08 27 LOGO 1 1 2 Use the or key to confirm the meaning of each item code 0 Disable 1 Enable or 3 Key in the number 0 or 1 to determine whether or not to use...

Page 54: ...number 0 or 1 to determine whether or not to use the Logo Image 2 function and press the ENTER key or 2 8 28 B08 29 LABEL FORMAT NUMBER Operation 1 Press the or ENTER key to enter B08 29 menu or LABEL FMT No 1 ENABLE b08 29 FORMAT 1 1 2 Use the or key to confirm the meaning of each item code 0 Disable 1 Enable or 3 Key in the number 0 or 1 to determine whether or not to use the label format number...

Page 55: ...isable 1 Enable or 3 Key in the number 0 or 1 to determine whether or not to use the upper limit function and press the ENTER key or 2 8 30 B08 33 LOWER LIMIT Operation 1 Press the or ENTER key to enter B08 33 menu or LOWER LIMIT 1 ENABLE b08 33 LOWER 1 2 Use the or key to confirm the meaning of each item code 0 Disable 1 Enable or 3 Key in the number 0 or 1 to determine whether or not to use the ...

Page 56: ...le 1 Enable or 3 Key in the number 0 or 1 to determine whether or not to use the unit type function and press the ENTER key or 2 8 32 B08 35 DEPARTMENT CODE Operation 1 Press the or ENTER key to enter B08 35 menu or DEPT CODE 1 ENABLE b08 35 DEPARTMENT 1 2 Use the or key to confirm the meaning of each item code 0 Disable 1 Enable or 3 Key in the number 0 or 1 to determine whether or not to use the...

Page 57: ...le 1 Enable or 3 Key in the number 0 or 1 to determine whether or not to use the group code function and press the ENTER key or 2 8 34 B08 37 REGISTER CODE Operation 1 Press the or ENTER key to enter B08 37 menu or REGIST CODE 1 ENABLE b08 37 REGISTER 1 2 Use the or key to confirm the meaning of each item code 0 Disable 1 Enable or 3 Key in the number 0 or 1 to determine whether or not to use the ...

Page 58: ...ble or 3 Key in the number 0 or 1 to determine whether or not to use the cost price function and press the ENTER key or 2 8 36 B08 39 POP NUMBER Operation 1 Press the or ENTER key to enter B08 39 menu or POP NUMBER 1 ENABLE b08 39 POP 1 2 Use the or key to confirm the meaning of each item code 0 Disable 1 Enable or 3 Key in the number 0 or 1 to determine whether or not to use the POP number functi...

Page 59: ...ther or not to use the storage message function and press the ENTER key or 2 8 38 B08 42 ADVISORY MESSAGE Operation 1 Press the or ENTER key to enter B08 42 menu or ADVISORY MSG 1 ENABLE b08 42 ADVISORY MSG 1 2 Use the or key to confirm the meaning of each item code 0 Disable 1 Enable or 3 Key in the number 0 or 1 to determine whether or not to use the advisory message function and press the ENTER...

Page 60: ...r ENTER key to enter B09 01 menu or PLU 1 ENABLE b09 01 PLU 1 2 Use the or key to confirm the meaning of each item code 0 Disable 1 Enable or 3 Key in the number 0 or 1 to determine whether or not to use the PLU registration function and press the ENTER key or 2 9 2 B09 02 COMMODITY NAME REGISTRATION Operation 1 Press the or ENTER key to enter B09 02 menu or COMMODITY 1 ENABLE b09 02 COMMODITY 1 2...

Page 61: ...e the or key to confirm the meaning of each item code 0 Disable 1 Enable or 3 Key in the number 0 or 1 to determine whether or not to use the preset key function and press the ENTER key or 2 9 4 B09 05 STORE NAME ADDRESS Operation 1 Press the or ENTER key to enter B09 05 menu or STORE ADDR 1 ENABLE b09 05 STORE 1 2 Use the or key to confirm the meaning of each item code 0 Disable 1 Enable or 3 Key...

Page 62: ...le or 3 Key in the number 0 or 1 to determine whether or not to use the date and time function and press the ENTER key or 2 9 6 B09 07 COMMODITY MESSAGE Operation 1 Press the or ENTER key to enter B09 07 menu or COMMODITY 1 ENABLE b09 07 COMMODITY MSG 1 2 Use the or key to confirm the meaning of each item code 0 Disable 1 Enable or 3 Key in the number 0 or 1 to determine whether or not to use the ...

Page 63: ... 0 Disable 1 Enable or 3 Key in the number 0 or 1 to determine whether or not to use the open PLU function and press the ENTER key or 2 9 8 B09 09 ITEM LIST Operation 1 Press the or ENTER key to enter B09 09 menu or ITEM LIST 1 ENABLE b09 09 LIST 1 2 Use the or key to confirm the meaning of each item code 0 Disable 1 Enable or 3 Key in the number 0 or 1 to determine whether or not to use the item ...

Page 64: ...the number 0 or 1 to determine whether or not to use the RS232C communication function and press the ENTER key or Note Steps b09 11 through b09 19 are not available 2 9 10 B09 20 COUPON MESSAGE Operation 1 Press the or ENTER key to enter B09 20 menu or COUPON MSG 1 ENABLE b09 20 COUPON 1 2 Use the or key to confirm the meaning of each item code 0 Disable 1 Enable or 3 Key in the number 0 or 1 to d...

Page 65: ...sable 1 Enable or 3 Key in the number 0 or 1 to determine whether or not to use the ingredients message function and press the ENTER key or 2 9 12 B09 22 NIP MESSAGE Operation 1 Press the or ENTER key to enter B09 22 menu or NIP MESSAGE 1 ENABLE b09 22 NIP MESSAGE 1 2 Use the or key to confirm the meaning of each item code 0 Disable 1 Enable or 3 Key in the number 0 or 1 to determine whether or no...

Page 66: ...ble 1 Enable or 3 Key in the number 0 or 1 to determine whether or not to use the TCP IP communication function and press the ENTER key or 2 9 14 B09 24 OPERATOR SYSTEM Operation 1 Press the or ENTER key to enter B09 24 menu or OPERATOR 1 ENABLE b09 24 OPERATOR 1 2 Use the or key to confirm the meaning of each item code 0 Disable 1 Enable or 3 Key in the number 0 or 1 to determine whether or not t...

Page 67: ...able or 3 Key in the number 0 or 1 to determine whether or not to use the tiltle message function and press the ENTER key or 2 9 16 B09 26 ADVERTISEMENT MESSAGE Operation 1 Press the or ENTER key to enter B09 26 menu or SCROLL MSG 1 ENABLE b09 26 AD MSG 1 2 Use the or key to confirm the meaning of each item code 0 Disable 1 Enable or 3 Key in the number 0 or 1 to determine whether or not to use th...

Page 68: ...em code 0 Disable 1 Enable or 3 Key in the number 0 or 1 to determine whether or not to use the department function and press the ENTER key or 2 9 18 B09 28 GROUP Operation 1 Press the or ENTER key to enter B09 28 menu or GROUP 1 ENABLE b09 28 GROUP 1 2 Use the or key to confirm the meaning of each item code 0 Disable 1 Enable or 3 Key in the number 0 or 1 to determine whether or not to use the gr...

Page 69: ...u or CAMPAIGN 1 ENABLE b09 29 CAMPAIGN 1 2 Use the or key to confirm the meaning of each item code 0 Disable 1 Enable or 3 Key in the number 0 or 1 to determine whether or not to use the campaign function and press the ENTER key or 2 9 20 RETURNING TO B01 Operation Press the END key to return to B01 menu 1 LABEL FORMAT ENTER b01 LABEL FORMAT ...

Page 70: ...SS SETTING Operation 1 Press the or ENTER key to enter B10 01 menu or Æ IP ADDRESS SET ENTER b10 01 IP ADDRESS 2 10 1 1 B10 01 01 IP Address 1 Operation 1 Press the ENTER key to enter B10 01 01 menu IP ADDRESS 1 b10 01 01 ADDR 1 194 2 Key in the desired address and press the ENTER key 2 10 1 2 B10 01 02 IP Address 2 Operation 1 Press the or ENTER key to enter B10 01 02 menu or IP ADDRESS 2 b10 01 ...

Page 71: ...he ENTER key 2 10 1 4 B10 01 04 IP Address 4 Operation 1 Press the or ENTER key to enter B10 01 04 menu or IP ADDRESS 4 b10 01 04 ADDR 4 1 2 Key in the desired address and press the ENTER key 2 10 1 5 Returning to B10 01 Operation Press the END key to return to B10 01 menu Æ IP ADDRESS SET ENTER b10 01 IP ADDRESS 2 10 2 B10 02 GATEWAY ADDRESS SETTINGS Operation 1 Press the key to enter B10 02 ÆGAT...

Page 72: ... Address 2 Operation 1 Press the or ENTER key to enter B10 02 02 menu or GATEWAY ADDRESS 2 b10 02 02 ADDR 2 255 2 Key in the desired address and press the ENTER key 2 10 2 3 B10 02 03 Gateway Address 3 Operation 1 Press the or ENTER key to enter B10 02 03 or GATEWAY ADDRESS 3 b10 02 03 ADDR 3 255 2 Key in the desired address and press the ENTER key 2 10 2 4 B10 02 04 Gateway Address 4 Operation 1 ...

Page 73: ...10 03 SUBNET MASK Subnet Address is usually fixed as 255 255 255 0 Operation Press the key repeatedly until B10 03 menu appears or key in 3 and press the key to enter B10 03 menu directly yyy ÆSUBNET MASK SET ENTER b10 03 SUBNET 2 10 3 1 B10 03 01 Subnet Mask Address 1 Operation 1 Press the or ENTER key to enter B10 03 01 or SUBNET MASK 1 b10 03 01 ADDR 1 255 SUBNET MASK 1 b10 03 01 ADDR 1 255 2 K...

Page 74: ...ubnet Mask Address 3 Operation 1 Press the or ENTER key to enter B10 03 03 or SUBNET MASK 3 b10 03 03 ADDR 3 255 2 Key in the desired address and press the ENTER key 2 10 3 4 B10 03 01 Subnet Mask Address 4 Operation 1 Press the or ENTER key to enter B10 03 04 or SUBNET MASK 4 b10 03 04 ADDR 4 0 2 Key in the desired address and press the ENTER key 2 10 3 5 Returning to B10 01 Operation Press the E...

Page 75: ...Press the or ENTER key to enter B10 04 01 or SERVER ADDRESS 1 b10 04 01 ADDR 1 255 2 Key in the desired address and press the ENTER key 2 10 4 2 B10 04 01 Server Address 2 Operation 1 Press the or ENTER key to enter B10 04 02 or SERVER ADDRESS 2 b10 04 02 ADDR 2 255 2 Key in the desired address and press the ENTER key 2 10 4 3 B10 04 01 Server Address 3 Operation 1 Press the or ENTER key to enter ...

Page 76: ...nu Æ IP ADDRESS SET ENTER b10 01 IP ADDRESS 2 10 5 B10 05 LOGIN NAME REGISTRATION Operation 1 Press the key repeatedly until B10 05 menu appears or key in 5 and press the key to enter B10 05 menu directly yyy Æ LOGIN NAME SET ENTER b10 05 LOGIN 2 Press the ENTER key to enter text editing screen LOGIN NAME TEST 3 Key in alpha numeric characters using the keyboard and press the ENTER key LOGIN NAME ...

Page 77: ... ENTER key PASSWORD KYOTO 4 Press the END key to return to B10 01 menu Æ IP ADDRESS SET ENTER b10 01 IP ADDRESS 2 10 7 B10 07 MAC ADDRESS Operation 1 Press the key repeatedly until B10 07 menu appears or key in 7 and press the key to enter B10 07 menu directly yyy ÆMAC ADDRESS SET ENTER b10 07 MAC 2 10 7 1 B10 07 01 MAC Address 1 Operation 1 Press the or ENTER key to enter B10 07 01 or MAC ADDRESS...

Page 78: ...ress the or ENTER key to enter B10 07 03 or MAC ADDRESS 3 0017 b10 07 03 ADDR 3 2 Key in the desired address and press the ENTER key 3 Press the END key to return to B10 01 menu Æ IP ADDRESS SET ENTER b10 01 IP ADDRESS 2 10 8 B10 08 DHCP COMMUNICATION SETUP Operation 1 Press the key repeatedly until B10 08 menu appears or key in 8 and press the key to enter B10 08 menu directly or Æ DHCP SETUP ENT...

Page 79: ...ESS 2 10 9 B10 09 NETWORK STATUS Each setting related to network can be confirmed Operation 1 Press the key repeatedly until B10 09 menu appears or key in 9 and press the key to enter B10 09 menu directly yyy Æ NETWORK STATUS ENTER b10 09 STATUS 2 10 9 1 B10 09 01 DHCP Status Confirmation Operation Press the ENTER key to enter B10 09 01 menu to confirm DHCP status DHCP STATUS b10 09 01 DHCP 0 2 10...

Page 80: ...o enter B10 09 04 menu to confirm Subnet Mask or SUBNET MASK b10 09 04 S255 255 255 000 2 10 9 5 B10 09 05 Gatway Address Confirmation Operation Press the or ENTER key to enter B10 09 05 menu to confirm Gatway address or GATEWAY ADDR b10 09 05 G255 255 255 255 2 10 9 6 Returning to B10 01 Operation Press the END key to return to B10 01 menu Æ IP ADDRESS SET ENTER b10 01 IP ADDRESS 2 10 9 7 Returni...

Page 81: ...fault value 60 seconds Operation 1 Press the key repeatedly until B11 menu appears or key in 11 and press the key to enter B11 menu directly yyy 11 SYSTEM TIMER ENTER b11 SYSTEM TIMER 2 Press the ENTER key to enter B11 01 menu SYSTEM TIMER 10 1000sec b11 01 TIMER 60 3 Key in the desired time seconds and press the ENTER key 4 Press the END key to return to B01 menu 1 LABEL FORMAT ENTER b01 LABEL FO...

Page 82: ...ORD SETUP b12 00 2 12 1 B12 01 PASSWORD FOR REGISTRATION MODE Operation 1 Key in 495344 and press the ENTER key to enter B12 01 menu ª REGISTRATION b12 01 REGISTRATION 2 Key in a password 4 digits for entering Registration Mode and press the ENTER key Note Default value is 9000 2 12 2 B12 02 PASSWORD FOR TOTAL MODE Operation 1 Press the or ENTER key to enter B12 02 menu or TOTAL b12 02 TOTAL 2 Key...

Page 83: ... or ENTER key to enter B12 04 menu or SETUP b12 04 SETUP 2 Key in a password 4 digits for entering Setup Mode and press the ENTER key Note Default value is 6000 2 12 5 B12 06 PASSWORD CHANGE This procedure is to change the password by which password change mode can be accessed Operation 1 Press the or ENTER key to enter B12 06 menu or PASSWORD CHANGE b12 06 2 Key in a password 6 digits for proceed...

Page 84: ...Chapter 2 SETUP MODE 2 68 BC 4000 Service Manual No 085 6693 02 b01 LABEL FORMAT ...

Page 85: ... menu directly or 13 MACHINE NUM ENTER b13 MACHINE NUMBER 2 Press the ENTER key to enter B13 01 MACHINE NUMBER IP ADDR b13 01 NUMBER 0 3 Key in the desired machine number for communications and press the ENTER key Note Usually the last digit of IP address is set as the machine number to avoid double registration 4 Press the END key to return to B01 menu 1 LABEL FORMAT ENTER b01 LABEL FORMAT ...

Page 86: ...Chapter 2 SETUP MODE 2 70 BC 4000 Service Manual No 085 6693 02 2 14 EXITING THE MODE Operation Press the MODE key to exit the current mode KEY IN ITEM No 0 000 0 000 0 00 0 00 ...

Page 87: ...eset the machine Keep pressing any key other than the RESET key for a while until C00 menu appears on the display ÆTEST MODE PRESS KEY C00 When the power is turned OFF Turn ON the power and immediately press and keep pressing any key other than the RESET key for a while until C00 menu appears on the display ÆTEST MODE PRESS KEY C00 Note It will take approximately 30 seconds to enter test mode ...

Page 88: ...e ENTER key to enter C01 01 00 menu The original A D data appears ZERO ZERO SPAN TARE C01 01 00 20008 20008 2 Press the ZERO key to make the A D initial value 20000 Note 2000 is a data output from the A D board and 0 denotes that 2000 are regarded as zero point ZERO ZERO SPAN TARE C01 01 00 20000 0 3 After a zero point adjustment place the same weight as the maximum weighing capacity on the weigh ...

Page 89: ... and press the Memory Switch to store the data in E2ROM 5 Turn OFF and ON the power to restart the machine 3 2 1 2 Returning to C01 01 Operation Press the END key to return to C01 01 menu 1 A D CHECK ENTER C01 01 3 2 2 C01 02 Key Check Operation Press the key to enter C01 02 menu 2 KEY CHECK ENTER C01 02 ...

Page 90: ... 32 33 34 35 36 37 38 39 40 41 42 43 44 45 46 47 48 49 50 51 52 53 54 55 56 57 58 59 60 61 62 63 64 65 66 67 68 69 70 71 72 73 74 75 76 77 78 79 80 81 82 83 84 85 86 87 88 89 90 91 92 93 94 95 96 97 98 99 100 101 102 103 104 105 106 107 108 109 110 111 112 3 2 2 2 Returning to C01 01 Operation Press the RESET key to exit the key check menu and return to C01 01 menu 1 A D CHECK ENTER C01 01 3 2 3 C...

Page 91: ...ly until C01 04 menu appears yyy 4 RS232C CHECK ENTER C01 04 2 Press the ENTER key to enter C01 04 00 menu Æ RS232C CHECK PRINT C01 04 00 3 Press the PRINT key to output test data and judge by verifying received test data and sent data When the data matches PASS is displayed and OK buzzer sounds Æ RS232C CHECK END C01 04 00 PASS 4 To finish the check press the END key The screen will return to C01...

Page 92: ...eturning to C01 01 Operation Press the END key to return to C01 01 menu 1 A D CHECK ENTER C01 01 3 2 6 C01 06 BIOS Program Number Operation Press the key repeatedly until C01 06 menu appears yyy 6 BIOS PROG No ENTER C01 06 3 2 6 1 C01 06 00 Program Number Version Display Operation Press the ENTER key to enter C01 06 00 menu Program number and version of the BIOS program are displayed Æ BIOS No B05...

Page 93: ... Press the key repeatedly until C01 07 menu appears yyy 7 RESET COUNT ENTER C01 07 3 2 7 1 C01 07 00 Number of Reset Times Operation 1 Press the ENTER key to enter C01 07 00 menu The number of reset times is displayed CLEAR YES ZERO ZERO C01 07 00 0000 2 To clear the record press the ZERO key twice Otherwise press the END key The screen will return to C01 01 menu 3 2 7 2 Returning to C01 Operation...

Page 94: ... key twice to clear SRAM data PASS is displayed and OK buzzer sounds when data clear is completed Æ SRAM CLEAR OK C02 01 PASS 3 3 2 C02 02 Set Data Clear Operation 1 Press the ENTER key to enter C02 02 menu Æ SETUP CLEAR C02 02 2 Press the ZERO key twice to clear the set data PASS is displayed and OK buzzer sounds when data clear is completed Æ SETUP CLEAR OK C02 02 PASS 3 3 3 C02 03 Test Data Cle...

Page 95: ... 02 3 9 2 Press the ZERO key twice to clear the test data PASS is displayed and OK buzzer sounds when data clear is completed Æ TEST DATA SET OK C02 03 PASS 3 3 4 Returning to C01 Operation Press the END key to return to C01 menu 1 HARDWARE TEST ENTER C01 ...

Page 96: ...et after the thermal head is replaced Æ RESISTANCE 960 C03 01 2 Press the COPY key to read the ID from the thermal head and set it automatically or key in the resistance described on the head and press the ENTER key to save it in E2ROM or 3 4 2 C03 02 Print Usage Distance Operation 1 Press the key to enter C03 02 menu Total print distance of the thermal head can be confirmed It is displayed in 100...

Page 97: ...ss the key to enter C03 03 menu The thermal head print density can be adjusted Æ RESIST VALUE ÆADJ 5 C03 03 2 Key in the desired level 1 9 and press the ENTER key Density range 1 thinnest through 9 thickest Default value 5 3 4 4 Returning to C01 Operation Press the END key to return to C01 menu 1 HARDWARE TEST ENTER C01 ...

Page 98: ... Key in the label sensor resistance value 0 and 255 and press the ENTER key The difference between the label sensor output value when a label is detected and when a label is not detected must be 50 or greater Adjustment target value of the label sensor is as follows y When a label is not detected 150 10 y When a label is detected 50 10 or less Æ LABEL SENSOR 32 228 C04 00 3 5 2 Returning to C01 Op...

Page 99: ...ess the key to enter C05 menu directly yyy 5 TOTAL MEMORY ENTER C05 3 6 1 C05 00 Total Memory Remaining Memory Operation Press the ENTER key to enter C05 00 Total memory capacity and remaining memory capacity are shown on the screen Æ MEM 878 KB REM 845 KB C05 00 3 6 2 Returning to C01 Operation Press the END key to return to C01 menu 1 HARDWARE TEST ENTER C01 ...

Page 100: ...TER key Details of ROM Switch Address Content Default 0 Number of weight display digits 04 1 Number of price display digits 03 2 Number of unit price display digits 03 3 DC motor 2B 4 Fixed price product count addition 0 Price 1 Number 00 5 Weighing unit 00 6 Price calculation rounding 0 4 5 1 0 5 00 7 Relish period calculation of days 0 That day 1 Next day 00 8 Time rounding 00 9 Sub total label ...

Page 101: ...decimal point 3 Round off at the 2nd digit after decimal point 16 ITF barcode digit check calculation method 0 Odd number digits 3 1 Even number digits 3 00 25 LCD backlight color 0 Green 1 Orange 00 26 ITF bar code length ratio 0 4 2 1 5 2 00 Note Two color printing is not available 3 7 2 Returning to C01 Operation Press the END key to return to C01 menu 1 HARDWARE TEST ENTER C01 ...

Page 102: ...peration 1 Press the ENTER key to enter C07 00 Æ PEEL SENSOR 255 1 C07 00 2 Key in the resistance value 0 255 and press the ENTER key Æ PEEL SENSOR 255 186 C07 00 3 8 2 Returning to C01 Operation Press the END key to return to C01 menu 1 HARDWARE TEST ENTER C01 3 8 3 Exiting the Mode Operation Press the RESET key or turn ON and OFF the power to exit Test Mode or KEY IN ITEM No 0 000 0 000 0 0 0 00...

Page 103: ...e 2 fixing screws 2 Remove the 2 screws fixing the thermal head Screws Front cover Screws 3 Raise the thermal head lever 4 Dismount the thermal head and remove the communication harness connecting with the head Lever Thermal head Communication harness Note If the print is so light adjust the print darkness by moving the thermal head position back and forth and around as per step 2 above ...

Page 104: ...emoving the 2 fixing screws Screws Front cover 3 Raise the thermal head lever 4 Remove the 3 screws located on the bottom of the machine that are fixing the top cover Lever Screws 5 Remove the screw fixing the top cover of the printer unit 6 Detach the top cover 6 and the above cover and remove the communication cable connecting with the keyboard Screw Keyboard communication cable ...

Page 105: ...T REPLACEMENT BC 4000 Service Manual No 085 6693 02 4 3 7 Remove the screw fixing the roller bracket 8 Remove the gear after pulling out the gear stopper and remove the print roller Screw for roller bracket Gear stopper ...

Page 106: ...removing the 2 fixing screws Screws Front cover 3 Remove the 3 screws located on the bottom of the machine that are fixing the top cover 4 Remove the screw fixing the top cover of the printer unit Screws Screw 5 Detach the top cover and remove the communication cable connecting with the keyboard 6 Remove the 2 screws fixing the weigh platter Keyboard communication cable Screws ...

Page 107: ...n harness Screws 9 Detach the load cell by removing the 2 screws Screws Load cell Limit stopper Explanation When replacing with a new load cell always adjust the 4 limit stopper screws on the weigh platter holder Adjustment target There is no gap between the stopper screw and the pole when the 1 5 times weight of the weighing capacity is placed on the platter After the load cell has been replaced ...

Page 108: ...crews Screws Front cover 3 Remove the 3 screws located on the bottom of the machine that are fixing the top cover 4 Remove the screw fixing the top cover of the printer unit Screws Screw 5 Detach the top cover and disconnect the keyboard communication cable 6 Disconnect all harnesses connecting with the main board and dismount the A D board Keyboard communication cable Connectors Connector A D boa...

Page 109: ...Chapter 4 COMPONENT REPLACEMENT BC 4000 Service Manual No 085 6693 02 4 7 7 Dismount the main board by removing the 3 screws fixing the board Screws ...

Page 110: ... 2 fixing screws Screws Front cover 3 Remove the 3 screws located on the bottom of the machine that are fixing the top cover 4 Remove the screw fixing the top cover of the printer unit Screws Screw 5 Detach the top cover and remove the communication cable with the keyboard 6 Pull out the key sheet flat communication cable connectors Keyboard communication cable Key sheet cable connectors ...

Page 111: ...Chapter 4 COMPONENT REPLACEMENT BC 4000 Service Manual No 085 6693 02 4 9 7 Pull out the key sheet from the lower left side of the key sheet ...

Page 112: ...ACEMENT 1 Remove the weigh platter 2 Dismount the front cover of the printer unit by removing the 2 fixing screws Screws Front cover 3 Remove the 3 screws located on the bottom of the machine that are fixing the top cover 4 Remove the screw fixing the top cover of the printer unit Screws Screw ...

Page 113: ... 5 Detach the top cover and disconnect the communication cable with the keyboard 6 Disconnect the load cell communication harness on the A D board using a soldering tool and remove the A D board from the main board Keyboard communication cable Load cell communication harness ...

Page 114: ...nter unit by removing the 2 fixing screws Screws Front cover 3 Remove the 3 screws located on the bottom of the machine that are fixing the top cover 4 Remove the screw fixing the top cover of the printer unit Screws Screw 5 Detach the top cover and remove the communication cable with the keyboard 6 Pull out the 2 plugs on the power supply board Keyboard communication cable ...

Page 115: ...Chapter 4 COMPONENT REPLACEMENT BC 4000 Service Manual No 085 6693 02 4 13 7 Remove the 2 screws fixing the power supply board on the scale base and detach the power supply board Screws ...

Page 116: ...CEMENT 1 Remove the 2 screws fixing the display unit with the pole 2 Pull out the display unit and remove the flat cable connector of the display unit Screws Connector 3 Pull out the 6 rubber stopper fixing the display cover 4 Open the display cover Rubber stoppers Operator display Customer display ...

Page 117: ...ng the junction board Connectors Screws 7 Remove the 4 screws fixing the operator display board 8 Remove the connector on the display board and detach the operator display board Screws Connector 9 Remove the 4 screws fixing the customer display board 10 Remove the connector on the display board and detach the customer display board Screws Connector ...

Page 118: ...memo memo memo memo ...

Page 119: ... Press the CLEAR key to return to Normal Mode ERR0R 9 Label size error Press the CLEAR key to return to Normal Mode ERR0R 10 Discount price calculation mistake Press the CLEAR key to return to Normal Mode ERROR 11 Extra message 2 overflow Press the CLEAR key to return to Normal Mode ERROR 12 Extra message 3 overflow Press the CLEAR key to return to Normal Mode ERROR 13 Coupon message overflow Pres...

Page 120: ... power supply unit and replace it Weight error occurred 1 Limit stopper screw hits something 2 There is a foreign object under the load cell 3 A D board is defective 4 Load cell is defective 5 Main board is defective 1 Adjust the limit stopper screws 2 Remove the foreign body 3 Replace the A D board 4 Adjust the load cell and replace it 5 Check the main board and replace it A specific program cann...

Page 121: ...oard and replace it Printing cannot be performed 1 Head cable is defective 2 Power supply unit is defective 3 Thermal head is defective 4 Main board is defective 1 Confirm the power supply voltage 2 Confirm the permissible head voltage and replace the power supply unit 3 Adjust the head and replace it 4 Check the main board and replace it ...

Page 122: ...memo memo memo memo ...

Page 123: ... XJ16 T1 Load cell Scale board PS 229A PS 037 Key board Membrane keys CN1 CN2 CN3 Winding DC motor Label feeding Stepping motor Thermal head Peel sensor Label sensor Fixed resistor Power supply Power inlet Power switch Customer LCD Operator LCD LAN Ferrite core Connector XJ2 XJ4 XJ1 CN1 CN2 24V P 986 LCD junction board PS 990 Main board J2 XJ18 ...

Page 124: ...inding DC motor 7 XJ 11 4 Bipolar STEP MOTOR Label feeding stepping motor 7 XJ 12 6 UNI Polar STEP MOTOR 7 XJ 13 6 RS232C Machine Inside 8 XJ 14 9 RS232C 8 XJ 15 9 VFD IF AC 40000 8 XJ 16 26 KEY IF PS 037 Key board 9 XJ 17 2 External Memory Switch AC 40000 10 XJ 18 11 Scale IF PS 229A Scale board 10 XJ 19 2 DRAWER 10 XJ 20 20 LCD IF P 986 XJ1 11 XJ 21 6 DC24V INPUT Power supply CN2 12 XJ 22 2 LCD ...

Page 125: ... 229A SCALE BOARD Connector No Contacts Signal name Other end J1 5 Lord cell Analog level check Not used J 2 14 Scale IF output PS 990 XJ18 S B G W R 5 Lord cell connection terminal S Shield Wire B blue Wire G Green Wire W White Wire R Red Wire Lord cell J1 J2 S B G W R PS 229A ...

Page 126: ...D LCD DISPLAY Connector No Contacts Signal name Other end XJ1 20 LCD IF PS 990 XJ20 X J2 20 LCD output Customer LCD XJ3 6 Not used Not used XJ4 20 LCD output Operator LCD Dot matrix display 192 x 16 dots Upper Fluorescent display Lower P 986 XJ1 LCD1 XJ4 XJ2 XJ3 LCD2 P 986 Customer LCD Operator LCD ...

Page 127: ...e Manual No 085 6693 02 6 5 6 5 PS 037 KEY BOARD MEMBRANE KEYS Connector No Contacts Signal name Other end CN1 26 Key Data PS 990 XJ16 CN2 16 Key Data Membrane Keys CN3 8 Key Data Membrane Keys Membrane Keys PS 037 Key board CN1 CN3 CN2 PS 037 ...

Page 128: ...tric Assembly 6 6 BC 4000 Service Manual No 085 6693 02 6 6 POWER SUPPLY Model CWS100 24 Connector No Contacts Signal name Other end CN1 3 AC INPUT Power switch CN2 6 DC24V OUTPUT 1 3 24V 4 6 GND PS 990 XJ21 CN1 CN2 ...

Page 129: ...Chapter 6 Electric Assembly BC 4000 Service Manual No 085 6693 02 6 7 6 7 PS 990 MAIN BOARD CIRCUIT DRAWING ...

Page 130: ...Chapter 6 Electric Assembly 6 8 BC 4000 Service Manual No 085 6693 02 ...

Page 131: ...Chapter 6 Electric Assembly BC 4000 Service Manual No 085 6693 02 6 9 ...

Page 132: ...Chapter 6 Electric Assembly 6 10 BC 4000 Service Manual No 085 6693 02 ...

Page 133: ...Chapter 6 Electric Assembly BC 4000 Service Manual No 085 6693 02 6 11 ...

Page 134: ...Chapter 6 Electric Assembly 6 12 BC 4000 Service Manual No 085 6693 02 ...

Page 135: ...Chapter 6 Electric Assembly BC 4000 Service Manual No 085 6693 02 6 13 ...

Page 136: ...Chapter 6 Electric Assembly 6 14 BC 4000 Service Manual No 085 6693 02 ...

Page 137: ...Chapter 6 Electric Assembly BC 4000 Service Manual No 085 6693 02 6 15 ...

Page 138: ...Chapter 6 Electric Assembly 6 16 BC 4000 Service Manual No 085 6693 02 ...

Page 139: ...Chapter 6 Electric Assembly BC 4000 Service Manual No 085 6693 02 6 17 ...

Page 140: ...Chapter 6 Electric Assembly 6 18 BC 4000 Service Manual No 085 6693 02 ...

Page 141: ...memo memo memo memo ...

Page 142: ... 44 SANNO CHO SHOGOIN SAKYO KU KYOTO 606 8392 JAPAN PHONE 81 75 771 4141 FACSIMILE 81 75 751 1634 URL http www ishidajapan com Design and specifications are subject to change without notice ...

Reviews: