User Guide
7-3
7.2
Calibrate the Scanner
Calibrate only if the scanned image looks fuzzy, the color looks abnormal (e.g., darker than
normal), after more than 8,000 scans, or the scanner has been stored without use for a long
time. The calibration process resets the Contact Image Sensor to resume its color and
sharpness precision.
1.
Open the document extension plate.
2.
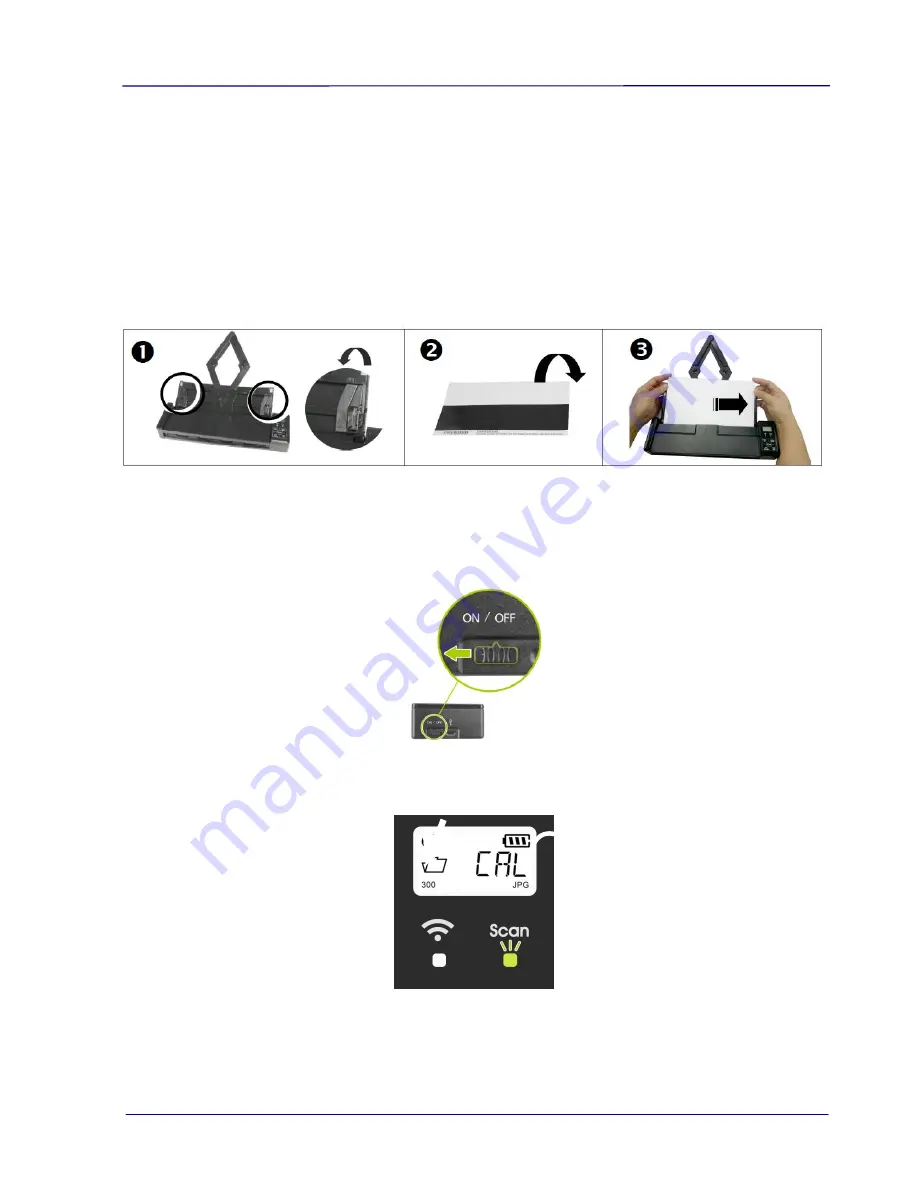
Make sure the Document Guides are unfolded as shown in the image (1).
3.
Hold the edges of the calibration sheet (which you find in the product box) and insert it
with the text FACING DOWN (2).
4.
Align it to the right and make sure the white area is fed first (3).
5.
Turn on the scanner by moving the Power switch to the [
ON
] position.
6.
To enter the calibration mode, press and hold the [
Color/BW
] until [
CAL
] is displayed
on the screen and the [
Scan
] LED flashes in
green
, indicating you are in calibration
mode
.
7.
Press the [
Scan
] button. The calibration sheet will be fed through.
8.
When the calibration process is finished, [OK] is displayed on the screen.
Summary of Contents for IRIScan Pro 3 Wifi
Page 15: ...2 2 3 Open the battery cover ...
Page 19: ...2 6 2 5 Install the Feed Extension Plate 1 Open the feed tray 2 Open the feed extension plate ...
Page 20: ...User Guide 2 7 3 Raise the document guides and adjust them to the size of your documents ...
Page 61: ...6 16 The entire document in B W The relative area in color ...
Page 73: ...7 6 3 Open the roller cover ...


