User Guide
6-15
3.
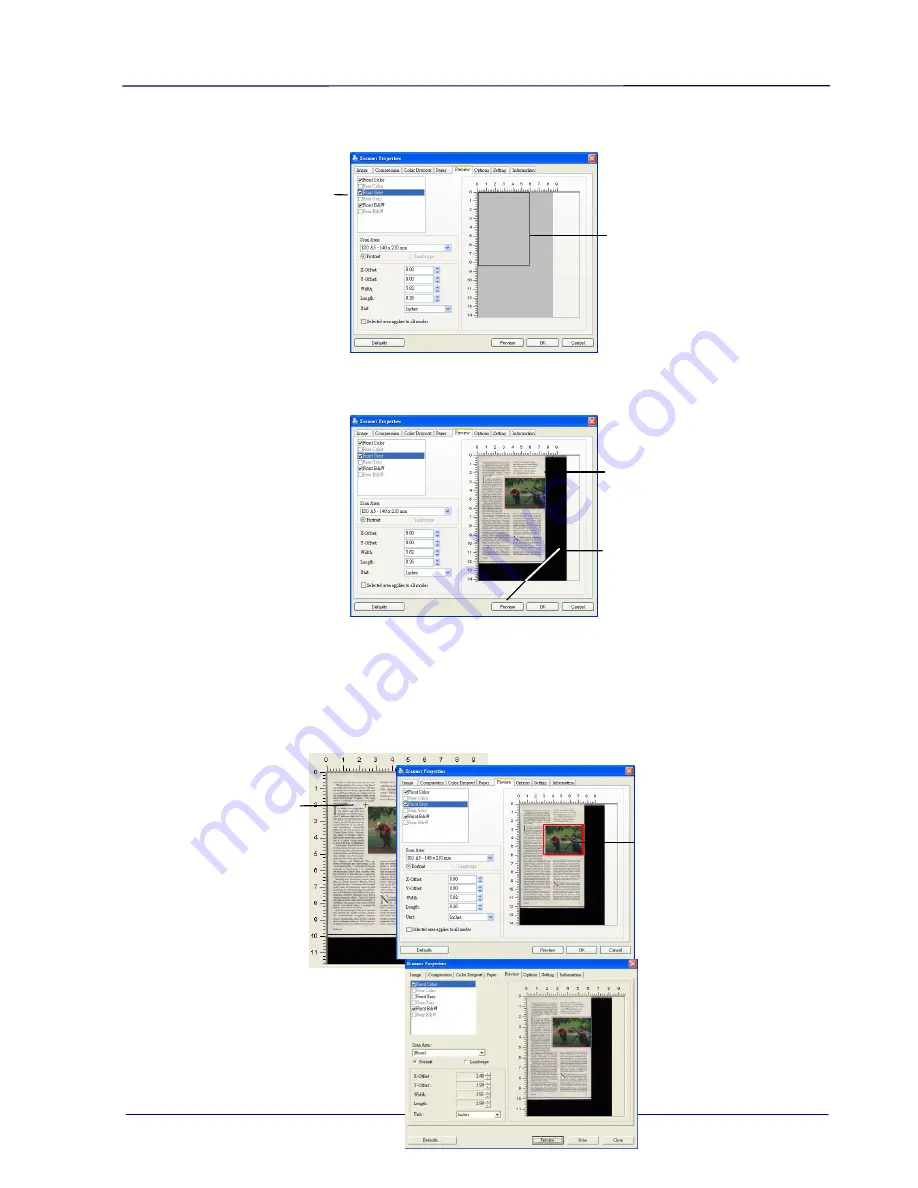
Click the Preview tab to display the Preview window. A black rectangular box appears to
indicate the max. scan size your have just selected.
4.
Click the Preview button to view the entire image in low resolution to correctly crop your
relative scan area.
5.
Select image type from the Image Selection box. The selected image will appear in
highlighted color. (For example, Front Color)
6.
Place your cursor on the Preview window and click your left mouse button. A cross sign
will appear as illustrated. Create your relative scan size diagonally by dragging the left
mouse button to your preferable size. The selected area will appear in a red box as
illustrated.
7.
Check the B&W image from the Image Selection box to scan the entire document.
8.
Click the Scan button to start scanning the document in two image types and sizes. (See
the result in below.)
A black
rectangular
box
The Preview
Image
The Relative
Area
A Cross
Sign
The Preview
Button
The Image
Selection
Box
Summary of Contents for IRIScan Pro 3 Wifi
Page 15: ...2 2 3 Open the battery cover ...
Page 19: ...2 6 2 5 Install the Feed Extension Plate 1 Open the feed tray 2 Open the feed extension plate ...
Page 20: ...User Guide 2 7 3 Raise the document guides and adjust them to the size of your documents ...
Page 61: ...6 16 The entire document in B W The relative area in color ...
Page 73: ...7 6 3 Open the roller cover ...


