background image

6

4. Positioning the Sensor Cam 

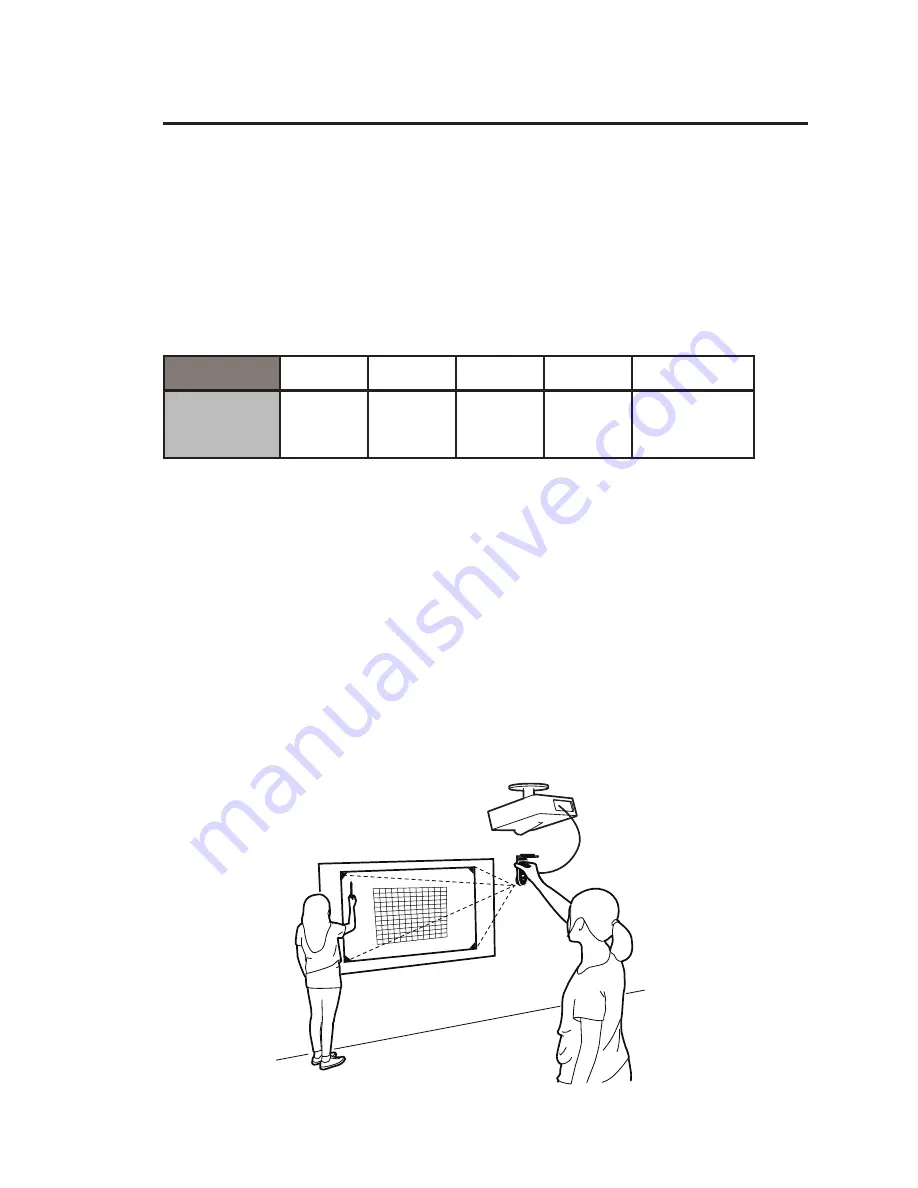
The optimum position for the Sensor Cam will be the same location 
as your ceiling-mounted short-throw projector. However, depending 
on the make and model of your projector, and even your screen size, 
there might be some exceptions. Please refer to the following chart for 
a general guideline:

Screen Size

50”

60”

70”

80”

90”~100”

Minimal 

Distance

1.6 ft

(50 cm)

2.0 ft

(60 cm)

2.3 ft

(70 cm) 

2.6 ft

(80 cm)

3.0~4.0 ft

(90~120cm)

For maximum accuracy, the Sensor Cam MUST be positioned and 
firmly affixed on your ceiling-mounted short-throw projector. Before 
affixing the Sensor Cam, please hold the Sensor Cam in an area just 
below (by a few inches) the projector and run the calibration
process once to make sure the Sensor Cam can indeed cover your 
whole projection screen. 

5. Securing the Sensor Cam

Installing IW2S (cont’d)

Summary of Contents for IW2S

Page 1: ...Quick Start Guide for IW2S Wireless Interactive Whiteboard System Short Throw Version...

Page 2: ...to control your computer s cursor And if you have any annotation software installed on your computer you can also use IW2S to draw annotate on your projection screen Emits infrared signals on contact...

Page 3: ...conds to enter Pairing Mode By default no pairing action is required the Sensor Cam and Wireless Receiver you received are already paired However if you are using a replacement Wireless Receiver or Se...

Page 4: ...longer for a right click Press twice for a dou ble click Wrist Strap Attachment Holes Attach the included wrist strap here Wireless Receiver Plug it into your computer for a wireless connection betwee...

Page 5: ...wrist strap into the attachment holes Turn on the pen when ready to use 2 Readying the Interactive Pen Turn on 3 Connecting Sensor Cam to Computer To connect the Sensor Cam wirelessly to your computer...

Page 6: ...on the Interactive Pen Next check the LED indicator of the Sensor Cam It will light up Green once it is successfully connected to your computer Green Light Press the Sensor Power Button 2 Detach the...

Page 7: ...ine Screen Size 50 60 70 80 90 100 Minimal Distance 1 6 ft 50 cm 2 0 ft 60 cm 2 3 ft 70 cm 2 6 ft 80 cm 3 0 4 0 ft 90 120cm For maximum accuracy the Sensor Cam MUST be positioned and firmly affixed on...

Page 8: ...Remove the sticker 6 Calibration IW2S must be calibrated before it can be used To start the process please click on the IW Driver icon located in the task bar or status bar and choose Calibrate To co...

Page 9: ...and on the user is encouraged to try to correct the interference by one or more of the following measures FCC Caution Any changes or modifications not expressly approved by the party responsible for c...

Page 10: ...ved IPEVO IPEVO Annotator IW2S the IPEVO logo and other IPEVO marks are owned by IPEVO Inc and may be registered All other trademarks are the property of their respective owners Customer Service Email...

Reviews: