


ioSelect Inc.
IOS EtherWave User’s Guide
31-Aug-09
Page 9 of 13
1-858-537-2060
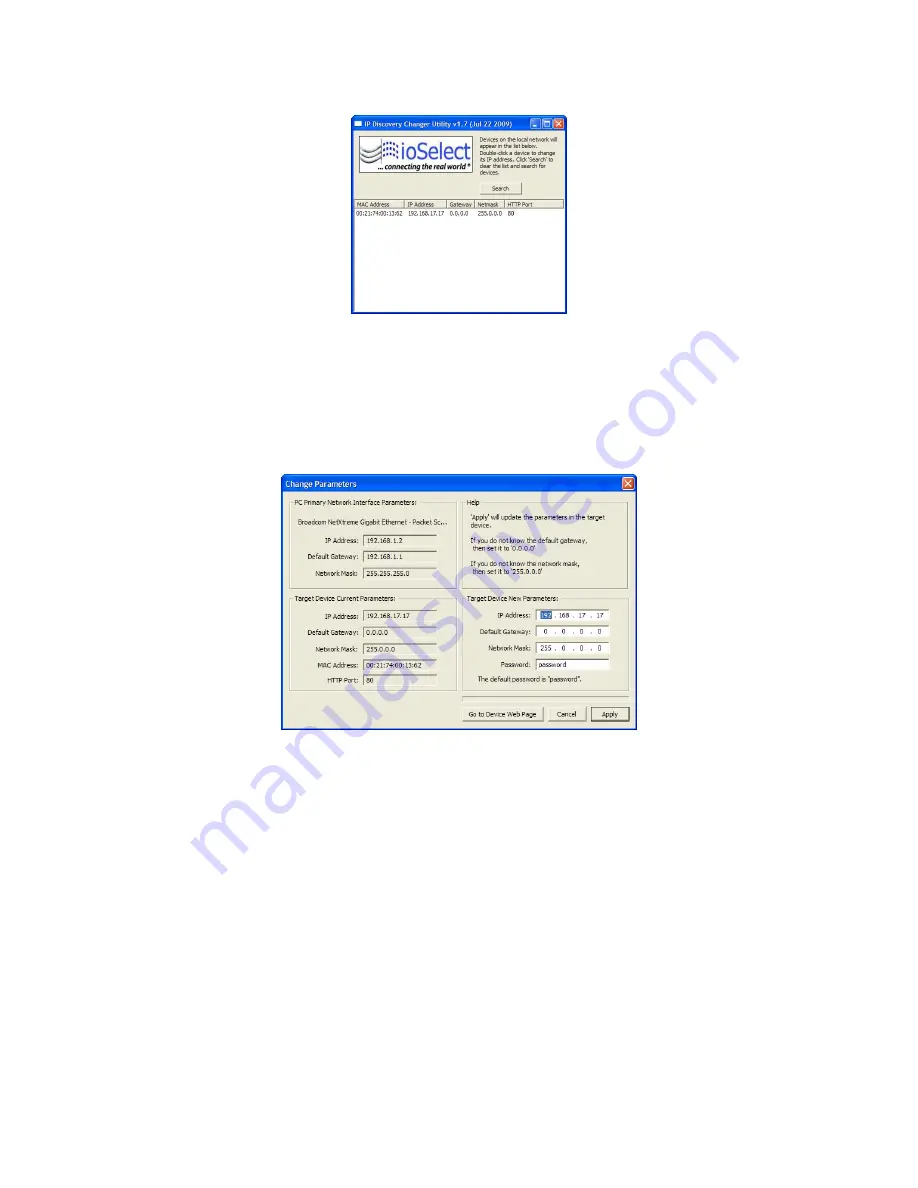
3) Run the EtherWave IP Utility and you should see a window similar to this:
The EtherWave should appear in the list at the default IP address of 192.168.17.17. If it does not,
click “Search” to regenerate the list. If it still does not appear, you have a connection issue and
need to re-examine the cabling or you may have a firewall issue on your computer.
4) Double click the list item that refers to the EtherWave being configured. You should see a
second window that is similar to this:
The information on the left is the current status of the radio, while the boxes on the right allow
you to change it. It is important that the IP address of the EtherWave is in the same subnet as
your computer. For example, if the subnet mask is 255.255.255.0 (a class C network), the first
three number groups of the IP address must match. Choose your desired parameters and click
“Apply.”
5) Make note of the chosen IP address and password, then click “Go to Device Web Page.” This
will cause your default web browser to launch with the device IP address in the browser
address bar. Or you may launch the browser on your own and enter the web page address
manually: http://[the IP address you just set].
6) The browser page (http://[the address of the unit]) that loads first shows the current device
information and QoS statistics and provides a login at the upper right. Log in using the
password you just specified (or “password” if you kept the default). If the login succeeds, you
will see an admin page similar to this: