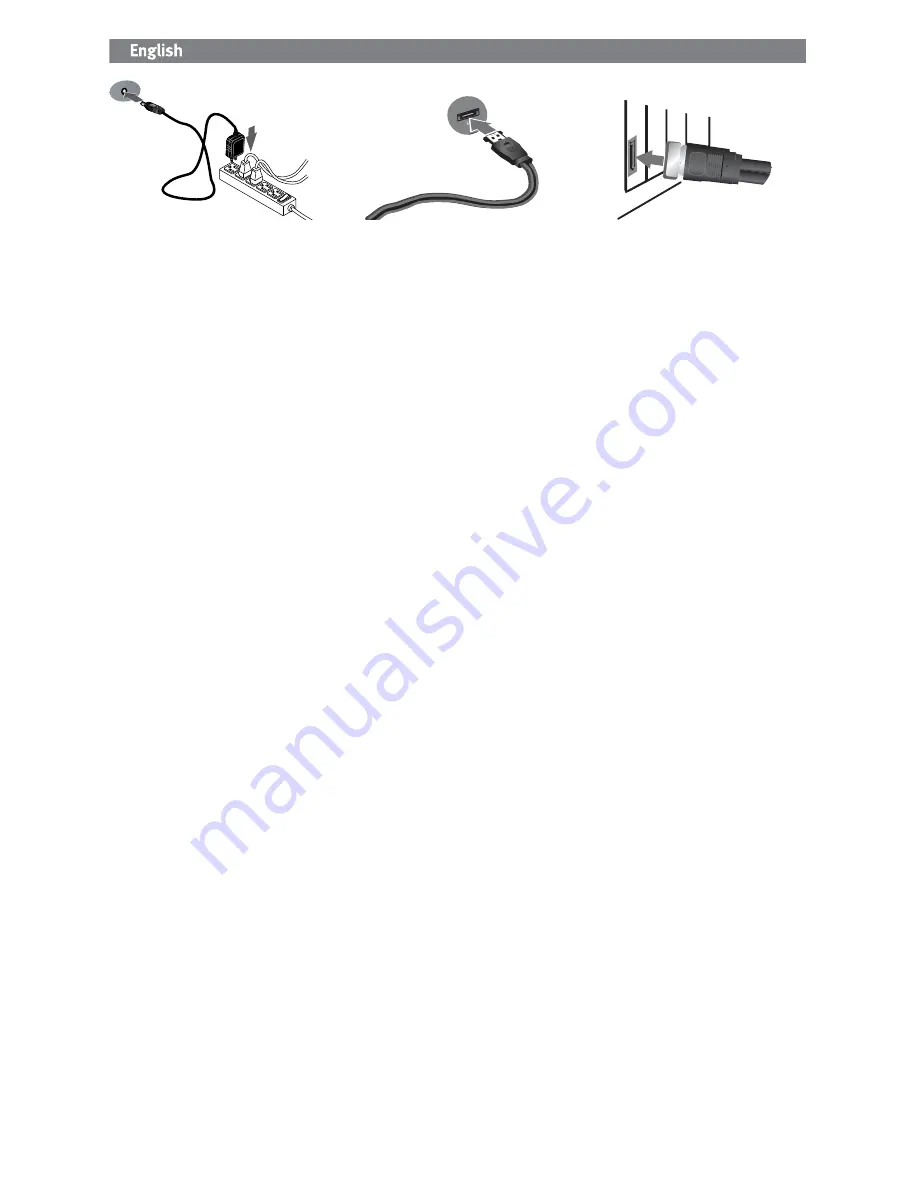
4
SA
TA
S
A
TA
Quick Install
For best performance, connect the drive to an eSATA PCI
card or a built-in external eSATA connection. Connect
the drive to USB if a supported eSATA connection is not
available.
1. If you are connecting to an eSATA PCI card, make sure
the drivers for the card have been installed and the
card is properly recognized by your operating system.
NOTE:
You do not need to install special drivers for
the Iomega Professional Hard drive. It is supported
by the drivers included with the eSATA PCI card. If
you are using a built-in eSATA connection, the drive is
supported by native drivers in the operating system.
2. Shut down the computer.
NOTE:
The eSATA interface is NOT plug-and-play.
Always shut down the computer before connecting or
disconnecting the drive.
3. Connect the included power supply to the back of the
drive. Place the drive on a stable surface and connect
the power supply to a power outlet.
CAUTION!
To avoid damage to the power supply
connector, make sure it is aligned correctly before
plugging it into the drive. Do not move the drive while
it is powered up to avoid drive damage or data loss.
4. Identify the eSATA cable and connect it to the back
of the drive.
Never
connect the drive to the computer
with more than one cable.
5. Connect the other end of the cable to your eSATA PCI
card or built-in eSATA connection.
6. Turn on the power switch on the back of the drive and
restart your computer.
PC Users:
The drive icon should appear in My
Computer or Windows Explorer.
Mac Users:
You will need to reformat the drive. See
instructions to the right.
Formatting the Drive for Mac OS
The drive ships formatted NTFS. Use Disk Utility to reformat
the drive
Mac OS Extended Journaled
.
NOTE:
The following instructions work for Mac OS X, version
10.4 or above. For Mac OS X version 10.1 through 10.3.9,
use Disk Utility, Erase to format the drive. See Mac Help if
you need more detailed instructions.
1. Select
Applications
→
Utilities
→
Disk Utility
2. In the left hand column, click on the drive icon for the
Iomega Hard Drive. Make sure you click on the orange
drive icon, not the volume icon.
3. Select
the
Partition
tab.
4. Select
Mac OS Extended (Journaled)
from the
Format
drop-down menu.
5. Click on the
Options
button.
6. Select the type of partition needed for your Mac:
GUID Partition Table
for bootability on an Intel-based
Macintosh computer.
Apple Partition Map
for a PowerPC-based Mac.
7. Click
OK
.
8. Click
the
Partition
button. The drive is ready to use
when the format completes.


