


Rea® Clematis®
4 Components
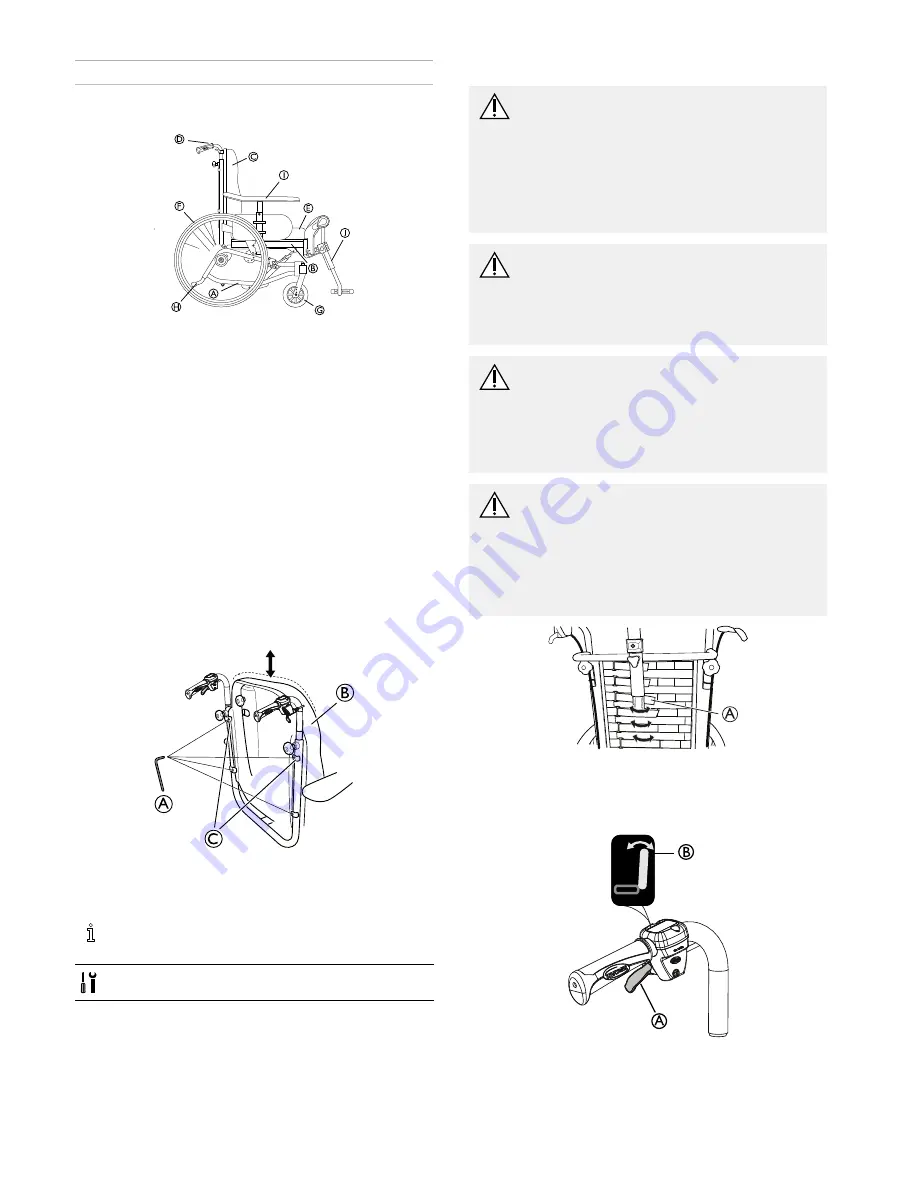
4.1 Wheelchair overview
A
B
C
D
E
F
G
H
I
J
A
Frame, lower section
B
Seat frame
C
Backrest
D
Push handles
E
Seat
F
Rear wheel
G
Castors
H
Step tube/Anti-tip device
I
Armrests
J
Legrests
4.2 Backrest
4.2.1 Adjusting the backrest plate
A
B
C
1.
Loosen the four screws
A
.
2.
Adjust the backrest
B
to the desired height.
3.
Re-tighten the screws firmly.
The brackets for the backrest
C
should be placed
as high as possible.
5 mm allen key
4.2.2 Adjusting the “Laguna” tension adjustable backrest
WARNING!
Risk of injury
The position of the head could cause neck and/or
breathing problems for the user if the velcro®
straps come loose at the top of the backrest.
– Make sure that the velcro® only has a minimum
of 6 cm overlap distance. Press the velcro®
straps firmly together and make sure that they
stay fixated.
WARNING!
Risk of tipping backwards
When using a tension adjustable backrest, the
center of gravity is moved backwards.
– Always use anti-tip devices and make sure that
the balance of the chair is stable.
WARNING!
Risk of pressure sores
When the backrest is in the most reclined
position, there is a risk of pressure sores.
– Make sure that there are no pressure areas
and monitor the user and make adjustments in
order to avoid pressure sores.
WARNING!
Risk of injury
Too much slack on the velcro® when using cover
Lateral and neckrest bow/pole can cause pressure
sores.
– Make sure that there is a space between the
backrest and the neckrest bow/pole in order to
avoid pressure sores.
A
1.
Adjust the shape of the “Laguna” tension adjustable
backrest with the velcro® straps
A
.
4.2.3 Adjusting the backrest angle
A
B
10
1439960-D