8
Setup for the 8.4” Screen Systems
1. Start vehicle and wait for systems to load completely.
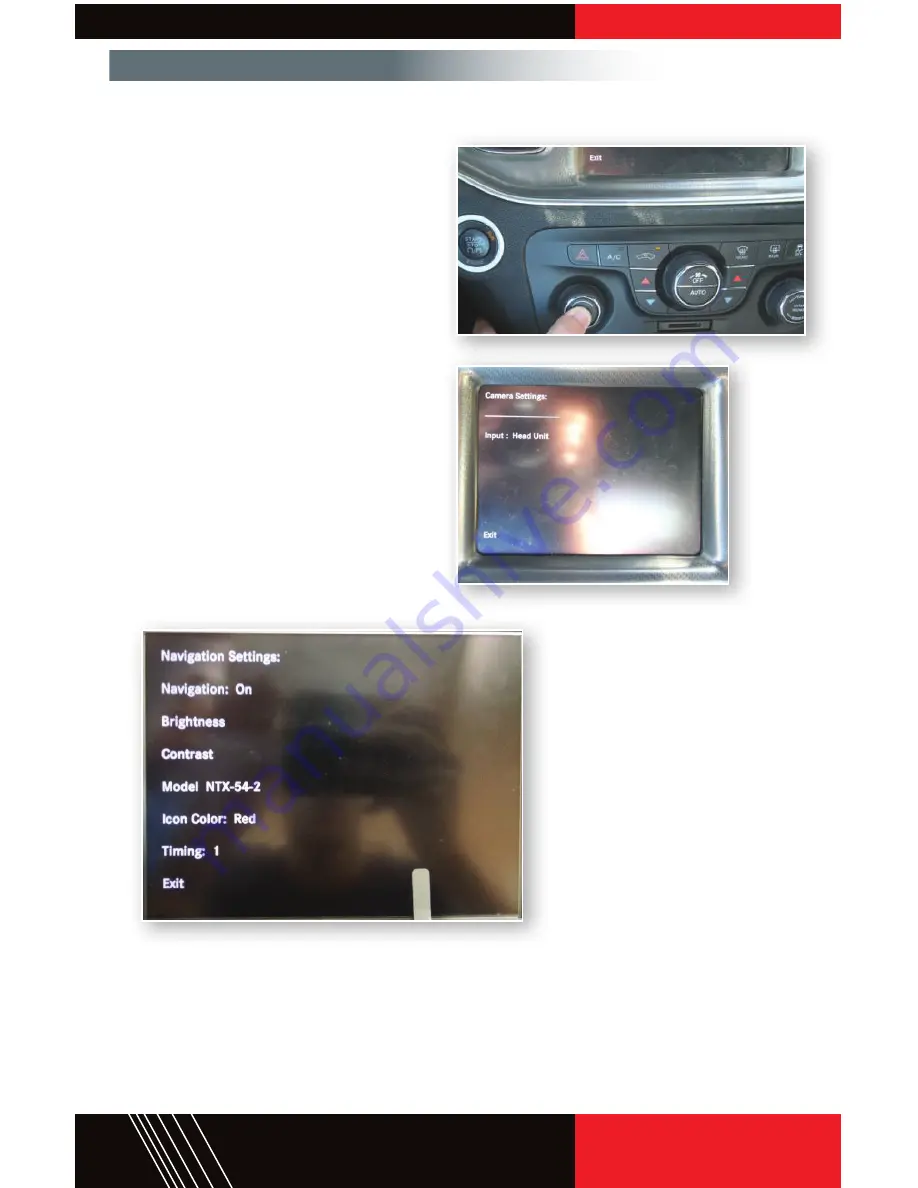
2. Press and hold the “Power” button
(located in the center of the volume
knob) for about 5 seconds.
3. If you are adding an aftermarket camera,
first select “Camera Input Settings.” In
this menu, select “Video 2” (this is where
you should have connected your CVBS
camera input previously in the install. If
the vehicle came with a factory backup
camera, select “Head Unit,” and if you
have no camera at all, select “Off.” Once
you have found your desired setting click
“Exit” to get back to the main menu.
4. Enter the “Navigation Input Settings”
menu. In this menu you will need to
change the “Model” setting to “WP.”
Once you have made this selection, you
can exit via the soft key.
5. In the same menu, you will also see a
selection for “Timing.” Leave it at its
default setting for the time being.
6. Once you are done, use the
soft exit key to get out of the
UCI-11C menu.
7. Turn vehicle off, shut all
doors, windows, hood, and
trunk. Lock vehicle and wait 3
minutes for the vehicle’s CAN
system to shut down. At this
point all settings should have
saved.
8. After the CAN system has
shut down, look at the factory
“soft buttons” at the bottom of
the screen. If they look like they
are cut off, go back into the
“Navigation Settings Menu” and change the timing to the other option (there are only two of
them). Exit via the soft exit key, and follow steps 6 and 7.
9. From the settings menu you may also make adjustments to Brightness, Contrast, Saturation
as you would like. Make sure all functions and display are correct before re-assembling
vehicle.


