background image

133

SAVE THESE INSTRUCTIONS

Page 24

(133)  MODEL CS8111  SALTWATER SYSTEM & FILTER PUMP  ENGLISH  7.5” X 10.3”  PANTONE 295U  11/17/2011

English

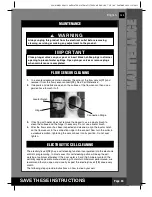
FLOW SENSOR CLEANING

ELECTROLYTIC CELL CLEANING

MM

AAII

NNTT

EENN

AANN

CCEE

IMPORTANT

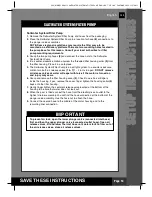
Close plunger valves on your pool or insert black hat-like plugs in strainer
opening to prevent water spillage. Open plunger valves or remove plugs
when maintenance is completed.

WARNING

Always unplug this product from the electrical outlet before removing,
cleaning, servicing or making any adjustment to the product.

1.

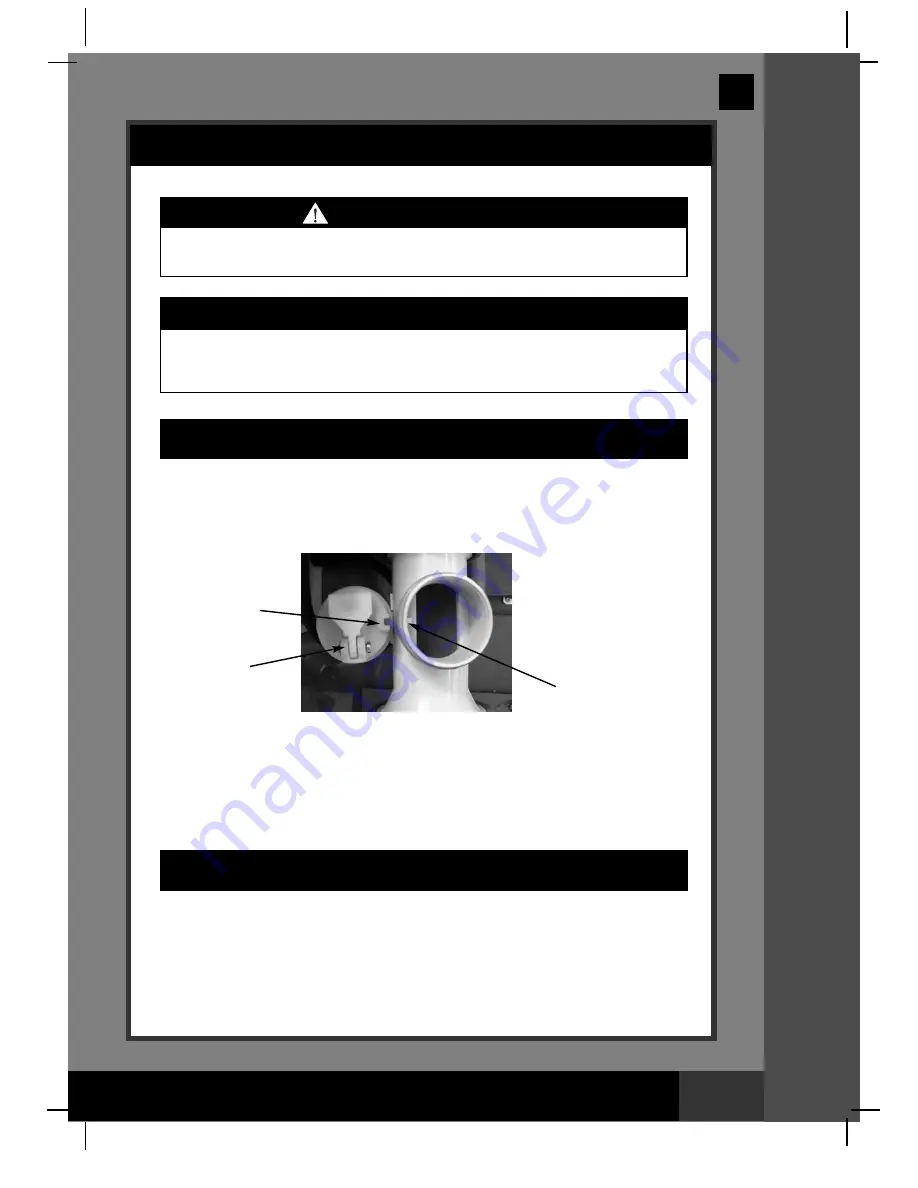
In a counter-clockwise motion unscrew the collar of the flow sensor 

(11) 

and 

remove it from the flow sensor conduit 

(15)

. See “Part Reference”.

2. 

If deposits and debris are seen on the surface of the flow sensor, then use a 
garden hose to wash it off.

3.

If flushing with water does not remove the deposits, use a plastic brush to 
clean the surface and the hinge if necessary. Do not use a metal brush.

4. 

After the flow sensor has been inspected and cleaned, align the locator notch 
on the flow sensor to the connection ridge in the conduit. Now turn the collar in 
a clockwise motion, tightening the sensor back into its position. Do not over 
tighten.

Connection Ridge

Locator Notch

Hinge

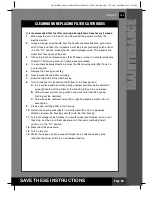
The electrolytic cell 

(13)

has a self cleaning function incorporated into the electronic

control's programming. In most cases this self cleaning action will keep the cell
working at optimum efficiency. If the pool water is hard (high mineral content) the
cell may require periodic manual cleaning. To maintain maximum performance, we
recommend that you open and visually inspect the electrolytic cell 

(13) 

once every

month.
The following steps provide instructions on how to clean your cell.

MAINTENANCE

Summary of Contents for Saltwater System CS8111

Page 1: ...MP PO OR RT TA AN NT T DO NOT RETURN PRODUCT TO STORE To purchase parts and accessories or to obtain non technical assistance Visit www intexcorp com For technical assistance and missing parts call us...

Page 2: ...ons 11 14 Salt Pool Water Volumes 15 Intex Pools Salt Table 16 Intex Pools Operating Time Table 17 Intex Pools Cyanuric Acid Table 18 Non Intex Pools Salt Table 19 Non Intex Pools Operating Time Table...

Page 3: ...uct The unit is provided with a ground fault circuit interrupter GFCI To test the GFCI push the test button The GFCI should interrupt power Push the reset button power should be restored If the GFCI f...

Page 4: ...111 SALTWATER SYSTEM FILTER PUMP ENGLISH 7 5 X 10 3 PANTONE 295U 11 17 2011 English P P A A R R T T S S L L I I S S T T PARTS LIST NOTE Drawings for illustration purpose only Actual product may vary N...

Page 5: ...ENGLISH 7 5 X 10 3 PANTONE 295U 11 17 2011 English 16 17 18 19 20 21 22 23 24 25 26 27 28 29 30 PARTS LIST continued P P A A R R T T S S L L I I S S T T NOTE Drawings for illustration purpose only Ac...

Page 6: ...mpliance could void the user s authority to operate the equipment This equipment has been tested and found to comply with the limits for Class B digital device pursuant to part 15 of the FCC Rules The...

Page 7: ...R RELEASE VALVE B WITH O RING PUMP HOSE WITH NUTS WATER TRANSFER HOSE WITH COLLAR AND 2 HOSE CLAMPS SCREW FLOW SENSOR O RING A ELECTROLYTIC CELL WITH 2 SCREWS O RING A INCLUDED COPPER ELECTRODE FLOW S...

Page 8: ...T T S S R R E E F F E E R R E E N N C C E E PARTS REFERENCE continued Before assembling your product please take a few minutes to check the contents and become familiar with all the parts NOTE Drawing...

Page 9: ...11072 11131 19635 11254 QTY 2 2 2 2 1 2 2 1 1 1 1 1 DESCRIPTION PLUNGER VALVE HOSE O RING STEP WASHER INCLUDED HOSE O RING STEP WASHER STRAINER NUT FLAT STRAINER RUBBER WASHER THREADED STRAINER CONNEC...

Page 10: ...er flows through the saltwater system s electrolytic cell to produce HCLO The HCLO dissolves in the water and instantly starts destroying bacteria and algae It also oxidizes all other organic material...

Page 11: ...p rubber washer 21 3 Grasp the plunger valve assembly Make sure the step washer 21 is in place Connect adaptor B 26 to plunger valve union 4 Repeat steps 1 through 3 for nozzle and plunger valve mecha...

Page 12: ...iner and plunger valve at the lower position of pool outlet marked From the inside of the pool liner insert the connector 24 into one of the pre cut holes with the washer remaining on the connector to...

Page 13: ...Then with the flat side of the strainer nut 22 facing the outside wall of the liner in a clockwise motion screw the strainer nut 22 back onto the threaded connector 24 see drawing 6 6 Finger tighten t...

Page 14: ...is an airtight system In a counter clockwise motion turn both air release valves 1 7 1 2 turns to open DO NOT remove air release valves as water will expel with force if the motor is turned on and in...

Page 15: ...om the pool Salt is not lost due to evaporation Adding Salt 1 Switch on the unit then press and hold both and button for 5 seconds the LED flashes FP The unit is now in a Filter pump working mode and...

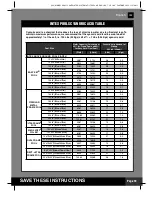
Page 16: ...2 549cm x 132cm 20 x 52 610cm x 132cm 24 x 48 732cm x 122cm 24 x 52 732cm x 132cm 16 x 48 488cm x 122cm 18 x 52 549cm x 132cm 16 8 x 49 508cm x 124cm 18 8 x 53 569cm x 135cm 18 x 10 x 42 549cm x 305cm...

Page 17: ...x 48 457cm x 122cm 16 x 48 488cm x 122cm 18 x 48 549cm x 122cm 18 x 52 549cm x 132cm 20 x 52 610cm x 132cm 24 x 48 732cm x 122cm 24 x 52 732cm x 132cm 16 x 48 488cm x 122cm 18 x 52 549cm x 132cm 16 8...

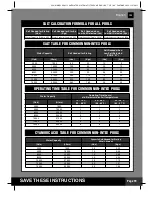
Page 18: ...cm 18 x 52 549cm x 132cm 15 x 36 457cm x 91cm 15 x 42 457cm x 107cm 15 x 48 457cm x 122cm 16 x 48 488cm x 122cm 18 x 48 549cm x 122cm 18 x 52 549cm x 132cm 20 x 52 610cm x 132cm 24 x 48 732cm x 122cm...

Page 19: ...rtup Lbs Salt Needed for Startup Kgs Salt Needed when Low Salt Detected Lbs Salt Needed when Low Salt Detected Kgs Water Capacity Gals x 0 025 Water Capacity Liters x 0 003 Water Capacity Gals x 0 006...

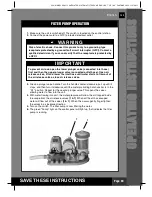
Page 20: ...ure will allow the air trapped inside to escape from the air release valves 1 7 When all the air has escaped water will flow out of the valves 1 7 When this occurs gently finger tighten the valves in...

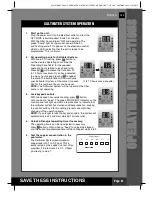
Page 21: ...now activate your Saltwater System at the same time each day for the number of hours you have set NOTE The Saltwater System will not operate if the filter pump is not operating 3 Lock keypad controls...

Page 22: ...rtant that the free chlorine is between 0 4 1 5 ppm and copper ion concentration is between 0 1 0 2 ppm When the copper level is below 0 1 ppm repeat step 6 NOTE A High copper ion concentration may ca...

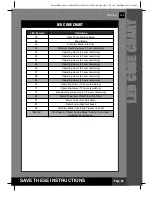
Page 23: ...s 3 hours remaining 04 Operating Hours 4 hours remaining 05 Operating Hours 5 hours remaining 06 Operating Hours 6 hours remaining 07 Operating Hours 7 hours remaining 08 Operating Hours 8 hours remai...

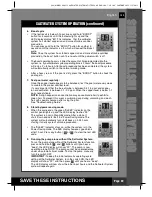
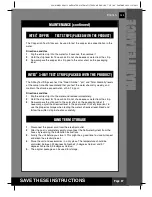
Page 24: ...hen use a garden hose to wash it off 3 If flushing with water does not remove the deposits use a plastic brush to clean the surface and the hinge if necessary Do not use a metal brush 4 After the flow...

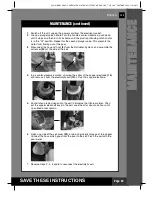
Page 25: ...from flowing out of the pool 3 Disconnect the hose with nut 8 from the Saltwater System and assemble the cell cover 30 at the side of the cell 4 In a counter clockwise motion unscrew the collar of th...

Page 26: ...ousing cover 4 6 Now remove the used filter cartridge 7 Examine the inside of the filter housing 8 If dirt or sediment is located on the bottom of the housing then A In a counter clockwise motion gent...

Page 27: ...immediately 2 Hold the strip level for 15 seconds Do not shake excess water from the strip 3 Now compare the strip pad to the color chart on the packaging label If necessary adjust the chemical level...

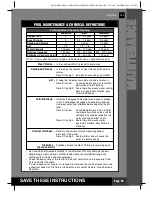
Page 28: ...ion is Result if too low Corroded metals eye skin irritation destruction of total alkalinity Result if too high Scale formation cloudy water shorter filter runs eye skin irritation poor Chlorine effic...

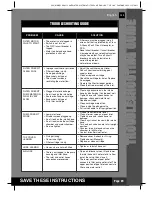
Page 29: ...outlet that is protected by a Class A Ground Fault Circuit Interrupter or RCD Reset circuit breaker If circuit breaker trips repeatedly your electrical system may have a defect Turn off circuit breake...

Page 30: ...ng Instructions Use PH decrease chemical to adjust contact your local pool chemical store Increase the operating time per day See Operating Instructions Remove the cell for inspection clean it if nece...

Page 31: ...lter pump manual Check the direction of the inlet and the outlet hose Reverse the hoses if necessary See Set Up Instructions Check that the arrow on the flow sensor conduit points in the same directio...

Page 32: ...and around the pool Learn to swim Take the time to learn CPR and first aid Instruct anyone who is supervising pool users about potential pool hazards and about the use of protective devices such as l...

Page 33: ...disputes regarding the provisions of this Limited Warranty shall be brought before an informal dispute settlement board and unless and until the provisions of these paragraphs are carried forth no civ...

Page 34: ...el 507 300 3800 NICARAGUA Fax 507 300 3813 E mail suproadmin supropanama com COSTA RICA CENTURY USA LLC DOMINICAN REPUBLIC 4731 W Atlantic Ave Suite B 3 GUATEMALA Delray Beach FL 33445 USA COLOMBIA Te...

Page 35: ...roits r serv s Todos los derechos reservados Alle Rechte vorbehalten Printed in China Imprim en Chine Impreso en China Gedruckt in China Trademarks used in some countries of the world under license fr...

Reviews: