background image


10 

First steps 

General vision 


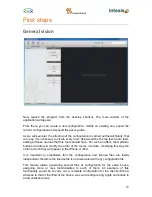
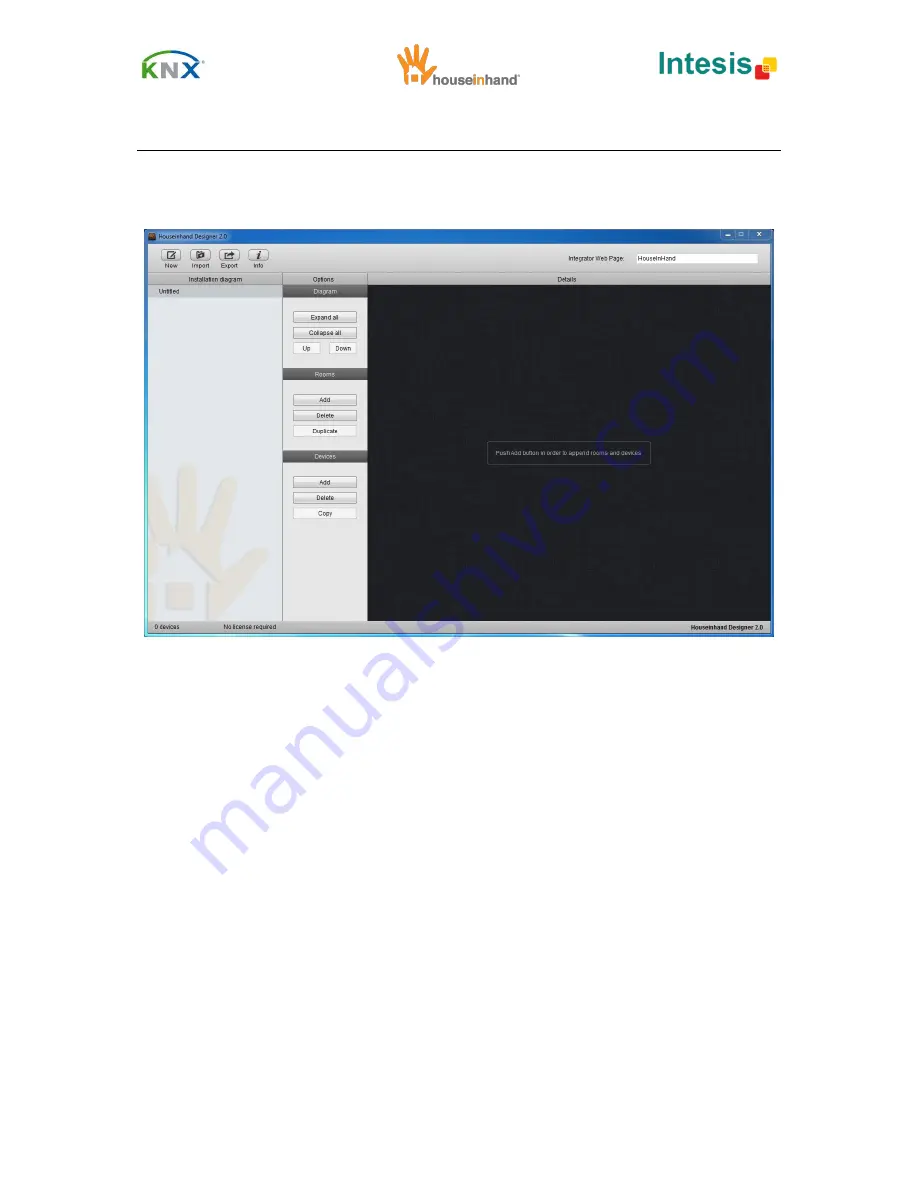
Now,  launch  the  program  from  the  desktop  shortcut.  The  main  window  of  the 
application will appear. 
  
From  there,  you  can  create a  new  configuration,  modify  an  existing  one,  export  the 
current configuration 

and consult the user’s guide.  

 
As we will see later, the structure of the configuration is carried out hierarchically, that 
is to say, it is necessary to create every room (that would be the top level) and, later, 
adding all those devices that this room should have. For such an effect, the Up/Down 
buttons will allow to modify the order of the rooms / devices, modifying this way the 
order in which they will appear in the iPhone or iPad. 
 
It  is  important  to  emphasize  that  the  configuration  and  license  files  are  totally 
independent; therefore the license file is not associated with any configuration file. 
 
This  feature  allows  generating  several  files  of  configuration  for  the  same  house, 
assigning  more  or  less  functionalities  to  each  of  them.  An  example  of  this 
functionality  would  be  to  carry  out  a  complete  configuration  for  the  client's  iPhone; 
whereas to that of the iPad of the house, we could configure only lights and blinds to 
avoid unwished uses. 

Summary of Contents for Houseinhand

Page 1: ...Configuration manual v2 5...

Page 2: ...Byte 24 Cool Heat mode 25 Temperature control 26 JUNG thermostats temperature control 27 Berker thermostat temperature control 28 Viewers 29 Central functions general turn off lower blinds presence si...

Page 3: ...these documents can be changed without prior warning Technical information can also be changed without notice iTunes App Store iPhone iPod and iPad are commercial brands of Apple Inc Houseinhand is a...

Page 4: ...is limitation we recommend using IP communication module with more than one simultaneous connection for example the IPS 100 REG Jung or 148 UAB22 Siemens For this application to work correctly showing...

Page 5: ...plication to recognize your house zzzzzzz hih This file is the license The configuration file can be shared by several people as long as they want to control the same house with the same room and devi...

Page 6: ...in the device built in Mail app 2 Send the file you want to load to the mail account configured in your device 3 Launch Mail app and open the mail you have sent 4 Click on the file you want to load a...

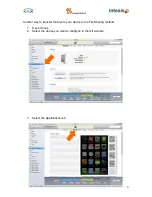
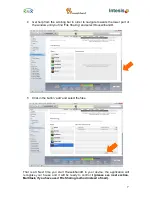
Page 7: ...6 Another way to transfer the files to your device is the File Sharing method 1 Open iTunes 2 Select the device you want to configure in the left side bar 3 Select the Applications tab...

Page 8: ...d File Sharing and select Houseinhand 5 Click in the button add and select the files That is all Next time you start Houseinhand in your device the application will recognize your house and it will be...

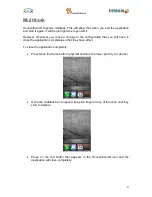
Page 9: ...uration files you will have to close the application completely so that they have effect To close the application completely Press twice the Home button physical button in the lower part of your devic...

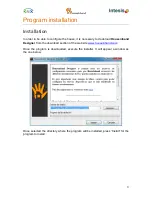
Page 10: ...to download Houseinhand Designer from the download section of the web site www houseinhand com Once the program is downloaded execute the installer It will appear a window as the one below Once selec...

Page 11: ...e For such an effect the Up Down buttons will allow to modify the order of the rooms devices modifying this way the order in which they will appear in the iPhone or iPad It is important to emphasize t...

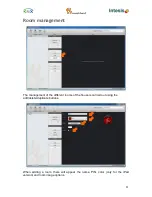
Page 12: ...ment The management of the different rooms of the house is carried out using the add delete duplicate buttons When adding a room there will appear the name PIN color only for the iPad version and room...

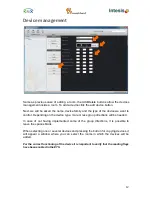
Page 13: ...nding on the device type more or less group directions will be needed In case of not having implemented some of the group directions it is possible to leave the spaces blank When selecting one or seve...

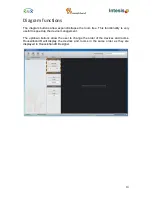
Page 14: ...oom tree This functionality is very useful to speed up the device management The up down buttons allow the user to change the order of the devices and rooms Houseinhand will display the devices and ro...

Page 15: ...us When active status from the selected device is returned Keep in mind that to activate this flag the selected device should support the status value return The group addresses to configure in both c...

Page 16: ...vice is returned Keep in mind that to activate this flag the selected device should support the status value return The group address to configure is 1Byte group address value adjustment communication...

Page 17: ...sent when tapping this segment through the 1 byte group direction Text fourth value Text that will appear in the corresponding segment Fifth value to send 0 255 Value that will be sent when tapping t...

Page 18: ...addresses to configure are On Off 1bit 1bit On Off control communication object Value 1Byte 1Byte control group address Status 1Byte value status feedback For the correct functioning of the device it...

Page 19: ...lor status communication object In case of not having the status group addresses configured in ETS it is recommended to fill them in with the same control group addresses Moreover it is possible to pr...

Page 20: ...op it Up down 1bit it allows lifting up down the blind continually or in case it is moving stopping it This communication object is activated with a long tap to the button more than 0 5 seconds Positi...

Page 21: ...nd as long as it is possible The group directions to configure are Stop movement 1bit it allows to lift up down the blind slightly in some blind actuators or in case it is moving stop it Up down 1bit...

Page 22: ...control The group addresses to configure are Lifting up blind open slats must match the corresponding actuator Lifting down blind close slats must match the corresponding actuator It is not required t...

Page 23: ...ind control The group addresses to configure are Lifting up blind must match the corresponding actuator Lifting down blind must match the corresponding actuator It is not required to use the central f...

Page 24: ...by mode 1bit standby mode Extremes protection 1bit extremes protection mode Block controller 1bit thermostat s controller blocking Leave it blank does not limit any functionality Controller status 1By...

Page 25: ...comfort standby night and protection against extremes Controller block 1bit thermostat s controller blocking Leave it blank does not limit any functionality Controller status 1Byte 1byte thermostat s...

Page 26: ...addresses to configure are Cool Heat Communication object for the 1 bit cool heat climate mode Modification status 1Bit Current climate mode status 1 bit For the correct functioning of the device it...

Page 27: ...e case of the direct control of the temperature is Set point Output 2Byte set point temperature control Set point Input 2Byte set point status For the correct functioning of the device it is important...

Page 28: ...dress used we get the same behavior than the thermostat adjustment wheel The group addresses to configure are Modification entrance set point 1Byte temperature s base value Set point temperature 2Byte...

Page 29: ...Berker thermostat temperature control is Set point output 2Byte set point temperature control Set point input 1Bit set point temperature forward value set point status For the correct functioning of t...

Page 30: ...ure 2 bytes F Humidity 2 bytes Pressure 2 bytes Pa Air quality 2 bytes ppm Power 2 bytes KW Voltage 2 bytes V Current 2 bytes A Speed 2 bytes Km h Wind 2 bytes m s Luminosity 2 bytes Klux Rain 1 bit y...

Page 31: ...addresses to configure are Central function 1bit programmed central function Besides it is necessary to configure the following parameter Sending value 1 if this checkbox is enabled the value to send...

Page 32: ...Scenes The group address to configure is Scene address 1Byte programmed KNX scene Besides it is necessary to configure the following parameter Scene number 1Byte Scene number to activate between 1 an...

Page 33: ...32 Technical alarms The group address to set up is Alarm state 14Bytes text configured in the case of alarm...

Page 34: ...ect from outside without VPN NAT For further information about remote connections please refer to the manual Remote setup without VPN The public IP address is known by the application when connecting...

Page 35: ...further information about remote connections please refer to the manual Remote setup without VPN Username Username of the IP camera Password Password of the IP camera Open door KNX Group address corr...

Page 36: ...port Port used by the application to connect from outside without VPN NAT For further information about remote connections please refer to the manual Remote setup without VPN Username Username of the...

Page 37: ...ut VPN NAT In this case user has to introduce the IP address the port address and if desired the parameters for image and transmission adjustments see example below yourdomain org 81 axiscgi mjpg vide...

Page 38: ...tup without VPN Destination LED Indicator used by the IRTrans module to know to which LED has to send the commands In these devices that has more than one LED The possible values are o i Refers to the...

Page 39: ...abels as default labels If you setup the IRTrans following this no more configurations will be needed If you want to use custom labels just edit the fields Full TV remote guide left up right txt green...

Page 40: ...39 Multipurpose multimedia remote on off av eject ok up right left down volUP volDOWN stop skipR play forward backward pause skipL rec chDOWN chUP mute...

Page 41: ...ion please check the manual Remote Connections without VPN Destination LED Indicator used by the IRTrans module to know to which LED commands need to be sent on those devices that has more than one Po...

Page 42: ...First function label of the first command to be sent First delay Delay in seconds that will apply before the next command is sent Second function label of the second command to be sent Second delay de...

Page 43: ...the Global Cache module from outside For further information about remote connections please refer to the manual Remote setup without VPN The rest of fields are about the Global Cache module to contro...

Page 44: ...Port used for the application to connect remotely to Global Cache For more information about remote connections please check the manual Remote connections without VPN First function label of the firs...

Page 45: ...in the manufacturer website Example sendir 4 1 1 36000 1 1 96 32 16 32 16 16 16 48 48 16 16 16 16 16 16 16 16 16 16 1 6 16 16 16 3024 96 32 16 32 16 16 16 16 48 48 16 16 16 32 15 16 32 16 16 16 720 Fo...

Page 46: ...an image or logotype To introduce the image it is necessary to attach to the application by means of the method iTunes File Sharing see corresponding section the logotype or image that you want with t...

Page 47: ...46 For the link with the web site to appear it is necessary to introduce it in the field Integrator s web site in the upper right corner of the application...

Page 48: ...ary to select the button Export Config appearing a window as the one below Once the name and destination are introduced it can be any name as long as it has the extension cfg you will press the button...

Page 49: ...only necessary to request one for every new device The steps to follow must be carried out from the final device that is to say the device for which one requests the license Though the captures that a...

Page 50: ...om indicating the reference of the order in the concept and the type of license to assign to each device The references for each license are the following LICENSE TYPE DEVICE REFERENCE iPhone iPod HIH...

Reviews: