


Caution...
Forcing the T1
line card into
place could
bend the pins on
the connector.
XMU+ Installation Handbook rev.06
19
Applying T1 Line Card Settings
3.
Pull the T1 line card straight out.
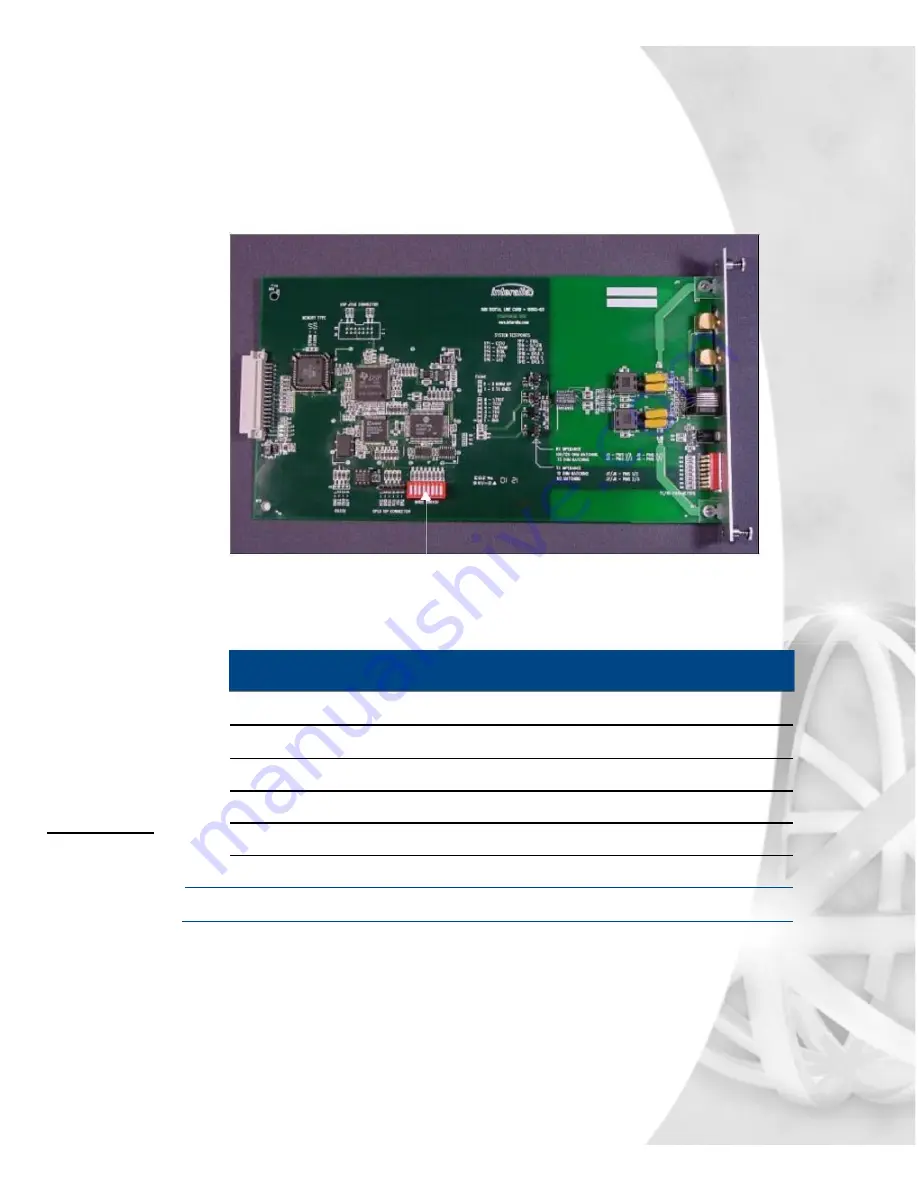
Locate the secondary option switch on the side of the T1 line card, as shown
below:
Secondary Option Switch
4.
Set the secondary option switch on the side of the T1 line card to the
appropriate protocol, as defined by the following table.
T1 Protocol Selector...
Reserved
0
0
0
0
0
0
0
1
Loop Start (FXS) D4
*
0
0
0
0
0
0
1
0
Loop Start (FXS) ESF
0
0
0
0
0
0
1
1
Clear Channel D4
0
0
0
0
0
1
0
1
Clear Channel ESF
0
0
0
0
0
1
1
0
Note:
* = default factory setting
Closed = 0, Open = 1
5.
Line up the line card’s circuit board on the plastic rails in the chassis.
6.
Slide the line card into place. When seating the line card, there should be slight
resistance. Do
not
force the line card into place.
7.
Tighten the thumbscrews.
8.
Repeat Steps 1 to 8 if another T1 line card is to be installed in the XMU+.
Summary of Contents for XMU+
Page 1: ...Installation Handbook...
Page 6: ...iv Table of Contents...
Page 8: ...2 Chapter 1 Before You Start...
Page 14: ...8 Chapter 1 Before You Start...
Page 16: ...10 Chapter 2 Installing the XMU...
Page 20: ...14 Chapter 3 Applying Hardware Settings to XMU Line Cards...
Page 26: ...20 Chapter 3 Applying Hardware Settings to XMU Line Cards...
Page 28: ...22 Chapter 4 Cabling the XMU...
Page 49: ...Recording and playing a 5 message from the front panel...
Page 50: ...44 Chapter 5 Recording and playing a message from the front panel...
Page 52: ...46 Chapter 5 Recording and playing a message from the front panel...
Page 53: ...Setting line card operating 6 mode...
Page 54: ...48 Chapter 6 Setting line card operating mode...
Page 58: ...52 Chapter 7 XMU Approvals...