


8‐Port Gigabit Web‐Smart Switch
7 |
P a g e
2.5
Hardware Installation
Desktop Installation
Place the switch on a flat surface. Ensure adequate ventilation space around the switch for dissipating
heat and air. Properly connect the device to a power outlet using the included power cable, and it will
automatically initialize and the power LED will light up.
Installing Network Cables
To make a valid connection and obtain the optimal performance, an appropriate network cable that
corresponds to different transmitting/receiving speeds is required. To choose a suitable cable, please refer
to the following table.
Media
Speed
Wiring
Network Media
(Cable)
10 Mbps
10Base‐T: UTP category 3, 4, 5 cable (maximum 100m) EIA/TIA‐568
100Ω STP (maximum 100m)
100 Mbps
100Base‐TX: UTP category 5, 5e cable (maximum 100m) EIA/TIA‐568
100Ω STP (maximum 100m)
1000 Mbps
1000Base‐T: UTP category 5e, 6 cable (maximum 100m) EIA/TIA‐568
100Ω STP (maximum 100m)
2.6
Connect to Web Admin Interface
In order to configure the smart features of the Intellinet 8‐Port Gigabit Web‐Smart Switch, you need to set
the IP address of your computer’s network adapter to a value of 192.168.2.xxx where xxx must not be
equal to 1. Refer to Appendix A for details.
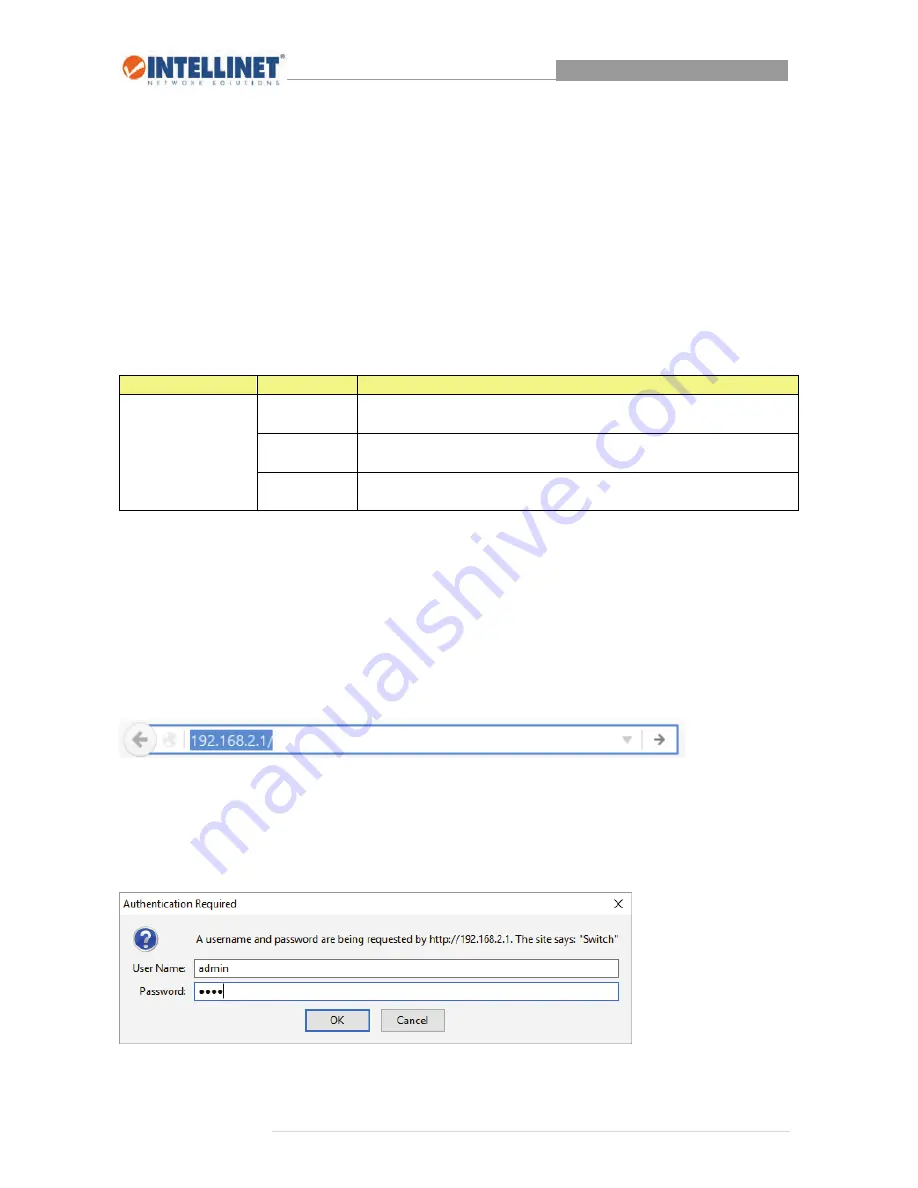
The default IP of the Intellinet 8‐Port Gigabit Web‐Smart Switch is 192.168.2.1. Open “http://192.168.2.1”
in your web browser.
The login screen appears.
User Name: ‘admin’
Password: ‘1234’