12
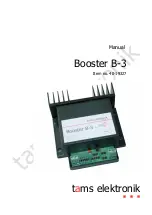
Compatible with Video Players such as VLC, etc.
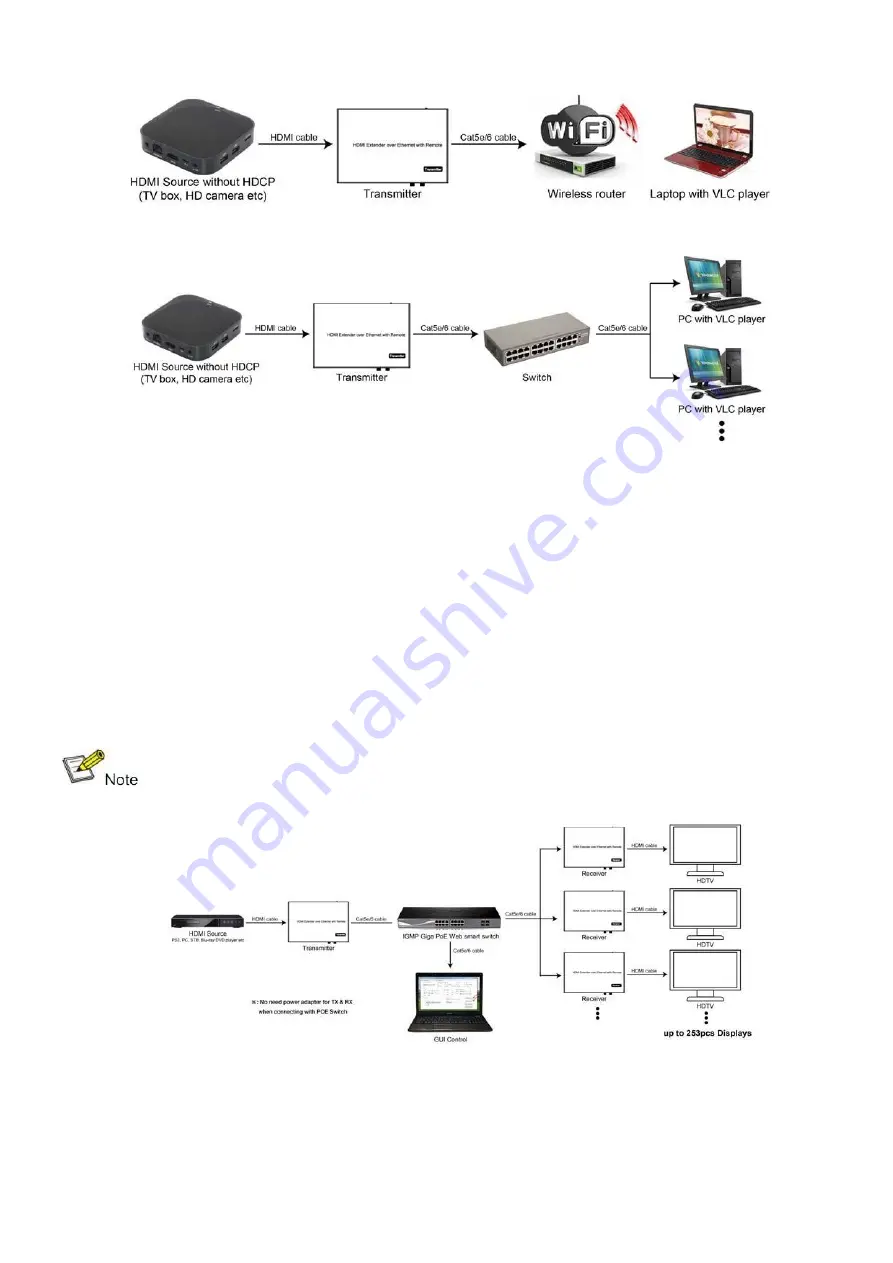
Point to Many
1.
Set the IP address for the transmitter and receiver. Prepare the switch following the steps
described above (5.1.1 &5.2).
2.
Connect the source device and the transmitter unit with HDMI cable.
3.
Connect the
transmitter’s
HDMI loop-out to the local HDMI display.
4.
Connect the transmitter and the switch/router with Cat5e or Cat6 cable.
5.
Connect all the receivers and the switch/router with Cat5e/6 cable.
6.
Connect the HDMI displays and the HDMI Receiver units with HDMI cable.
7.
Connect the IR TX cable to
IR TX
port on the transmitter; connect the IR RX cable to the
IR RX
port
on the receiver. Control the source at the RX side with
the source’s remote control
.
8.
Connect one RS-232 cable from the PC or automation system to the RS-232 port on the
transmitter; connect one RS-232 cable from the receiver to the RS-232 device to be controlled.
9.
Power on the transmitter and receiver using the 5 V / 1 A adapter; turn on the switch.
※
Daisy chain the switch if its RJ45 ports are not enough.
※
The number of connected receivers can be up to 255 pieces.
Summary of Contents for 207577
Page 1: ...H 264 HDMI Over IP Extender User Manual Models 207577 208246 208253 ...
Page 7: ...7 How to connect the IR Cable Panel Drawings Source remote HDMI extender remote ...
Page 17: ...17 Step 2 Click Upgrade Encoder FW first ...
Page 19: ...19 Step 2 Click Upgrade Rx FW ...
Page 21: ...21 Click Factory Reset on TX or RX ...
Page 23: ...23 Step 6 Click Next Step 7 Choose RTP MPEC Transport Stream or UDP ...
Page 24: ...24 Step 8 Click Next Step 9 Click Stream ...
Page 25: ...25 Step 10 Click Open Network Stream then click Play to view the video ...