background image

-9-

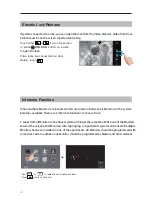
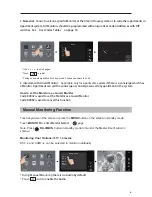
Call Divert Function

Forwarding a call from the system to a mobile phone requires an additional TPS Telephone 
Interface or GSM Interface. Up to 3 mobile or land line numbers can be programmed

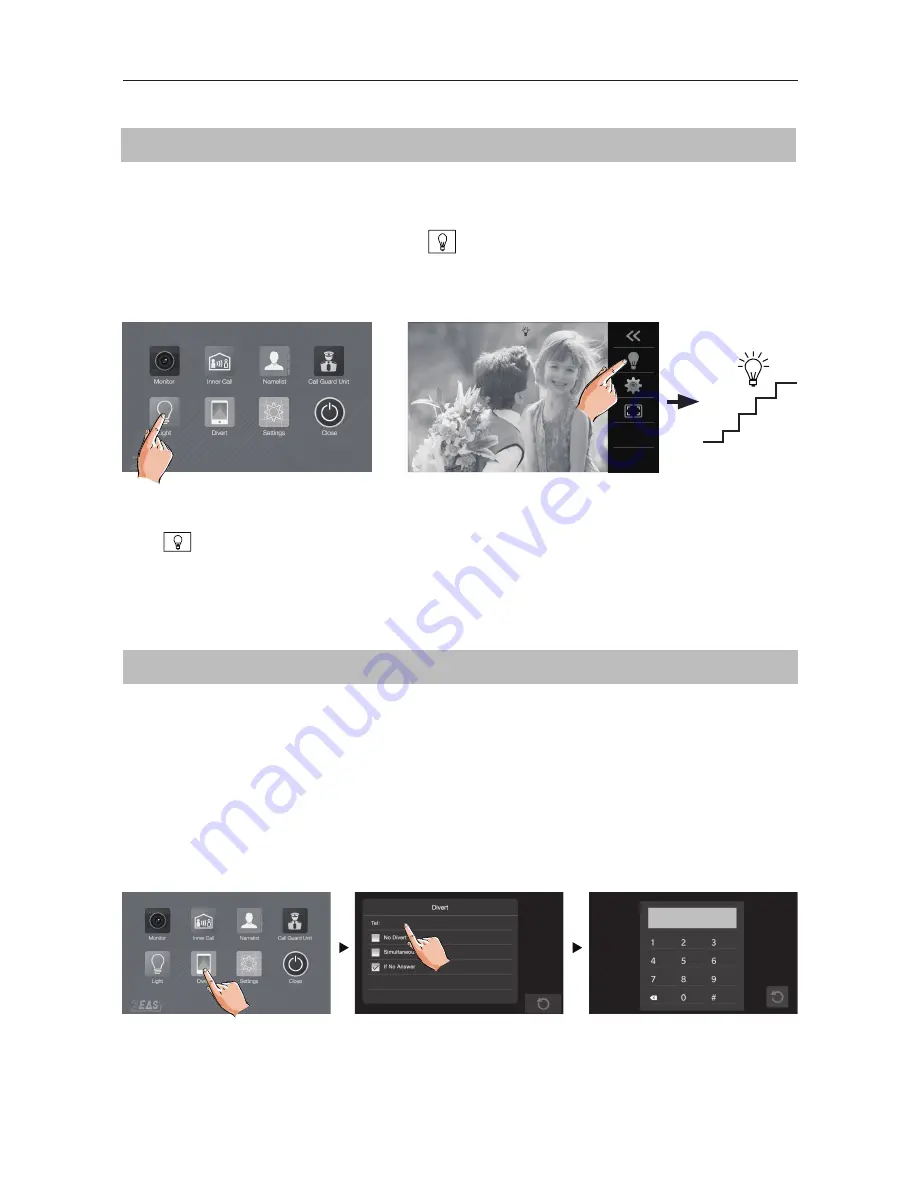
Setting Divert Number: 

On

 the 

Home


page

, touch 

Di

v

ert’

 icon 

Touch the telephone number frame and type in the number/s using digital keypad
Touch 

#  

to save the setting

-

-

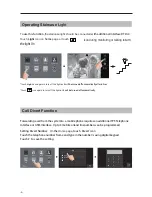
Operating Staircase 

L

ight

T

o use this function, t

he staircase light should be connected 

with additional Interface DT-

 RLC

Touch 

Light

 icon on 

home

 page or touch 

 icon during monitoring or talking to

 turn 

the light On

*Touch 

Light


icon again to turn off the light

 or it will be turned off automatically after 60 sec

or

*Touch 

 icon again to turn off the light

 or it will be turned off automatically

00:10    DS-1

Summary of Contents for Cronus

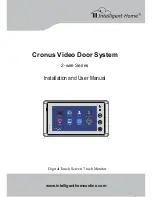
Page 1: ...Cronus Video Door System 2 wire Series 1 www intelligenthomeonline com Installation and User Manual Digital Touch Screen 7 inch Monitor 1 2 3 4 ...

Page 2: ......

Page 3: ...nstallation such as a bookcase unless proper ventilation is provided All parts should be protected from violent vibration Prevent impacts knocking and dropping Clean the LCD monitor with Plastic Protection cleaner only Image distortion may occur if the video door phone is mounted too close to magnetic field e g Microwaves TV computer etc Please keep away the video door monitor from wet high temper...

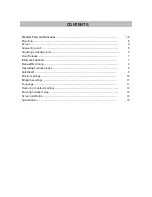
Page 4: ... a call 5 Adjusting screen volume 5 Door Release 7 Intercom Function 7 Manual Monitoring 8 Operating Staircase Light 9 Call Divert 9 Monitor settings 10 Ringtone settings 11 Language 11 Restoring to default settings 12 Entering Installer setup 12 Screen calibration 16 16 ...

Page 5: ...ll 4 Unlock button Press to Unlock door or gate 5 Talk Mon button Press to communicate hands free with visitor Press to view outsidein standby mode 6 MENU button Press to open Mainmenu 7 Microphone Transmits the audio from doorstation 8 Mounting hook Use to hang the monitor 9 Speaker Visitors voice coming from speakers 10 Connection port Bus connectionterminal 1 2 3 4 SW SW RING GND NC 1 2 3 4 5 6...

Page 6: ...he line or if connected with DBC4 Additional Call Button Additional call button can be connected to a monitor via terminals SW White and SW Green wires Please note There will be no video on the monitor when somebody rings this call button Additional External Ringer Additional external ringer can be connected to a monitors via terminals RNG Red wire to a Positive and GND Black wire to a Negative On...

Page 7: ...1 Use the screws to fix the mounting bracket on the wall 2 Hang the Monitor on themounting bracket firmly Monitor Mounting Mounting screws Monitor Mounting bracket 2 wire cable 145 160 cm 3 ...

Page 8: ... enter setup page DIVERT Touch to setup call divert function if Telephone GSM Interfaces are connected Displays which door station is calling Displays talking time LIGHT Touch to operate the staircase light with add RLC Interface INNER CALL Touch to startIntercom to all rooms MONITOR Touch to view outdoor NAMELIST Touch to startIntercom to a specific room CALL GUARD UNIT Touch to call Guard Unit M...

Page 9: ...on on a screen Adjusting Colour Brightness and Talk Volume 00 10 DS 1 00 10 DS 1 Normal 00 10 DS 1 BASIC OPERATIONS When Door Station is rung the monitor comes On with video To start conversation touch TALK MON TALK MON icon on the button or Talk icon on the screen To end conversation touch icon on the button once again or touch icon on the screen Monitor will shut down automatically after 40 seco...

Page 10: ...r volume The range are 0 Mute 9 Touch or to set desired levels 4 scene modes are available toselect Normal Bright Soft and User Screen Contrast The range is 0 9 Touch or to set desired levels Screen Brightness The range is 0 9 Touch or to set desired levels Screen Colour The range is 0 9 Touch or to set desired levels 6 ...

Page 11: ...use system will ring at the same time When one of the Monitors answers the call all other Monitors will stop ringing In Apartments system can be used if multiple Monitors has been installed in one of the apartments All Monitors should be programmed with same User Code In addition one Monitor should be programmed as Master and other as Slaves 00 10 DS 1 1 Touch either or icon on the screen or press...

Page 12: ...s on page 18 Code 8004 is used to set the Monitor as a Guard Monitor Code 8005 is used to cancel this function Use or to scroll pages Touch to redial Calling ends automatically after 40 seconds if nobody answers the call Touch anywhere of the screen or press the MENU button on the screen in standby mode Touch MONITOR to enterMonitor Select page Note Press TALK MON button in standby mode to monitor...

Page 13: ...ame and type in the number s using digital keypad Touch to save the setting Operating Staircase Light To use this function t he staircase light should be connected with additional Interface DT RLC Touch Light icon on home page or touch icon during monitoring or talking to turn the light On Touch Light icon again to turn off the light or it will be turned off automatically after 60 sec or Touch ico...

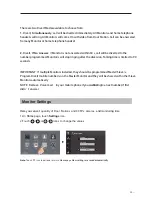
Page 14: ...r the diversion Talking time is limited to 90 seconds IMPOR TANT If multiple Monitors installed they should be programmed Master Slave s Program Divert mobile number s on the Master Monitor and they will be shared with other Slave Monitors automatically NOTE Remove Voice mail in your mobile phone if you want diallingto a next number if first didn t answer Monitor Settings Here you can set quantity...

Page 15: ...h Settings icon Touch Door Station Intercom Bell Button tone individually Touch and icon to change Setting will perform immediately Note Touch icon to exit and return to Home page 5 6 7 8 4 4 30 sec On the Homepage touch Settings icon Language Choose desired language and touch to save the settings Changing Language 4 4 30 sec English Turkish Greek Hebrew Spanish French ...

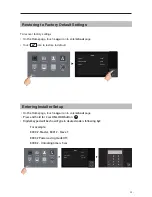
Page 16: ...ory Default Settings 00 00 AUTO 00 01 00 On the Homepage touch Logo icon to enter About page Press and hold for 2 sec UNLOCK button Digital keypad will be shown Type in desired code s following by For example 8000 Master 8001 Slave 1 8006 Power saving mode Off 8405 Unlockingtime is 5 sec Entering Installer Setup 00 00 AUTO 00 01 00 _ ...

Page 17: ...isplay Standard 8001 8003 Slave Monitor 9015 9016 Enable Disable Intercom Call 8006 8007 Setting Slave Monitor Panel On Off 9017 9018 Screen Ratio 4 3 16 9 8010 8011 Unlock Mode Close Open Select DIP Switcher Set Address setting then touch icon total 32 User C odes will be displayed Power Saving Mode On Off By default the system is set toPowerSavingMode where only the first Monitor in the system c...

Page 18: ...em should be assigned with the unique User Code according the tables on page 18 and have DIP6 set On in each Monitor in the system How to Program the User Code for Daisy Chain Connection ON 1 OFF 0 ON ON ON DIP 1 2 3 4 5 6 DIP state Setting DIP state Setting 1 2 3 4 5 6 ON DIP 1 2 3 4 5 6 ON DIP Monitor not at the end of bus line Monitor at the end of bus line End of line setting with DIP 6 There ...

Page 19: ...ser Code 00 for House system and 01 for Apartment system Range of codes available 00 31 In addition program all Monitors as Master Applicable Intercom Function for such programming Intercom by Namelist to call to a specific Monitor in the system USER CODES TABLES Note In Apartment system program Apartment 32 with User Code 0 Select DIP Switcher Set Address setting then touch icon total 32 User Cod...

Page 20: ...h digital color LCD Display Resolution 800 3 R G B x 480 pixels Video signal 1Vp p 75Ω CCIR standard Wiring 2 wires no polarity Dimensions H125 W225 D23mm In standby mode press UNLOCK button andhold for 3 seconds Red cross symbolwill appear Keep touching Red cross symboluntilcalibration complete and OK will appear 1 2 3 4 1 2 3 4 1 2 3 4 OK ...

Page 21: ...e Online Ltd 62 Hartley Old Road Purley Surrey CR8 4HJ 44 0 20 86170015 www intelligenthomeonline com _ _ _ _ _ _ _ _ _ _ _ _ _ _ _ _ _ _ _ _ _ _ _ _ _ _ _ _ _ _ _ _ _ _ _ _ _ _ _ _ _ _ _ _ _ _ _ _ _ _ _ _ _ _ _ _ _ _ _ _ _ _ _ _ _ _ _ _ _ _ _ _ _ _ _ _ _ _ _ _ _ _Cronus no memory version _ t c u d o r P _ _ _ _ _ _ _ _ _ _ _ _ _ _ _ _ _ _ _ _ _ _ _ _ _ _ _ _ _ _ _ _ _ _ _ _ _ _ _ _ _ _ _ _ _ _ _ ...

Page 22: ... 18 www intelligenthomeonline com Right to interpret and copyright of this manual are preserved Cronus 2 wire series ...

Reviews: