Platform Installations and Upgrades
Intel
®
Carrier Grade Server TIGI2U User Guide
48
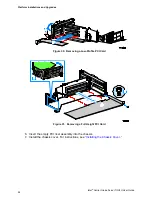
Figure 24. Inserting Hard Disk Drive Assembly into Chassis
10. Install the front bezel. Install the front bezel. For instructions, see
Removing a Hard Drive
1. Remove the front bezel. For instructions, see
2. Press in on the green latch at the front of the hard drive carrier.
3. Pull out on the black lever to slide the carrier from the chassis.
4. Remove the four screws that attach the hard drive to the drive carrier. Lift the drive
from the carrier. Store the drive in an anti-static bag.
5. (optional) Place the plastic retention device into the drive carrier, using the four screws
you removed from the hard drive.
6. Insert the screws that held the drive in the carrier into the screw locations on the
carrier.
7. With the black lever in the fully open position, slide the drive carrier into the chassis.
The green latch must be to the right. Do not push on the black lever until the lever
begins to close by itself.
8. When the black lever begins to close by itself, push on it to lock the drive carrier into
place.
9. Install the front bezel. For instructions, see
Replacing the CD-ROM Drive
Your Intel
®
Carrier Grade Server TIGI2U comes with a CD-ROM drive installed in it. As an
option, you can replace the CD-ROM drive with a DVD-ROM drive. It is necessary to
remove the chassis cover and the front bezel from the chassis to remove or replace the
drive.
The peripheral bay supports either a CD-ROM drive carrier assembly or a DVD-ROM drive
carrier assembly. Both the blind-mate CD-ROM drive carrier assembly and the blind-mate
DVD-ROM drive carrier assembly can be inserted or removed when the system power is
off. After the drive carrier assembly is installed into the system, a horizontal handle is
used to secure it to the chassis.
CAUTION
The CD-ROM / DVD-ROM drive is NOT hot-swappable. Before
removing or replacing the drive, you must first take the server out of
service, turn off all peripheral devices connected to the system, turn
off the system by pressing the power button, and unplug the AC
power cord from the system or wall outlet or disconnect the DC mains.
Summary of Contents for TIGI2U - Carrier Grade Server
Page 32: ......


