Hardware Installations and Upgrades
Intel® Entry Server Chassis SC5299-E UP/DP/WS/BRP User Guide
15
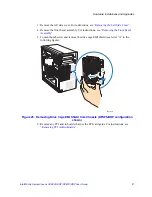
3. Reconnect all peripheral devices and the AC power cord. Power up the server.
Removing and Installing the Right Side Cover
Warning:
This chassis must be operated with the right side cover installed to ensure proper cooling
Removing the Right Side Cover
1. Observe the safety and ESD precautions listed in
Appendix A, “Safety Information”
.
2. Power down the server and unplug all peripheral devices and the AC power cable.
3. Remove the left side cover. For instructions, see
“Removing the Left Side Cover”
4. Remove the front bezel assembly if it is installed. For instructions, see
“Removing the
Front Bezel Assembly”
.
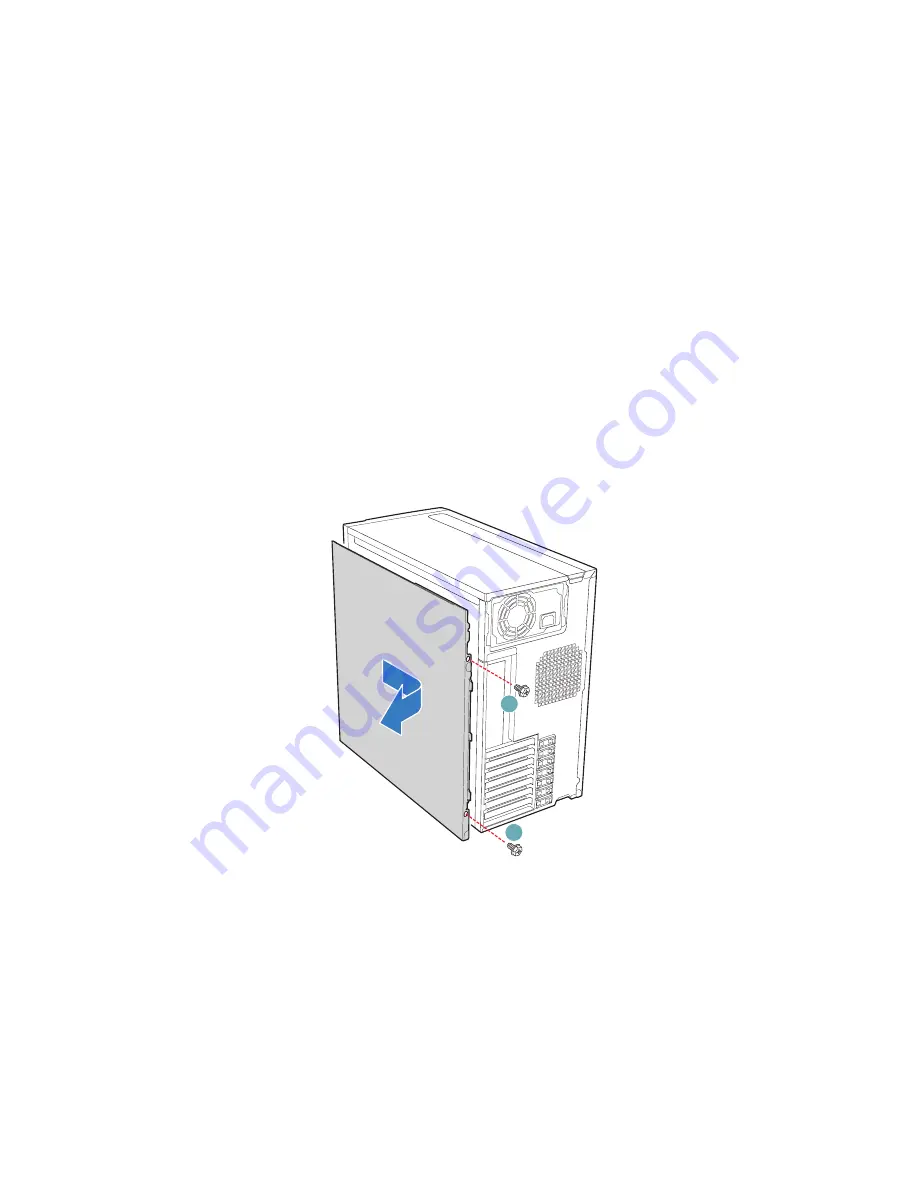
5. Remove the two screws (see letter “A” in the following figure”) securing the right
side cover to the chassis. Lift the right side cover off the chassis.
Figure 12. Removing Right Side Cover from Chassis
TP01736
A
A
Summary of Contents for S3210SHLC - Entry Server Board Motherboard
Page 8: ...Preface viii Intel Entry Server Chassis SC5299 E UP DP WS BRP User Guide...
Page 16: ...xvi Intel Entry Server Chassis SC5299 E UP DP WS BRP User Guide...
Page 18: ...xviii Intel Entry Server Chassis SC5299 E UP DP WS BRP User Guide...
Page 30: ...Server Chassis Features 12 Intel Entry Server Chassis SC5299 E UP DP WS BRP User Guide...
Page 114: ...Technical Reference 96 Intel Entry Server Chassis SC5299 E UP DP WS BRP User Guide...
Page 139: ...Safety Information Intel Entry Server Chassis SC5299 E UP DP WS BRP User Guide 121 ITE ITE 5V...
Page 140: ...Safety Information 122 Intel Entry Server Chassis SC5299 E UP DP WS BRP User Guide...
Page 142: ...Safety Information 124 Intel Entry Server Chassis SC5299 E UP DP WS BRP User Guide...
Page 158: ...Getting Help 140 Intel Entry Server Chassis SC5299 E UP DP WS BRP User Guide...
Page 166: ...Warranty 148 Intel Entry Server Chassis SC5299 E UP DP WS BRP User Guide...


