


Intel
®
High Availability Storage User Guide
35
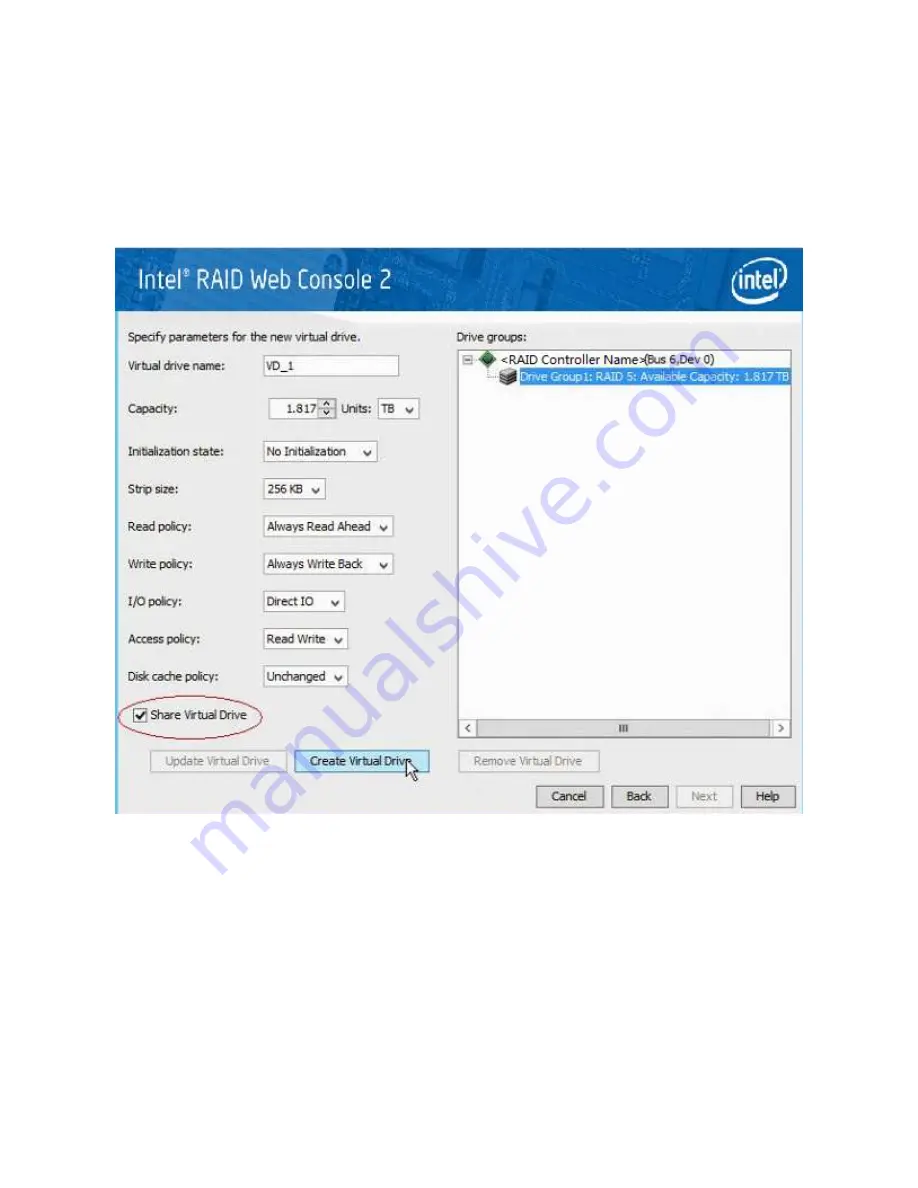
6. Enter a name for the VD.
7. Select
Always Write Back
as the Write policy option, and select other VD settings as required.
8. Select the
Share Virtual Drive
option, as shown in the following figure.
NOTE: If you do not select Share Virtual Drive, the VD is visible only from the server on which it is
created.
Figure 25 Share Virtual Drive Option
9. Click
Create Virtual Drive
to create the virtual drive with the settings you have specified.
The new VD appears in the Drive groups window on the right of the window.
10. Click
Next
to continue.
The Create Virtual Drive Summary window appears, as shown in the following figure.


