background image

43

EN

FUNCTION SETUP


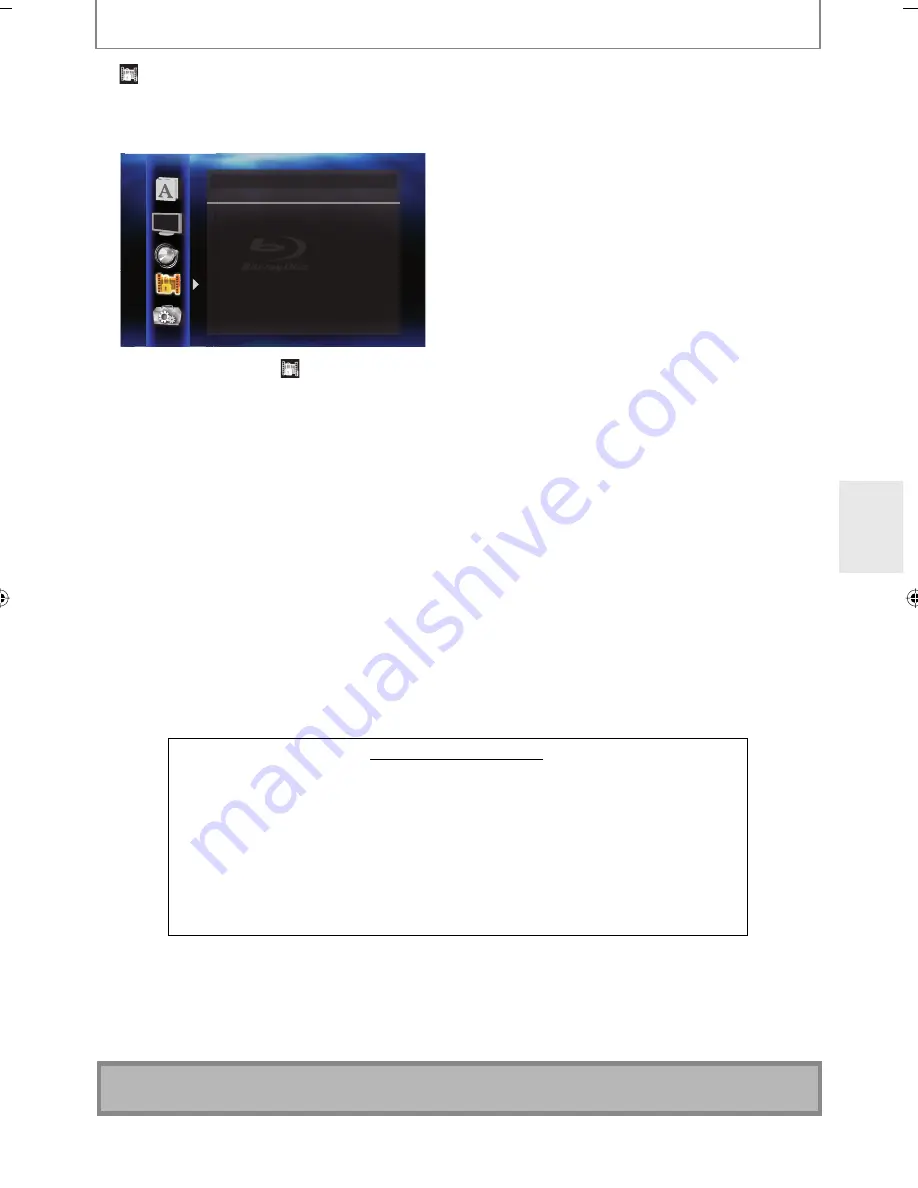
   Parental

Ratings control allows you to set a limit, which prevents your children from viewing inappropriate materials. Playback 
will be stopped if the ratings exceed the levels you set, and it will require you to enter a password before playing back 
the disc.

Parental

BD Rating Level 


All

DVD Rating Level 


All

Password Change

1

 Use [

K

 / 

L

] to select 

 , then press [Enter].

2

  Use [the Number buttons] to enter your 4-digit password.

For the first time use:

 Use 

[the Number buttons]

 to enter any 4-digit number (except for 4737), then press 

[Enter]

That number will be used as the password from the second time. Record your password in case you forget it.
•  If you forget the password, enter 

[4]

[7]

[3]

[7]

. The password will be cleared and rating level will be set to “All”.

•  While you input the password, press 

[Clear]

 to clear the number, then re-enter the password.

3

  Proceed to A – C

A) BD Rating Level

1) Use 

[

K

 / 

L

] to select “BD Rating Level”, then press [Enter].

2) Use 

[

K

 / 

L

] to select your desired option, then press [Enter].

“All”

To release the limitation.

“Age Setting”

:  To set the age limitation.

•  After selecting “Age Setting”, use 

[the Number buttons]

 to enter the age from 0 – 254. (e.g. for age 15, press 

[0]

[1]

[5]

)

3)  Press [Setup] to exit.

B) DVD Rating Level

1) Use 

[

K

 / 

L

] to select “DVD Rating Level”, then press [Enter].

2) Use 

[

K

 / 

L

] to select your desired level, then press [Enter].

3)  Press [Setup] to exit.

RATING EXPLANATIONS

•  All 

: Parental control is inactive; all discs can be played back.

• 8 

[Adult]


: DVD software of any grades (adult/general/children) can be played back.

• 7 

[NC-17]


: No one under 17 admitted.

• 6 

[R]


: Restricted; under 17 requires accompanying parent or adult guardian.

• 5 

[PGR]


: Parental guidance recommended.

• 4 

[PG-13]


: Unsuitable for children under 13.

• 3 

[PG]


: Parental guidance suggested.

• 2 

[G]


: General audience.

• 1 

[Kid Safe]

  : Suitable for children.

C) Password Change

1) Use 

[

K

 / 

L

] to select “Password Change”, then press [Enter].

2)  Enter a new 4-digit password, then press [Enter].
3)  Press [Setup] to exit.

Note

•  The resume information will be cleared if you change the parental level when the resume information is on.

E5K55UD̲DBS-30.1̲EN̲v1.indd   43

E5K55UD̲DBS-30.1̲EN̲v1.indd   43

2009/05/15   11:44:57

2009/05/15   11:44:57

Summary of Contents for DBS-30.1

Page 1: ...DBS 30 1...

Page 2: ...the operating instructions Adjust only those controls that are covered by the operating instructions as an improper adjustment of other controls may result in damage and will often require extensive...

Page 3: ...This unit s top and rear panels may get warm after prolonged use This is normal If you do not use this unit for a long time it may not work properly the next time you turn it on so be sure to use it...

Page 4: ...ADIATION EXPOSURE The label on the right is applied on the rear panel 1 This unit is a CLASS 1 LASER PRODUCT and employs a laser inside the cabinet 2 To prevent the laser from being exposed do not rem...

Page 5: ...wise authorized by Macrovision Reverse engineering or disassembly is prohibited Supplied Accessories remote control with batteries AAx2 RCA audio video cables AC cord instruction manual Instruction Ma...

Page 6: ...929 7 212 872 other U S and worldwide patents issued pending DTS is a registered trademark and the DTS logos Symbol DTS HD and DTS HD Master Audio Essential are trademarks of DTS Inc 1996 2008 DTS In...

Page 7: ...Pop up Menu 24 Pause 24 Resume Playback 24 Playing Back an Audio CD or a Disc with MP3 Files 25 Reading the SD Memory Card 26 SPECIAL PLAYBACK 27 Fast Forward Fast Reverse 27 Slow Forward Playback 27...

Page 8: ...r depending on the disc Pop up menu Some BD video have pop up menu which is a navigation menu that can be called up and be operated on the TV screen without interrupting the playback You can call up t...

Page 9: ...TAL OPTICAL COAXIAL jacks Use to connect an AV receiver amplifier Dolby Digital DTS decoder or other device with a digital audio optical coaxial input jack with a digital audio optical coaxial cable 3...

Page 10: ...n Press to set the HDMI output mode 15 Open Close A button Press to open or close the disc tray 16 PIP button Press to switch picture in picture feature on or off only applicable to BD video which sup...

Page 11: ...s not going to be used for a month or more When disposing of used batteries please comply with governmental regulations or environmental public instruction s rules that apply in your country or area D...

Page 12: ...apsed time repeat mode etc Playback status icon Mode Disc SD Memory Card Playback is in progress Stop mode Pause mode Fast forward mode Fast reverse mode for AVCHD only Slow forward mode Appears while...

Page 13: ...nent Output setting on page 37 to set the video resolution 2 Analog audio connection is not required for this connection Supplied cables used in this connection are as follows RCA audio cable L R x 1...

Page 14: ...peed HDMI Cable also known as HDMI category 2 cable for better compatibility HDMI Audio Setting When using HDMI connections make HDMI Audio Out setting in Audio menu according to the specifications of...

Page 15: ...CM 2ch PCM Audio CD MP3 PCM 2ch PCM 2ch PCM 2ch PCM DTS CD DTS DTS Multi PCM Downmix 2ch PCM 1 Full decoded 2 Only the independent substream is decoded 3 Dolby TrueHD stream is decoded 4 Only the Dolb...

Page 16: ...OAXIAL AV receiver amplifier digital audio optical cable or digital audio coaxial input jack digital audio optical input jack Supplied cables used in this connection are as follows RCA audio cable L R...

Page 17: ...gital Downmix 2ch PCM 1 Downmix 2ch PCM 2 Dolby TrueHD Dolby Digital Dolby Digital Downmix 2ch PCM 3 Downmix 2ch PCM 4 DTS DTS DTS Downmix 2ch PCM Downmix 2ch PCM DTS HD DTS DTS Downmix 2ch PCM 5 Down...

Page 18: ...is connection Please purchase the necessary cables at your local store Note After connecting to the Internet set up necessary network settings Do not insert any cable other than a LAN cable to the ETH...

Page 19: ...n It s Out of Range If the DBS 30 1 is located in another room installed in a cabinet or out of range of its remote controller you can use a commercially available IR receiver to pickup the remote con...

Page 20: ...iniSD Card 8MB 2GB microSD Card 8MB 2GB Note for SD Memory Cards Do not remove the SD Memory Card or turn the unit to the standby mode while the contents of the card is in playback It may result in ma...

Page 21: ...chapter 2 chapter 3 Audio CDs are divided into tracks audio CD audio CD track 1 track 2 track 3 track 4 track 5 Data discs or SD Memory Cards containing MP3 are divided into folders and the folders a...

Page 22: ...being read 2 Layer number L0 Layer 0 is played back L1 Layer 1 is played back HDMI information Video Info Audio Info Max Channel YCbCr PCM 2 ch 1080i 1 4 3 2 1 HDMI video format 2 Resolution of the H...

Page 23: ...f BD video and DVD video a menu screen may appear In this case use K L s B to select the desired item then press Enter 7 Press Stop C once to stop playback temporarily Refer to Resume Playback on page...

Page 24: ...erations may vary among discs Refer to the manual accompanying the disc for details Pause 1 During playback press Pause F Playback will be paused 2 Press Play B to return to normal playback Note For B...

Page 25: ...der audio CD track MP3 file It is recommended that MP3 files to be played back in this unit are recorded under the following specifications Sampling frequency 32 kHz 44 1 kHz or 48 kHz Constant bit ra...

Page 26: ...folders or files in the SD Memory Card with your computer This unit might not read the SD Memory Card This unit recognizes up to 8 characters including 1 of file name in the SD Memory Card Characters...

Page 27: ...peatedly Every time you press Pause F playback will advance one step at a time 2 Press Play B to return to normal playback Note Only step by step forward is available Set Still Mode setting to Field i...

Page 28: ...t Refer to SwitchingAudioSoundtrack onpage32and Setting the BD Audio Mode on page 33 Program Playback CD MP3 You can play back the disc in your desired order 1 In stop mode press Mode The program scre...

Page 29: ...fles the playback order of tracks files 1 In stop mode press Mode twice The random screen will appear 1 13 29 CD_DA 1 0 36 1 14 0 45 0 50 0 53 0 20 0 54 2 3 4 5 6 7 16 1 6 2 3 4 5 l a t o T m o d n a...

Page 30: ...g BD Live Discs with Internet BD V You can enjoy the BD Live functions which enable you use the interactive functions when the unit is connected the Internet For the Network connection refer to pages...

Page 31: ...u want to search using the Number buttons Playback of the title will start in a few seconds Chapter Search 1 During playback of a title enter the chapter number you want to search using the Number but...

Page 32: ...ck Switching Audio Soundtrack Some BD and DVD contain multiple audio streams Those are often in different audio languages or audio formats For BD available audio varies depending on BD Audio Mode sett...

Page 33: ...gital Out setting set to Bitstream DTS DTS HD and LPCM will be output as Dolby Digital for BD audio Refer to pages 14 17 You can also set BD Audio Mode setting from the setup menu Refer to page 39 Adj...

Page 34: ...ect then press Enter 3 Use K L to select your desired setting items Quick Media Select Disc HDMIAudio Out HDMI Multi Normal HDMI Video Resolution Auto Component Output 480i Player Menu English 4 Follo...

Page 35: ...The setting items which are not available with current situation of this unit will be displayed in gray and you cannot select them 5 Follow the procedure below depending on the setting items A If B do...

Page 36: ...Slovak Bulgarian Other Disc Menu Sets the language for disc menu or pop up menu English French Spanish German Italian Swedish Dutch Russian Chinese Japanese Korean Danish Finnish Norwegian Icelandic H...

Page 37: ...es the picture is displayed in the center of the 16 9 screen with a 4 3 aspect ratio HDMI Video Resolution Sets the HDMI video resolution Auto HDMI video resolution will be selected automatically depe...

Page 38: ...istics Quick menu consists of the setting menus frequently used and they are accompanied with If you set HDMI Video Resolution setting to 1080p24 and the contents of the BD are not compatible for 1080...

Page 39: ...from the HDMI OUT jack with a downmixed to 2ch LPCM Audio Mute Mutes the HDMI audio signal and set the signal format from AUDIO OUTPUT DIGITAL OPTICAL COAXIAL jacks Refer to Digital out setting on pag...

Page 40: ...ot effective when the HDMI audio signal is output Speaker setting This unit allows you to enjoy multi channel surround sound such as 7 1 channel 5 1 channel surround e g basic layout with 7 1 channel...

Page 41: ...ound You cannot change the setting of Subwoofer If connected device is not compatible with subwoofer Subwoofer will be displayed in gray Small Center Large Small Subwoofer On Surround Large Small Surr...

Page 42: ...the ideal delay time Center 0ft to 60ft 12ft 0m to 18m 3 6m Surround 0ft to 60ft 10ft 0m to 18m 3 0m Surround Back 0ft to 60ft 10ft 0m to 18m 3 0m Default Select Default then press Enter to reset Dela...

Page 43: ...Level then press Enter 2 Use K L to select your desired option then press Enter All To release the limitation Age Setting To set the age limitation After selecting Age Setting use the Number buttons...

Page 44: ...brighter Dimmer Front panel display gets darker HDMI CEC Sets whether to utilize HDMI CEC function On Off Media Select Selects the media to playback Setting will be back to Disc when you turn the uni...

Page 45: ...is part of the HDMI standard In addition to Integra Onkyo AV components it allows interoperability with CEC compatible AV components and TVs made by other manufacturers When HDMI CEC setting is set t...

Page 46: ...ion Enable Easy Network settings are set to the following settings initially In most cases you can connect to the Internet without making any changes to the default settings IP Address Setting Auto DH...

Page 47: ...ck the number of other devices e g PC connected via LAN cable and assign the same number 3 d After you enter all correctly press Enter Confirmation message will appear Select Yes to complete the setti...

Page 48: ...s 65535 For proxy port the selected ports may be blocked and not be able to use depending on your network environment Connection Speed You can set connection speed as your preference The default setti...

Page 49: ...pleting loading disc confirmation message will appear Select Yes and press Enter to start upgrading It may take a while to complete the upgrading Please wait until 100 appears on the front panel displ...

Page 50: ...ed for the BD ROM contents such as BD ROM game scores from this player Erase Saved BD ROM Data SD Card Available only when an SD Memory Card is inserted Clears the supplemental data for the BD ROM pla...

Page 51: ...p Check if the disc is defective by trying another disc Cancel the ratings control or change the control level Insert a correct disc that can be played back on this unit SD Memory Card cannot be read...

Page 52: ...serted Do not remove the card during playback as some BD videos require an SD Card during playback HDCP NOK appears on the front panel display HDCP NOK appears under the following conditions When the...

Page 53: ...gital The system to compress digital sound developed by Dolby Laboratories It offers you sound of stereo 2ch or multi channel audio Dolby Digital Plus Dolby Digital Plus is the next generation digital...

Page 54: ...second defines as sampling frequency The higher the rate the better the sound quality Subnet Mask A mask which is used to determine what subnet an IP address belongs to Title A collection of chapters...

Page 55: ...a 5860 Lithuanian 5866 Language Code Macedonian 5957 Malagasy 5953 Malay 5965 Malayalam 5958 Maltese 5966 Maori 5955 Marathi 5964 Moldavian 5961 Mongolian 5960 Nauru 6047 Nepali 6051 Norwegian NOR 606...

Page 56: ...han 80 no condensation Terminals Rear Audio output Analog RCA jack x 2 L R 2Vrms output impedance more than 1k Video output RCA jack x 1 1Vp p 75 Component video output RCA jack x 3 Y 1Vp p 75 PB 700m...

Page 57: ...57 EN MEMO...

Page 58: ...58 EN MEMO...

Page 59: ...59 EN MEMO...

Page 60: ...integrahometheater com Integra Division of ONKYO CORPORATION Sales Product Planning Div 2 1 Nisshin cho Neyagawa shi OSAKA 572 8540 JAPAN Tel 072 831 8023 Fax 072 831 8163 Printed in China E5K55UD 1VM...

Reviews: