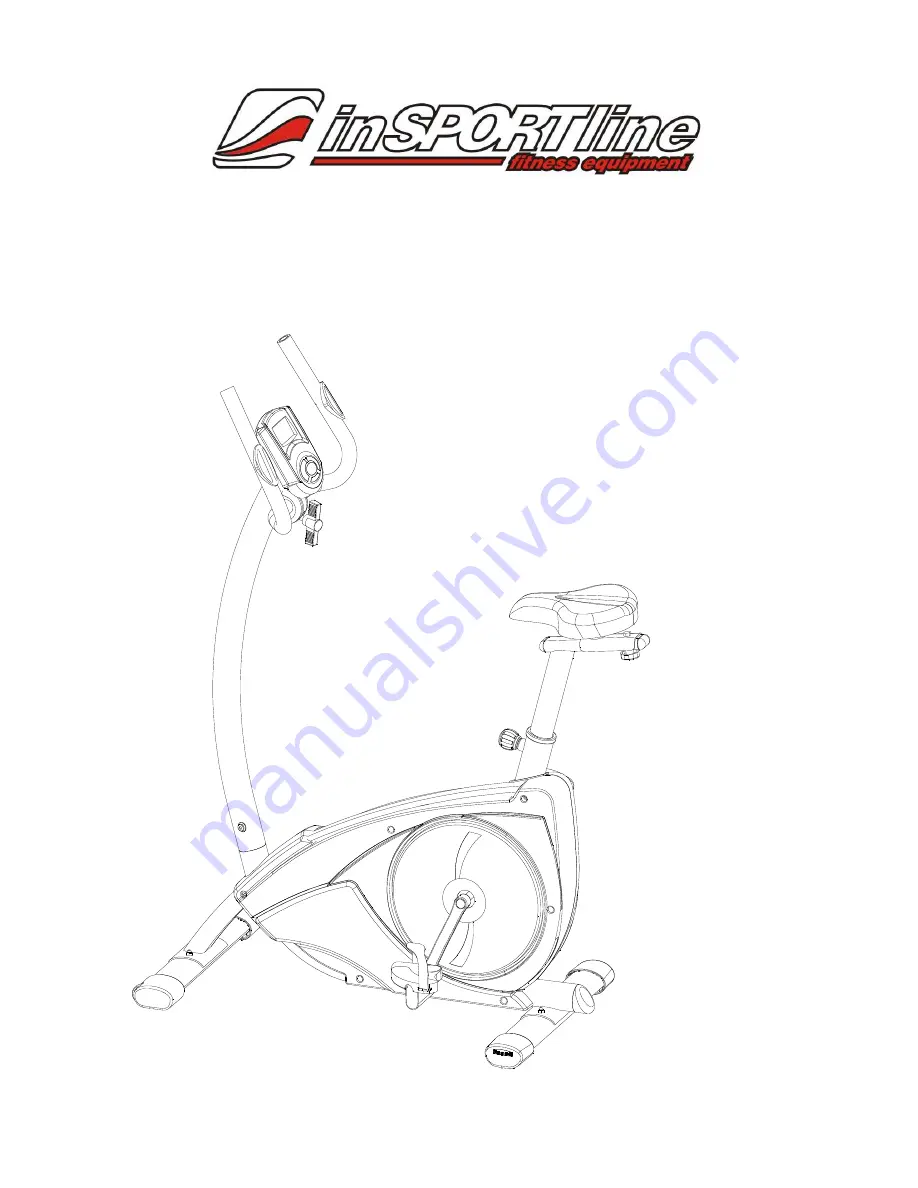
User’s manual – EN
IN 4464 Up-right bike inSPORTline Oberon
Page 1: ...User s manual EN IN 4464 Up right bike inSPORTline Oberon...
Page 2: ...use the exerciser only under adult supervision and be instructed on the correct and proper use of the exerciser The exerciser is not a toy Make sure there is sufficient free space around the exerciser...
Page 3: ...that exercisers and training devices are no toys Therefore they must only be used by properly informed or instructed persons Stop your work out immediately in case of dizziness nausea chest pain or an...
Page 4: ...73 70 71 72 59 58 61 60 63 62 3 4 5 10 11 9 6 7 8 12 15 13 14 47 48 49 16R 86R 16L 17 20 21 18 24 1 26 28 27 25 29 32 40 39 35 30 31 37 36 34 38 33 22 23 42 41 43 50 54 55 56 57 49 48 65 64 67 68 46...
Page 5: ...Allen nut M8 1 25 6T 1 58 Seat 1 14 Nylon nut M8 1 25 8T 1 59 Seat adjustable tube welding set 1 15 Plastic cover D4 30L 2 60 Seat tube welding set 1 16L Left crank 6 1 2 x9 16 1 61 End cap 25 50 32L...
Page 6: ...nsor cable 150L 1 35 Allen bolt M6 65L 1 80 Cross screw M5x0 8x12L 1 36 Nylon washer D6 D19 1 5T 1 81 Motor 1 37 Allen nut M6 1 6T 1 82 Cross screw ST4 2 1 4 15L 4 38 Nylon nut M6 1 6T 1 83 Electric c...
Page 7: ...Check List X4 56 X1 X1 X4 47 X8 48 X8 49 X4 57 M8 1 25 20L D15 4 D8 2 2T D22 D8 5 1 5T M8 1 25 55L M8 15L 1 X1 51 50 X1 X1 58 46 74 50 59 73 72 71 70 75 85 86L R 60 X1 X1 X1 X1 X1 X1 X1 X1 X1 X1 X1...
Page 8: ...56 M8 15L M8 55L D15 4 D22 x4 56 49 48 57 A 1 Assemble the front stabilizer 51 and the rear stabilizer 50 on the main frame 1 by using the Square neck bolt 56 the Domed nut 57 the spring washer 48 and...
Page 9: ...table tube 60 by using the flat washer 62 and the knob 63 2 Insert the seat post welding sets 60 into the main frame 1 and use the ball quick release knob 2 to lock the seat post 3 The seat 64 could b...
Page 10: ...M8 20L D15 4 D22 x4 56 49 48 C 1 Assemble the handlebar post 46 on the main frame 1 by using the curved washer 49 spring washer 48 and the inner allen bolt 47 2 Connect the upper computer cable 46 and...
Page 11: ...Step 4 1 Assemble the handlebar 66 by using T knob 70 flat washer 71 spring washer 72 bushing 73 and protective cover 74 2 The Handlebar is adjustable 74 73 70 71 72 66 DOWN UP...
Page 12: ...Step 5 85 86R 86L 75 16L 1 Assembele the computer 75 by using the 2 Assemble the pedal sets 86L R to the crank 16L R 3 Plug the adaptor 85...
Page 13: ...c workout modes MANUAL PRESET PROGRAM BODYFAT PROGRAM T H R PROGRAM HRC PROGRAM USER PROGRAM Note The monitor will sleep when no signal inputs for four minutes Then pedal or press any key to wake up t...
Page 14: ...3 Press this key to start measurement in BodyFat program WORKOUT PARAMETERS After selecting desired workout mode you may pre set several workout parameters for desired results TIME DISTANCE CALORIES A...
Page 15: ...then press ENTER key and select the function values of time distance calories age etc to set when select the function value it will flash and press UP or DOWN key to adjust then press ENTER key to co...
Page 16: ...85 TARGET H R 85 of 220 AGE Setting parameters for HRC PROGRAM Select one HRC PROGRAM 65 or 85 by UP or DOWN key then press ENTER key and select the function values of time distance calories age etc...
Page 17: ...h then press UP or DOWN key to set the level of loading and press ENTER key to confirm it at the same time enter to the next one to set Continue to finish all the 10 profiles User can press ST SP to s...