background image

18

NOTES

Summary of Contents for Pursuit Exercise Cycle

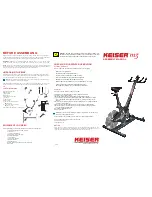
Page 1: ...OWNER S GUIDE Pursuit Exercise Cycle JAN13 2010...

Page 2: ...gh quality safe and innovative piece of equipment as your training partner and we are certain it will keep you motivated on the way to achieving your personal fitness goals Please take the time to rea...

Page 3: ...ght 11 Leveling your cycle 11 Battery replacement instructions 11 Maintenance 12 Storage 12 Cleaning 12 Maintenance 12 Troubleshooting 12 Warranty 13 Fitness Guide 14 Starting and finishing your worko...

Page 4: ...2 hours before exercising as this will help to prevent muscle strain Never overload the equipment See maximum user weight Never use the equipment in any other manner other than the ways explained in...

Page 5: ...replace damaged worn components with original parts from the manufacturer Customer Support Should you require any assistance regarding this product please gather the following information and then con...

Page 6: ...and make sure you have it the right way up 4 Unpack the carton Make sure you have the following parts Part No 13 x 1 Saddle Part No 5 x 1 Console Part No 11 x 1 Tension knob Part No 2 x 1 Saddle post...

Page 7: ...wer cable 2 Connect the computer cable as shown and make sure it s fully connected 3 Slide the front post tube over the front post mounting 4 Secure in place using the bolts and washers as shown and b...

Page 8: ...be sure to fit them in the same order as the diagram Make sure the bolts are fully tightened with the allen key Step 4 Attach the console 1 Connect the computer wires together as shown and make sure i...

Page 9: ...he straps and pedals are marked L and R Match each strap to the corresponding pedal 2 Attach the L pedal to the left crank arm This pedal will thread on anti clockwise 3 Attach the R pedal to the righ...

Page 10: ...should only be used as a comparison between workouts on this unit HEART RATE Display your heart rate in beats per minute To display heart rate select HEART RATE mode and grasp the pulse sensors on the...

Page 11: ...eplacement instructions 1 Open the battery compartment cover Diagram 1 2 Remove battery by pulling the battery in direction of spring and lift opposite end upwards Diagram 2 3 Insert 2 AA batteries en...

Page 12: ...your heart rate reading please note that some fibres used in clothes eg polyester create static electricity that may prevent a reliable heart rate reading Mobile phones TV s microwaves and other elec...

Page 13: ...Fitness s option if it becomes defective malfunctions or otherwise fails to conform with this warranty under normal non commercial personal family or household use In repairing the product Inspiratio...

Page 14: ...be done on most days of the week Weight loss To see a significant reduction in body fat your sessions must be a little more intense between 60 and 70 of your estimated maximum heart rate These sessio...

Page 15: ...and your back foot flat on the floor Bend your front leg lean forward and move your hips toward the wall Hold for 15 counts then relax Repeat 3 times for each leg To cause further stretching of the ac...

Page 16: ...16 Exploded Drawing...

Page 17: ...r W Sensor Wire 450MM L 1 26 YKF50185b6 Crank Bearing Assembly Set 27 YKF20433q22 Chain Cover L R Pair 28 YKF10483b6 Round Phillips Head Self Tapping Screw M4 x 20MM 5 29 YKF50186b5 Pedal W Strap Asse...

Page 18: ...18 notes...

Page 19: ...19 notes...

Page 20: ......
Reviews: